


Deleting an old campaign is a permanent action, so it must be done safely to ensure you don’t lose valuable historical data or disrupt your current strategy.
The safest approach is to Pause it first and Export the data before you Remove it.
Here is the detailed, step-by-step guide on how to safely delete an old campaign:
Step 1: Pre-Deletion Checks (Pause and Export)
Before permanently removing a campaign, you must secure its data and confirm it’s truly obsolete.
1.1 The Pause vs. Remove Rule
Status | Effect | Recommendation |
Pause | Stops ads and spending instantly. All historical data, settings, keywords, and ads are kept intact. | Always Pause first. If you are unsure if you will ever need the campaign again (e.g., seasonal sales, new product test), do not remove it. Just pause it. |
Remove | Permanently deletes the campaign. You cannot resume it. | Only use this when you are $\text{100}\%$ certain the campaign is obsolete (e.g., advertising a product you no longer sell). |
1.2 Export and Backup Data
Historical data is critical for budgeting and forecasting future campaigns. While Google keeps the data, having a local copy is a good backup.
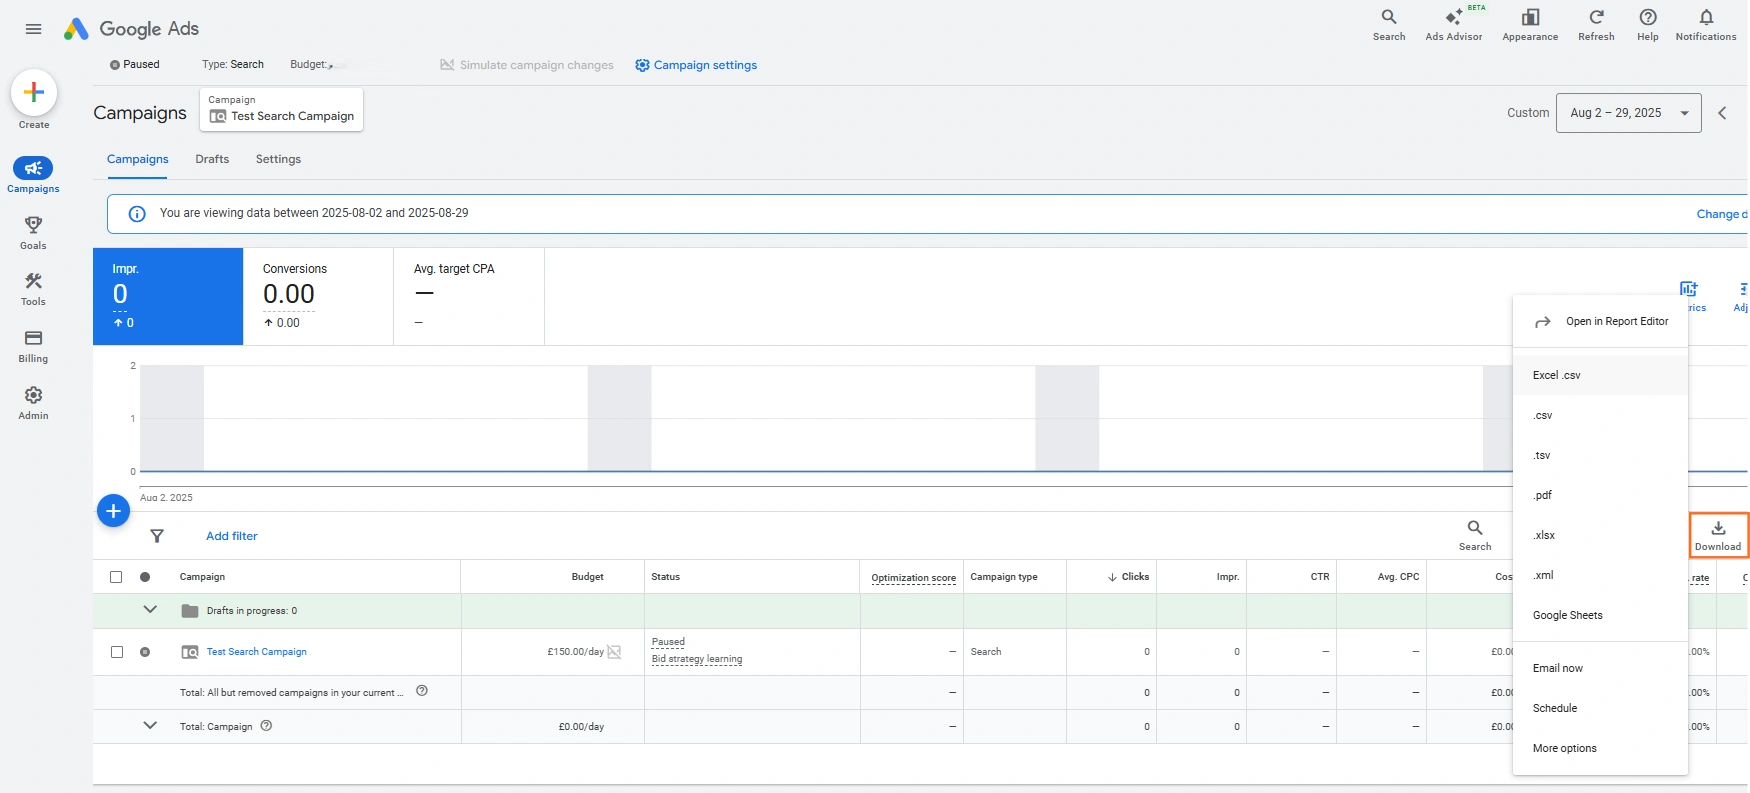
- Select Date Range: Inside the campaign, select a date range filter that covers the campaign’s entire lifetime (e.g., ‘All time’).
- Download Report: Click the Download icon ($\text{\textdownload}$) above the main data table.
- Choose Format: Select Google Sheets or .csv format and download the full campaign performance report.
Step 2: Delete the Campaign (The Final Step)
Once you have paused and exported the data, you can proceed with the permanent removal
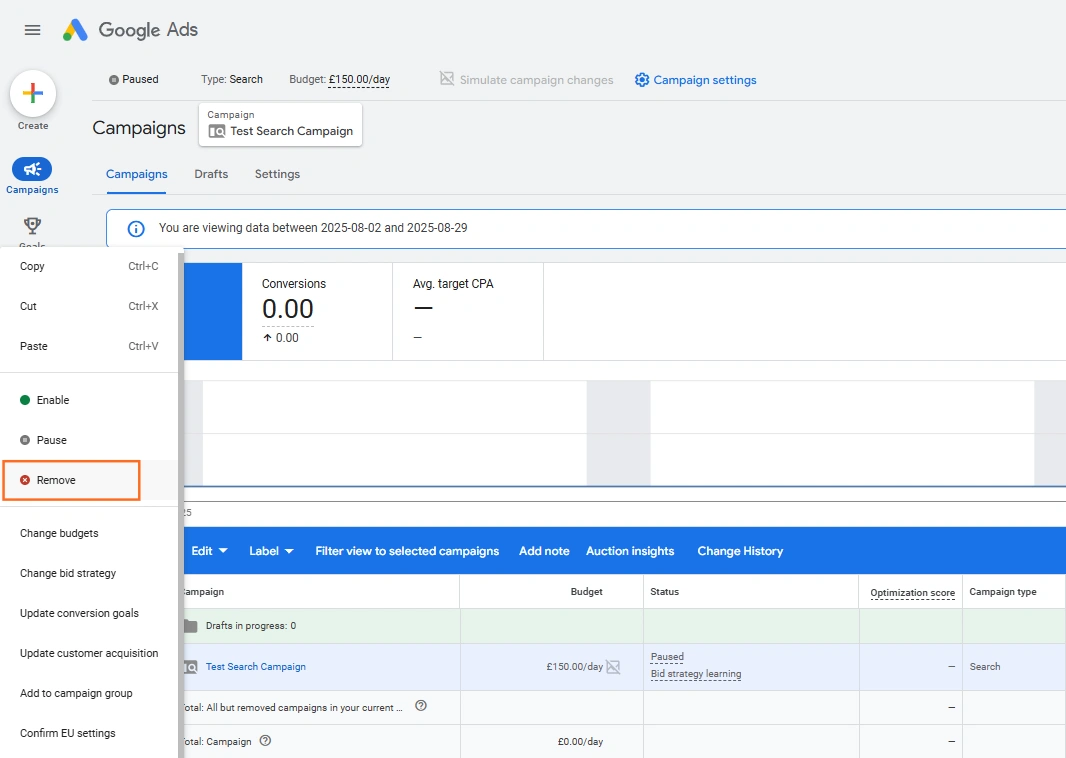
- Navigate to Campaigns: In your Google Ads account, click on Campaigns in the left-hand menu.
- Select Campaign: Check the box next to the campaign you wish to delete.
- Access Edit Menu: Click the Edit drop-down menu that appears above the table.
- Select Remove: Click Remove.
- Confirm Permanence: Google will display a final warning asking you to confirm the permanent removal. Click Confirm.
The campaign will now disappear from your main view (which typically filters to ‘All enabled’ and ‘All but removed’ by default).
Post-Deletion Best Practices
Action | Why This is Important |
Check Shared Budgets | If the deleted campaign was part of a Shared Budget, the budget will automatically be reallocated among the remaining campaigns. Check your other campaigns’ spending to ensure the reallocation hasn’t caused an unintended budget increase. |
Reallocate Budget | The daily budget previously allocated to the removed campaign is now freed up. Go to your other high-performing campaigns and consider increasing their budgets to utilise the newly available funds. |
Review Filters | To see the removed campaign in your list again (for reporting purposes), you must change your filter. Click the filter bar above the campaign table and select ‘ Campaign Status: All’. |
Clean Assets | Opinion: If the deleted campaign introduced specific Assets (like unique Sitelinks or Callouts) that are not needed elsewhere, you should remove those, too, for a tidy account. Go to Campaigns > Assets > Assets in the left side menu and remove any elements associated with the obsolete campaign. |
 Google Ads

 Search Engine Optimisation
 About Us