


A navigation menu helps visitors move between important pages on your WordPress website. The steps depend on whether your theme uses the newer Site Editor or the classic menu system.
1. Check your WordPress setup
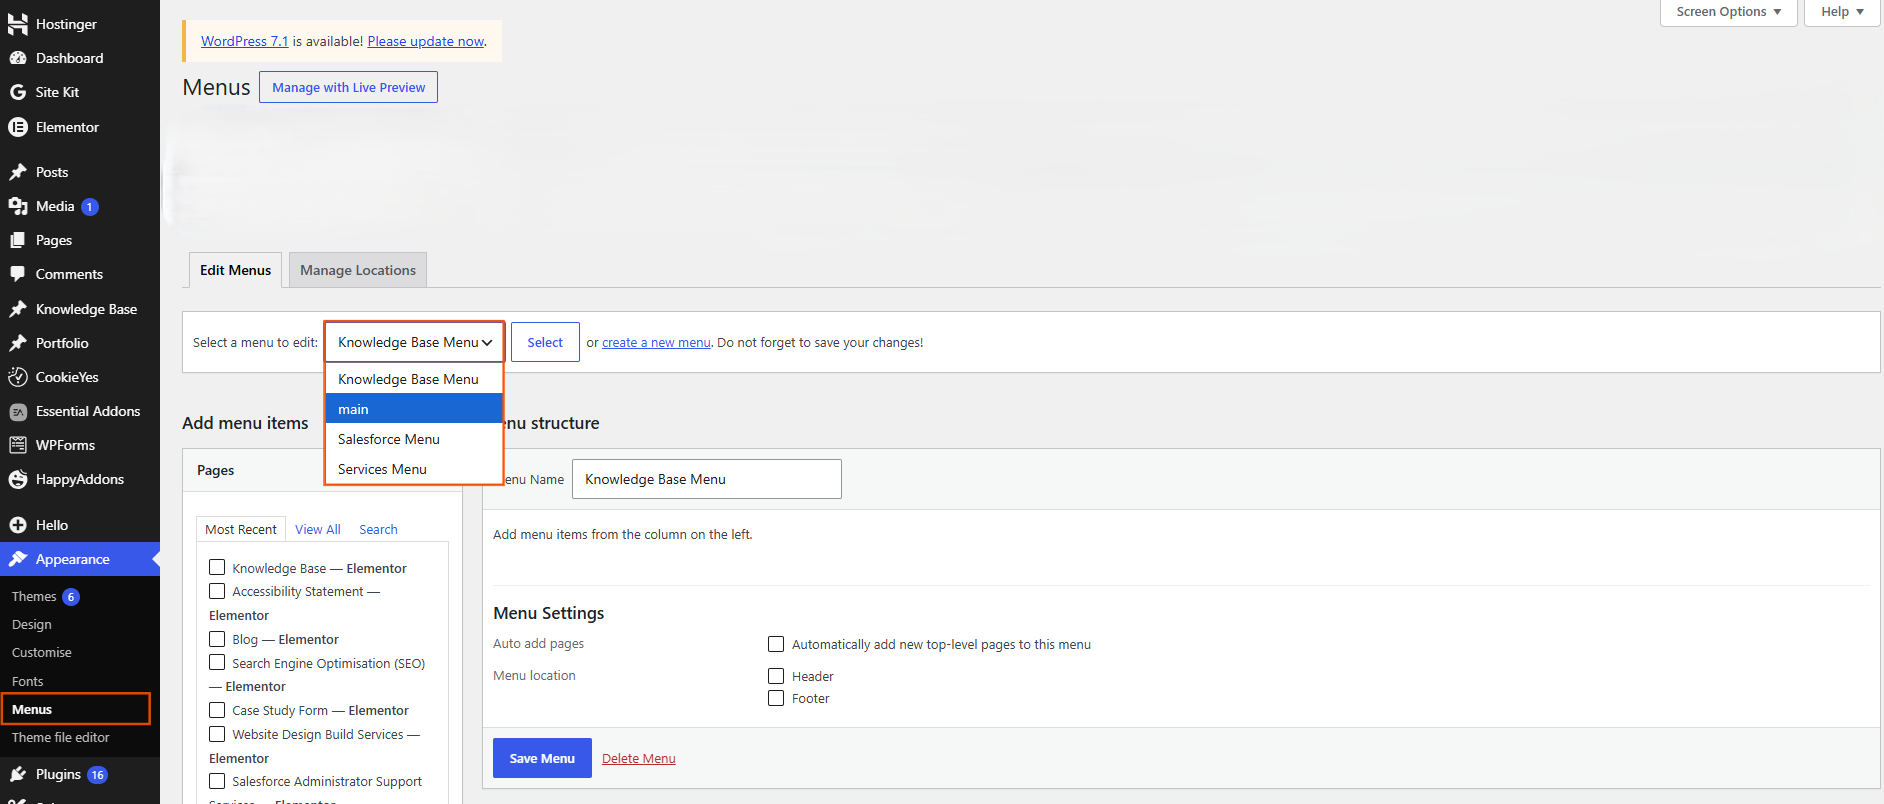
First, identify how your theme manages navigation.
For block themes, navigation is generally managed through Appearance → Editor.
For themes that use the classic menu system, you may find Appearance → Menus instead.
2. Open the navigation settings
With a block theme, open the Navigation area in the Site Editor and select the navigation menu you want to edit.
With a classic theme, go to Appearance → Menus and create a new menu or select an existing one.
3. Add your important pages
Add the pages visitors need to access, such as:
- Home
- About
- Services
- Blog
- Contact
Avoid adding every page to the main menu. Keep the navigation focused on the most important destinations.
4. Arrange the menu items
Put the menu items in a logical order. You can also create a hierarchy where appropriate, such as placing service-related pages under a Services item if your WordPress setup supports dropdown navigation.
Use clear, short labels so visitors can understand where each link leads.
5. Choose where the menu appears
Depending on your theme, you may be able to place navigation in areas such as the website header or another supported location.
For most business websites, the primary navigation should be easy to find and consistent across the main pages.
6. Save and test
Save your changes and view the published website.
Test every menu link and check the navigation on both desktop and mobile. Make sure dropdowns, menus and other navigation controls can be used easily on smaller screens.

 Salesforce

