


In Salesforce, an Approval Process is a systematic way to ensure that specific records (like high-discount Opportunities or Travel Expenses) are reviewed and signed off by the right people before they move forward.
Step 1: The Setup Wizard
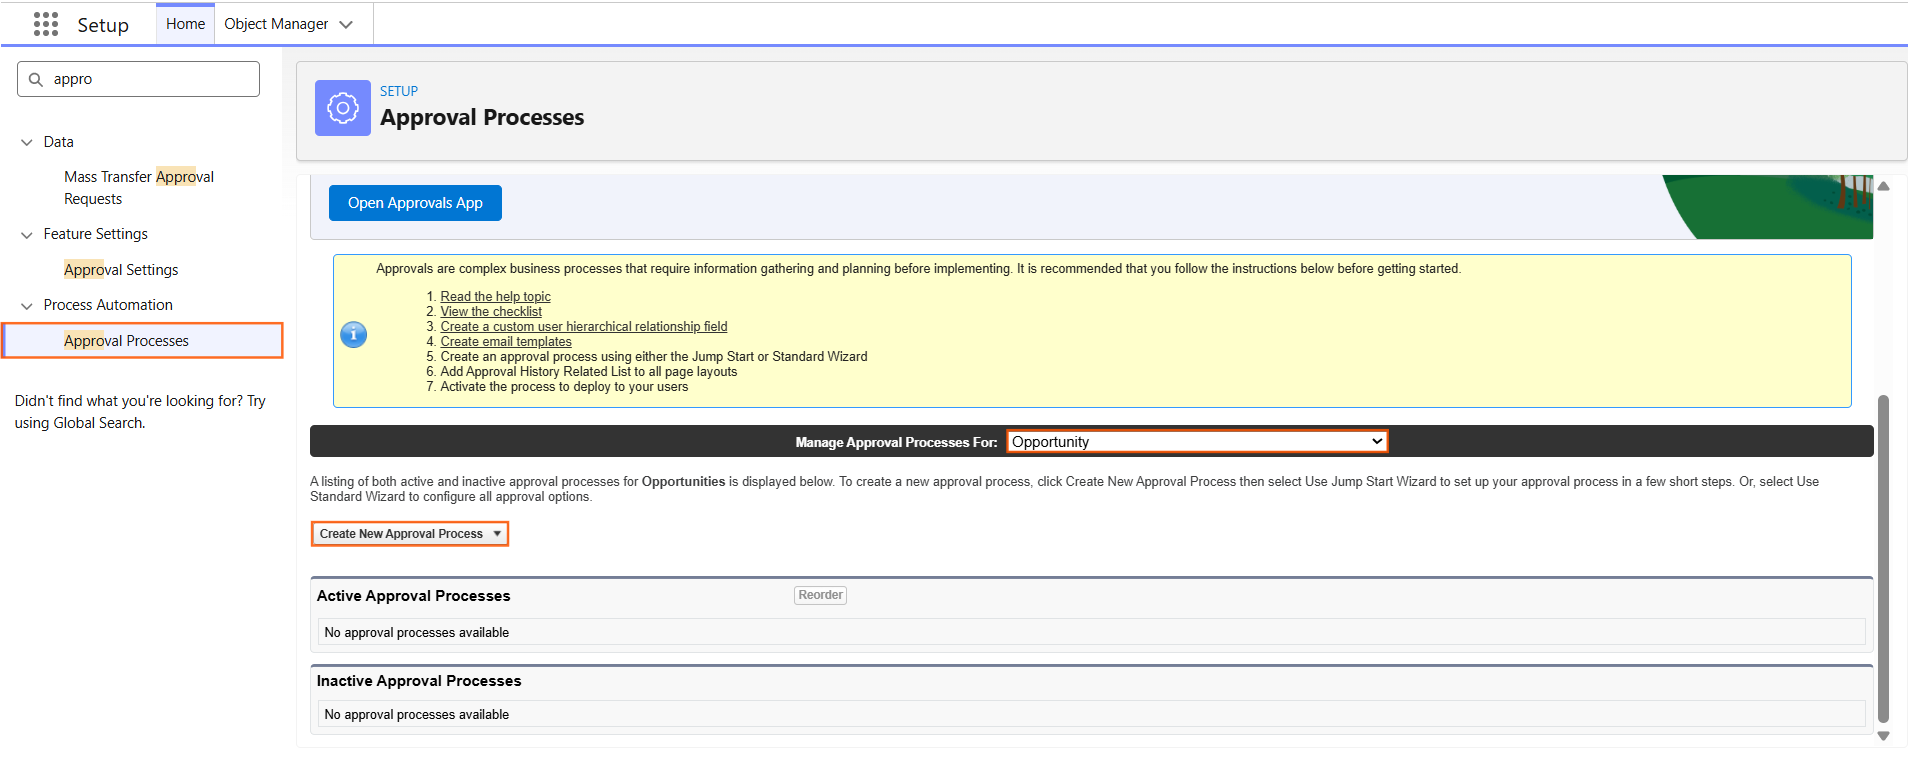
- Navigate to Setup.
- In the Quick Find box, type Approval Processes.
- Select the Object you want the process to run on (e.g., Opportunity).
- Click the Create New Approval Process dropdown and select Use Jump Start Wizard (this is the fastest way for standard processes).
Step 2: Define the Entry Criteria
You don’t want every record to require approval, only the ones that meet specific rules.
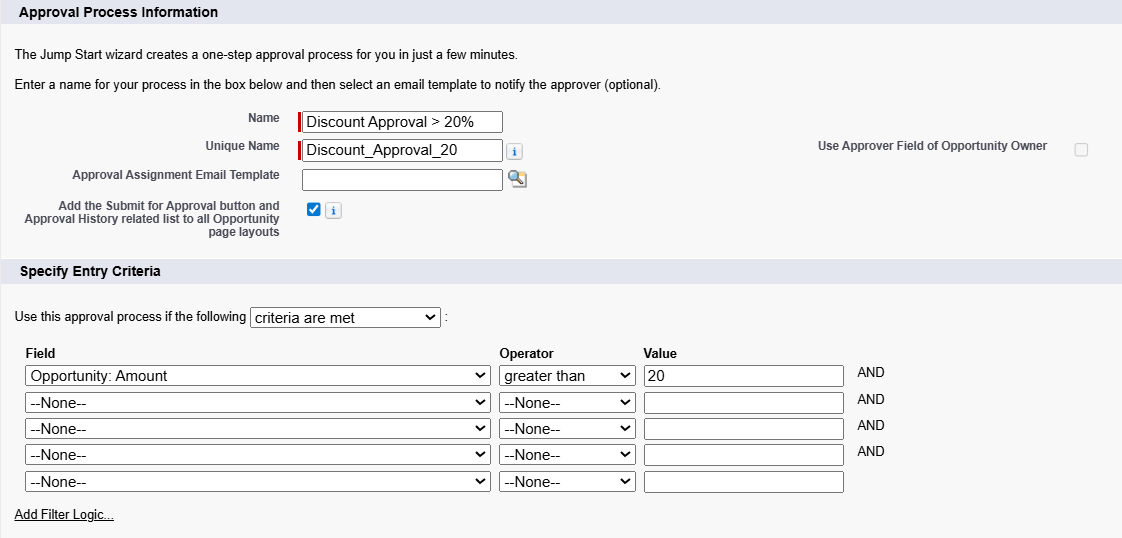
- Name: Give it a clear name (e.g., Discount Approval > 20%).
- Entry Criteria: Set the rules for when the process should start.
- Example: Opportunity: Discount Percentage greater than 20.
- Select Approver: Choose who decides.
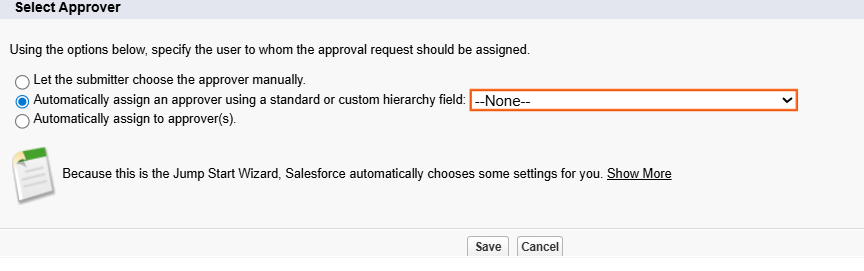
- Manager: Automatically routes to the person listed in the “Manager” field on the submitter’s User record.
- Automatically Assign to Queue: Routes to a group of people.
- Manually Chosen: The submitter picks the person.
Step 3: Configure Approval Actions
Once the process is created, you must define what happens at each stage of the “lifecycle.”
Step 4: Create the "Submit for Approval" Button
The process won’t start automatically unless you tell it to. Users usually trigger it manually.
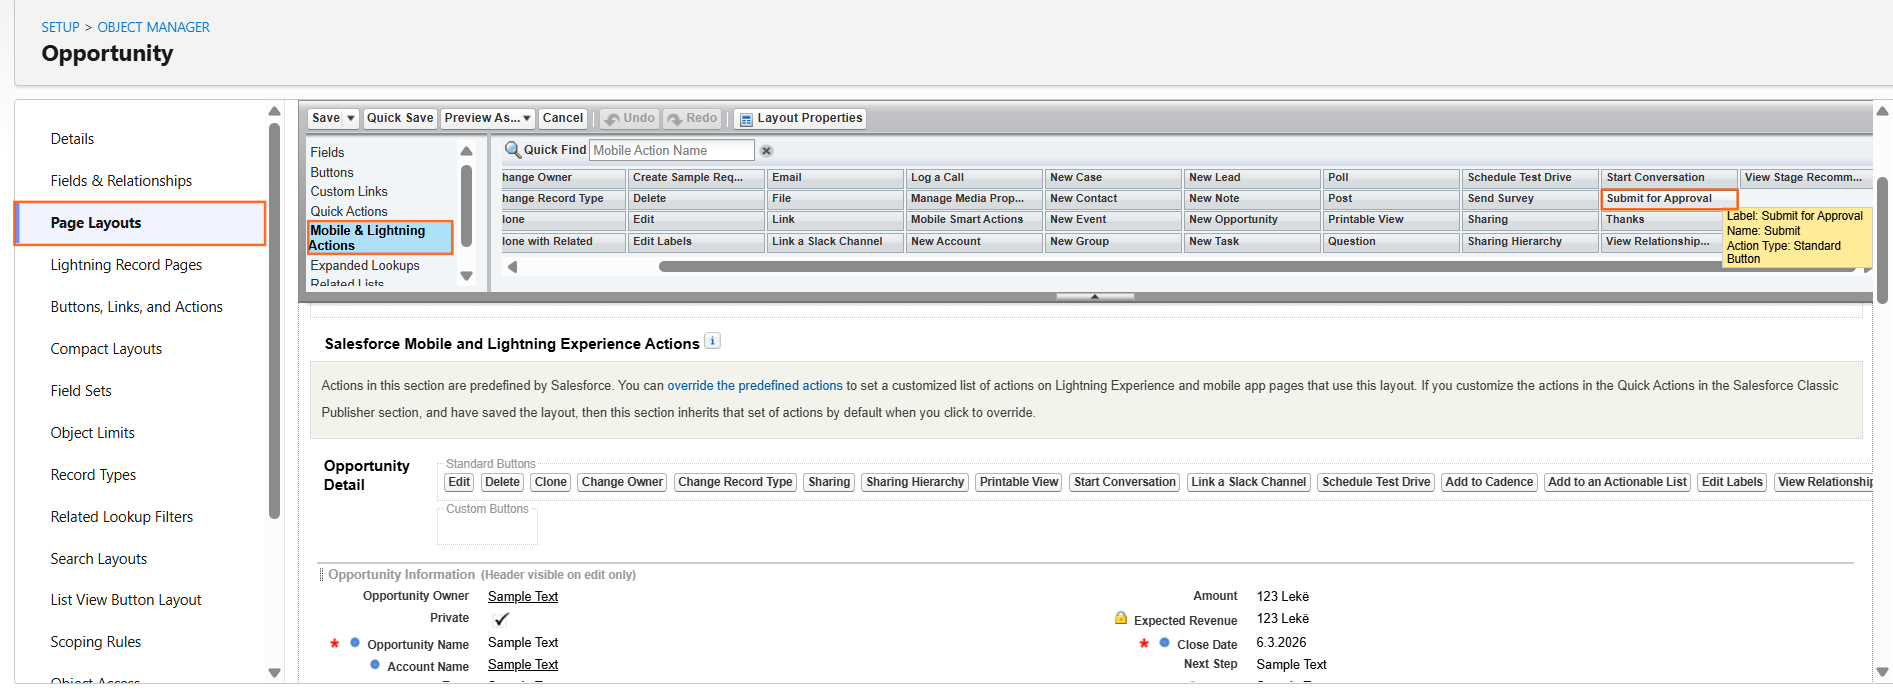
- Go to Object Manager > Opportunity > Page Layouts (select a layout)
- Find Mobile & Lightning Actions.
- Drag the Submit for Approval button into the “Salesforce Mobile and Lightning Experience Actions” section.
- Click Save.
Step 5: Activate the Process
An approval process will not run until it is Active.
- Return to the Approval Process detail page.
- Click Activate.
- Note: Once a process is active, you cannot add or remove steps. You must clone it to a new version to make structural changes.
Step 6: Technical Checklist for Your Guide
- Email Templates: Before starting, create an Email Template so the approver gets a clear message with a link to the record.
- Approval History: Ensure the “Approval History” related list is added to the page layout so users can see who approved what and when.
- Initial Submitter: By default, only the record owner can submit for approval. You can change this in the “Initial Submitters” section if needed.

 Salesforce

