


Importing a large volume of Leads from a CSV (Comma Separated Values) file is typically done using the Data Import Wizard for smaller, straightforward imports, or the Data Loader application for larger, more complex imports. The Data Loader is the preferred and more powerful tool for professional data management.
Step 1: Prepare Your CSV File (The Optimal Data Scrub)
The quality of your import depends entirely on the quality and structure of your CSV file.
- Required Fields: Ensure your CSV contains data for all mandatory fields for the Lead object (e.g., Last Name and Company).
- Field Headers: Ensure the first row of your CSV contains clear, concise column headers (e.g., First Name, Last Name, Lead Source). These will be used for mapping.
- Data Consistency: Standardize picklist values. If your Salesforce picklist uses “Paid Search,” your CSV must not use “PPC” or “Paid Ads.” Use the exact value.
- Optimal Action: Use Excel or Google Sheets to clean and format your data before saving it as a .csv file.
Step 2: Choose the Import Tool
Tool | Optimal Use Case | Availability |
Data Import Wizard | Best for importing up to 50,000 records and easily preventing duplicates. | Directly accessible inside Salesforce Setup. |
Data Loader | Our Choice for bulk imports (up to 5 million records) and complex logic. | Separate desktop application that must be downloaded and installed. |
Step 3: Using the Data Import Wizard (In-Platform Method)
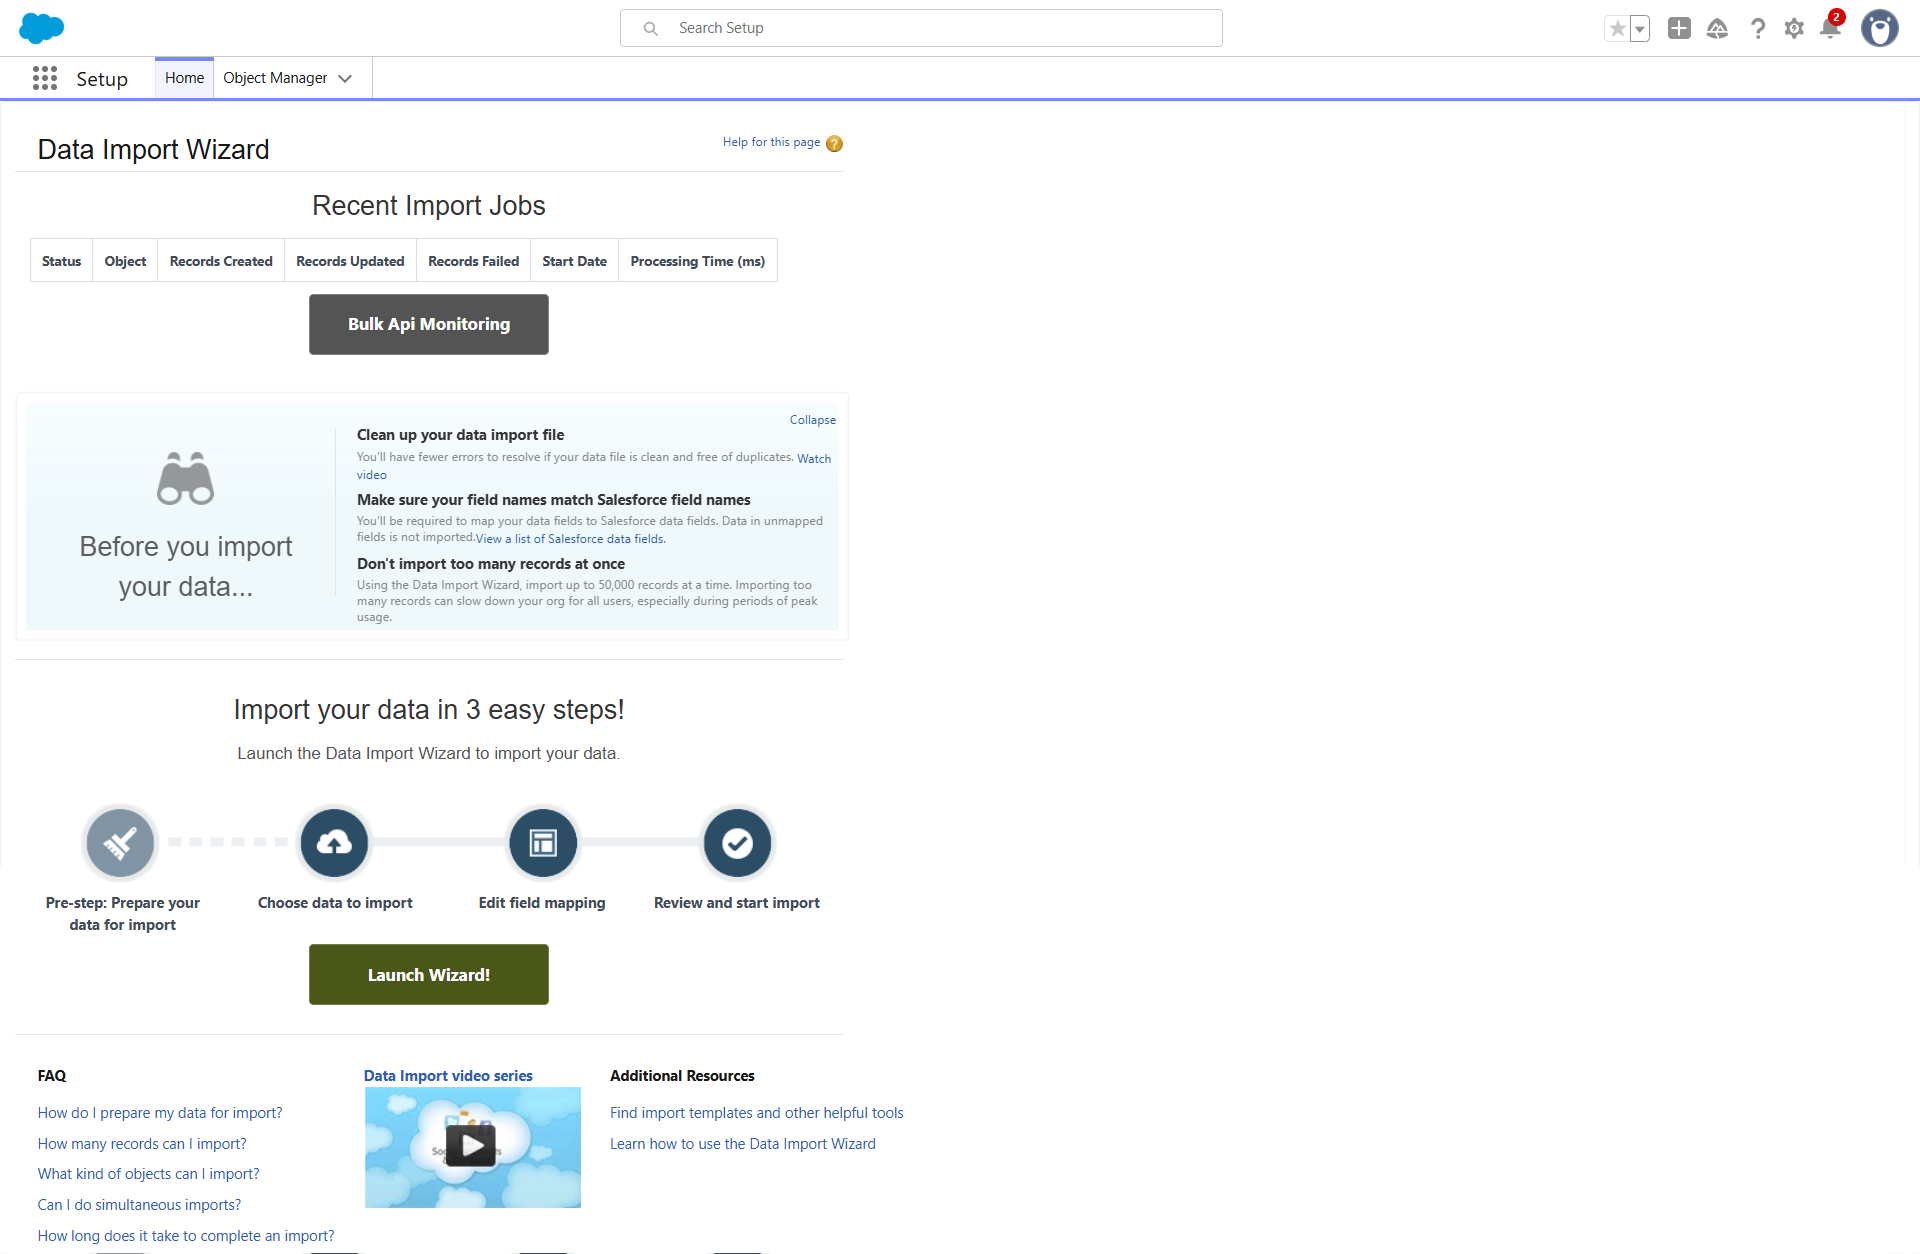
This is the easiest method for basic imports.
- Navigate to Wizard: Click the gear icon (⚙️) to Setup. In the Quick Find box, type Data Import Wizard and select it.
- Launch Wizard: Click “Launch Wizard”.
- Select Object: Select the Standard Object (Leads) you want to import.
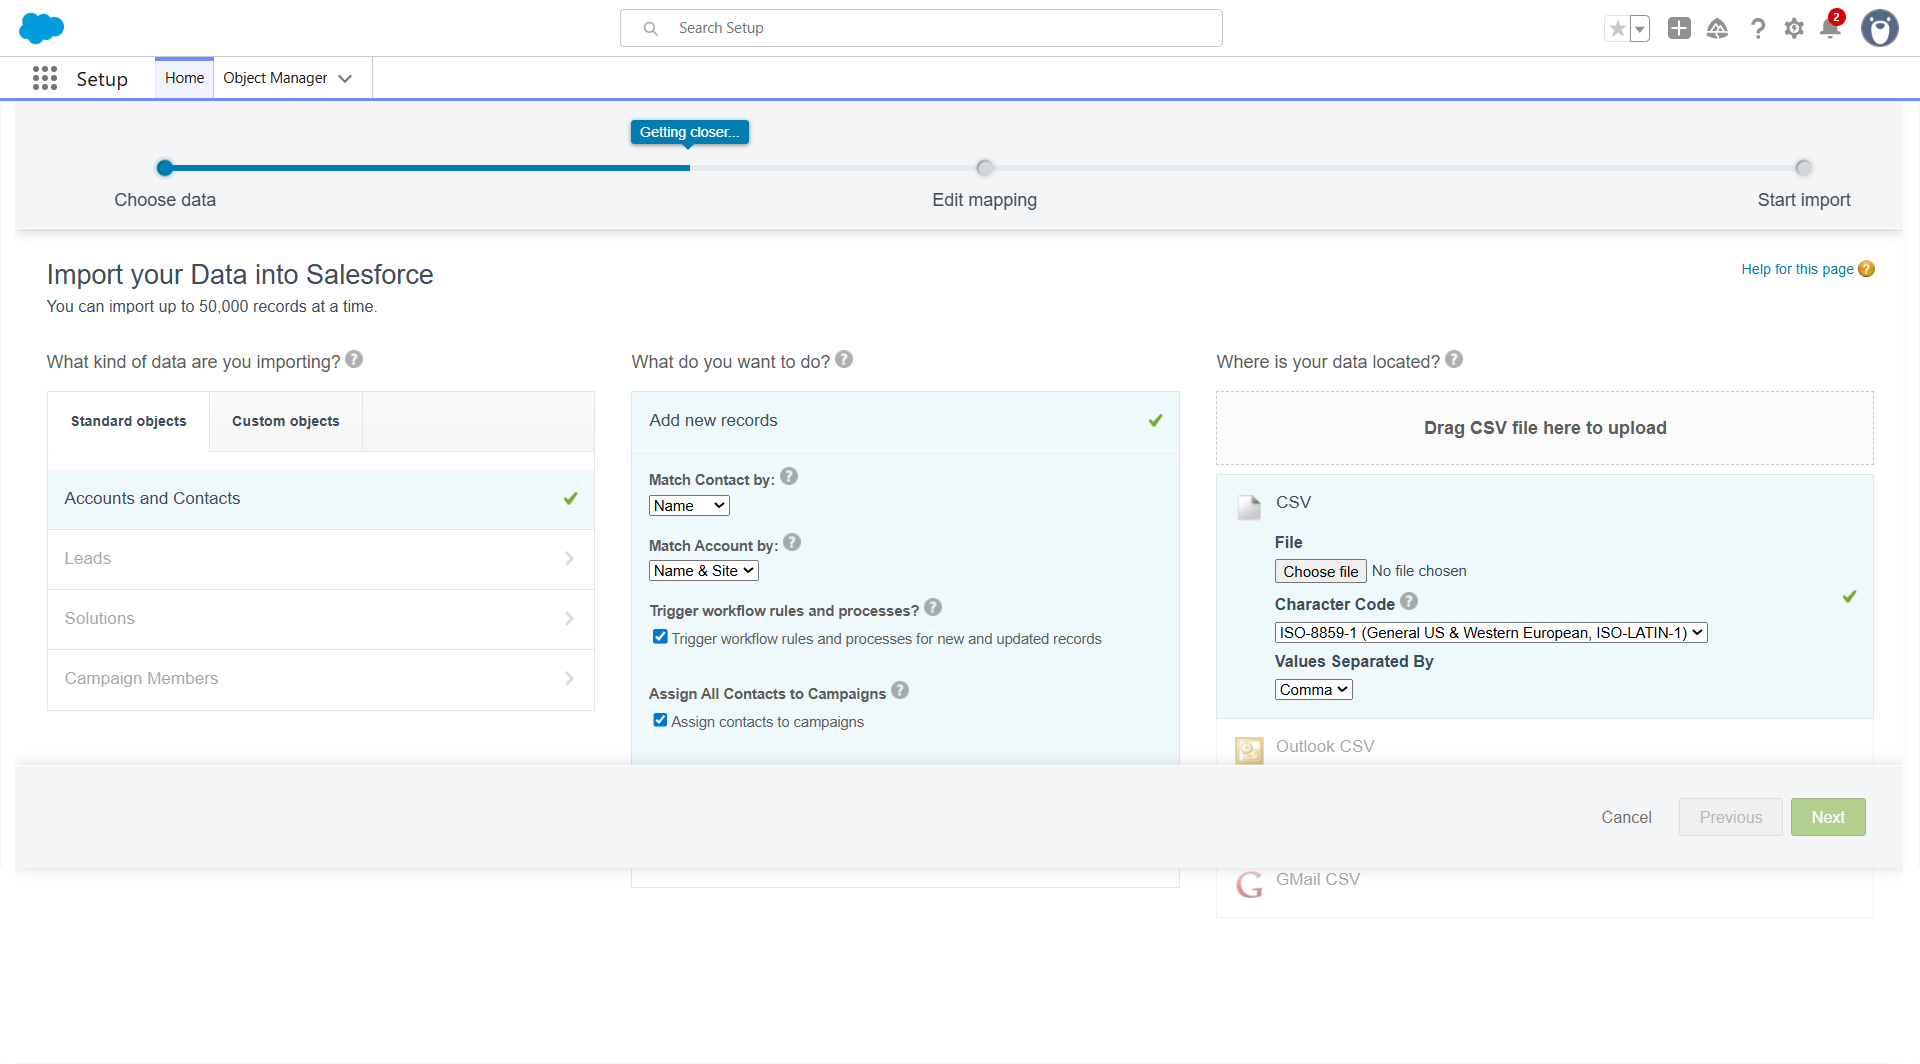
- Select Action: “Choose Accounts and Contacts > Add new records” .
- Specify Matching: Select your matching criteria (e.g., matching by Email and Lead Name) to prevent duplicates.
- Upload File: Select “CSV” and upload your file.
- Map Fields (Crucial):
- Salesforce tries to automatically match your CSV headers to Salesforce fields.
- Review any unmapped fields and manually drag the correct CSV column header to the corresponding Salesforce field.
- Start Import: Click “Start Import.”
Step 4: Using the Data Loader (Desktop Application Method)
This is the most powerful method for large-scale imports. First you’ve to install Data Loader
- Open Data Loader: Launch the application on your desktop and click “Insert.”
- Log In: Log in using your Salesforce credentials and security token (or use OAuth).
- Select Object: Select the object you are inserting into (the Lead object).
- Select CSV: Choose your prepared CSV file from your local drive.
- Mapping: Click “Create or Edit Map”.
- Click “Auto-Match Fields to Columns” to start, then manually verify or drag and drop the remaining unmapped CSV column headers to the correct Salesforce fields.
- Select Directory: Choose a directory on your computer where the success and error files will be saved.
- Run: Click “Finish.” The Data Loader will process the records and provide a comprehensive report of successes and failures.

 Salesforce

