


Automatically deduplicating Leads in Salesforce is crucial for maintaining data quality, improving user adoption, and ensuring your sales and marketing teams aren’t wasting time contacting the same person multiple times. Salesforce provides built-in tools called Duplicate Rules and Matching Rules to automate this process.
Step 1: Define the Matching Rules
The Matching Rule defines how Salesforce identifies a record as a duplicate. It uses field values to compare two records.
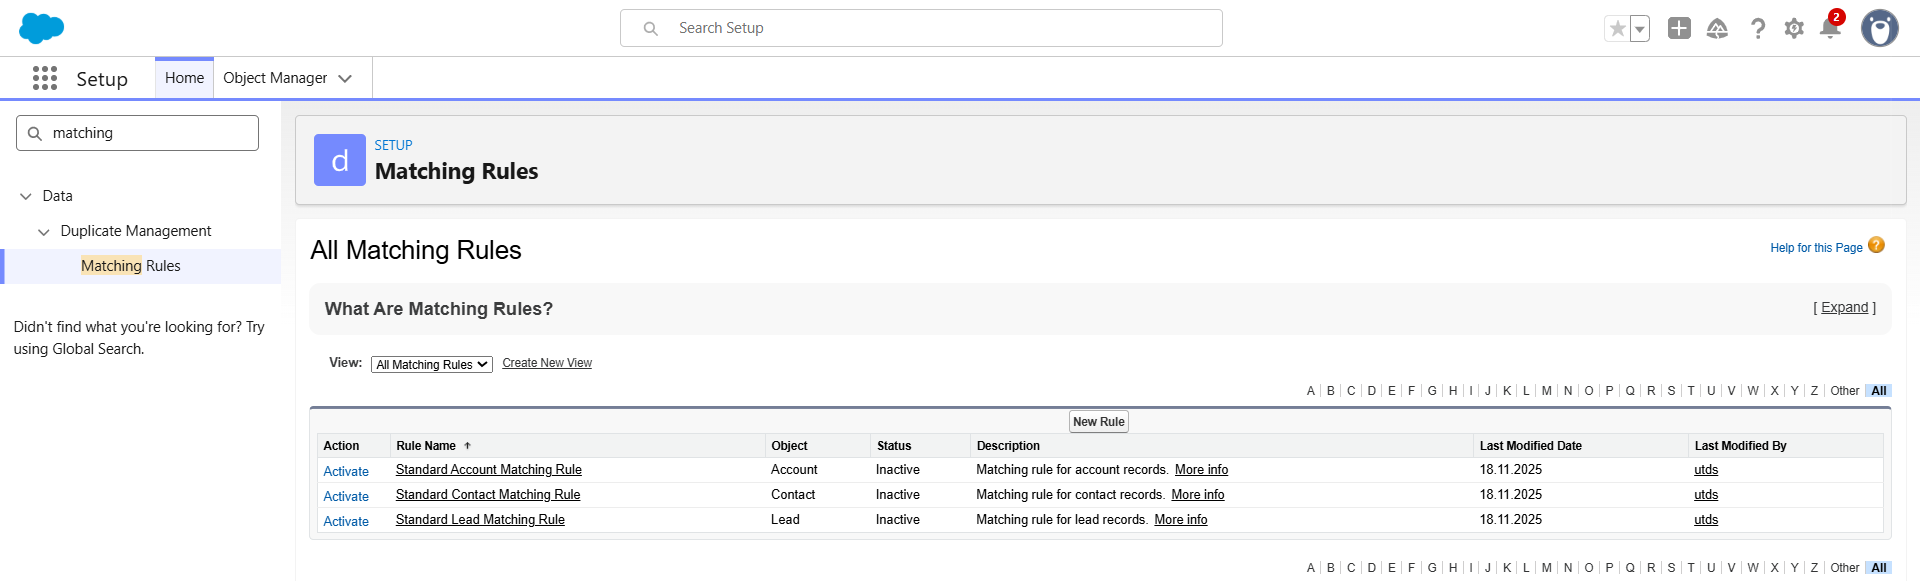
- Navigate to Setup: Click the gear icon (⚙️) to Setup.
- Find Matching Rules: In the Quick Find box, type Matching Rules and select it under Data.
- Create New: Click “New Rule” and select the Lead object.

Define Conditions:
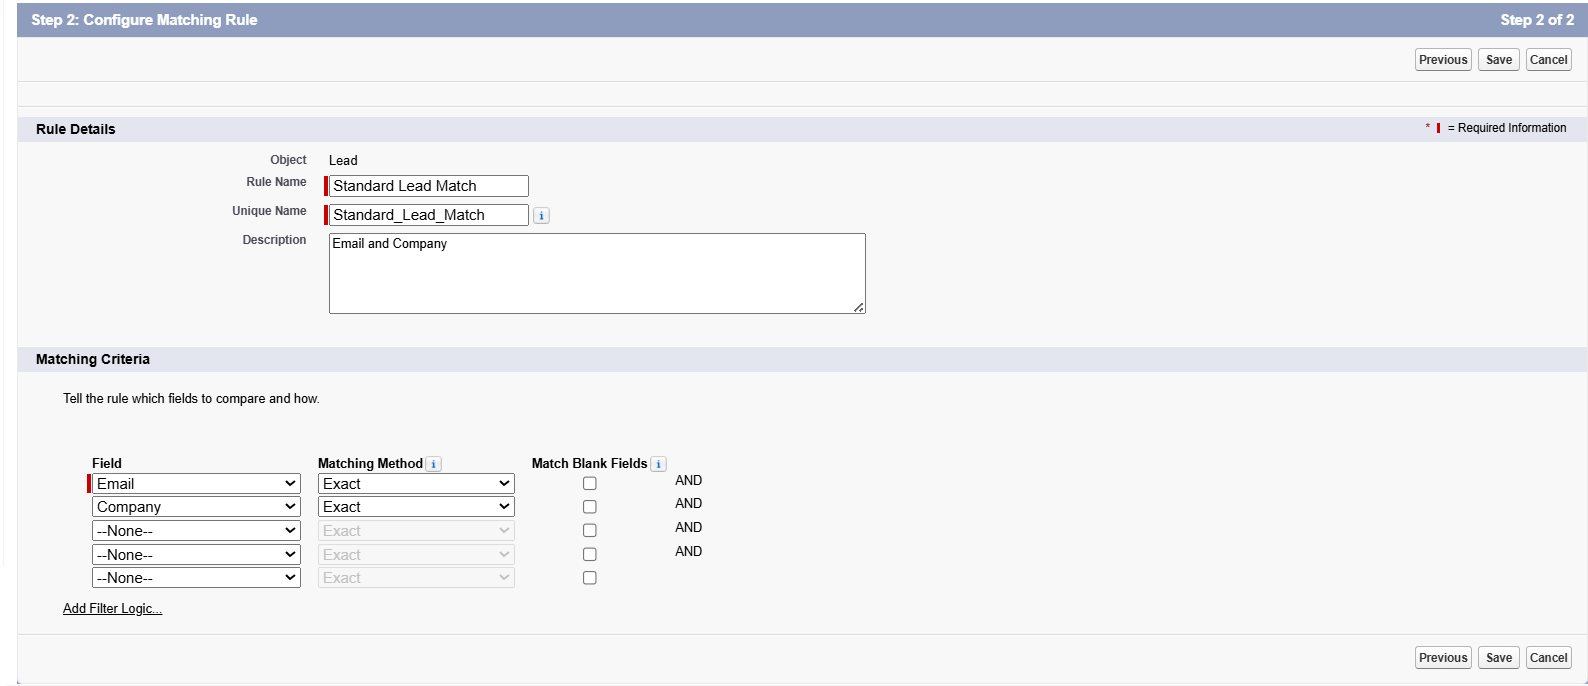
- Name the Rule: Give it a descriptive name (e.g., Standard Lead Match – Email and Company).
- Select Fields: Choose the fields the rule should use for comparison.
- Optimal Combination: Use fields that are required and unique, such as Email and Company Name. You can also include Last Name.
- Matching Method: For each field, define the matching method:
- Exact: Requires an identical match (optimal for Email).
- Fuzzy: Allows for minor variations, common misspellings, or punctuation differences (optimal for Company Name).
- Click Save and then Activate the rule.
Step 2: Create the Duplicate Rule
The Duplicate Rule defines the actions Salesforce takes when a match is found based on the Matching Rule created above.
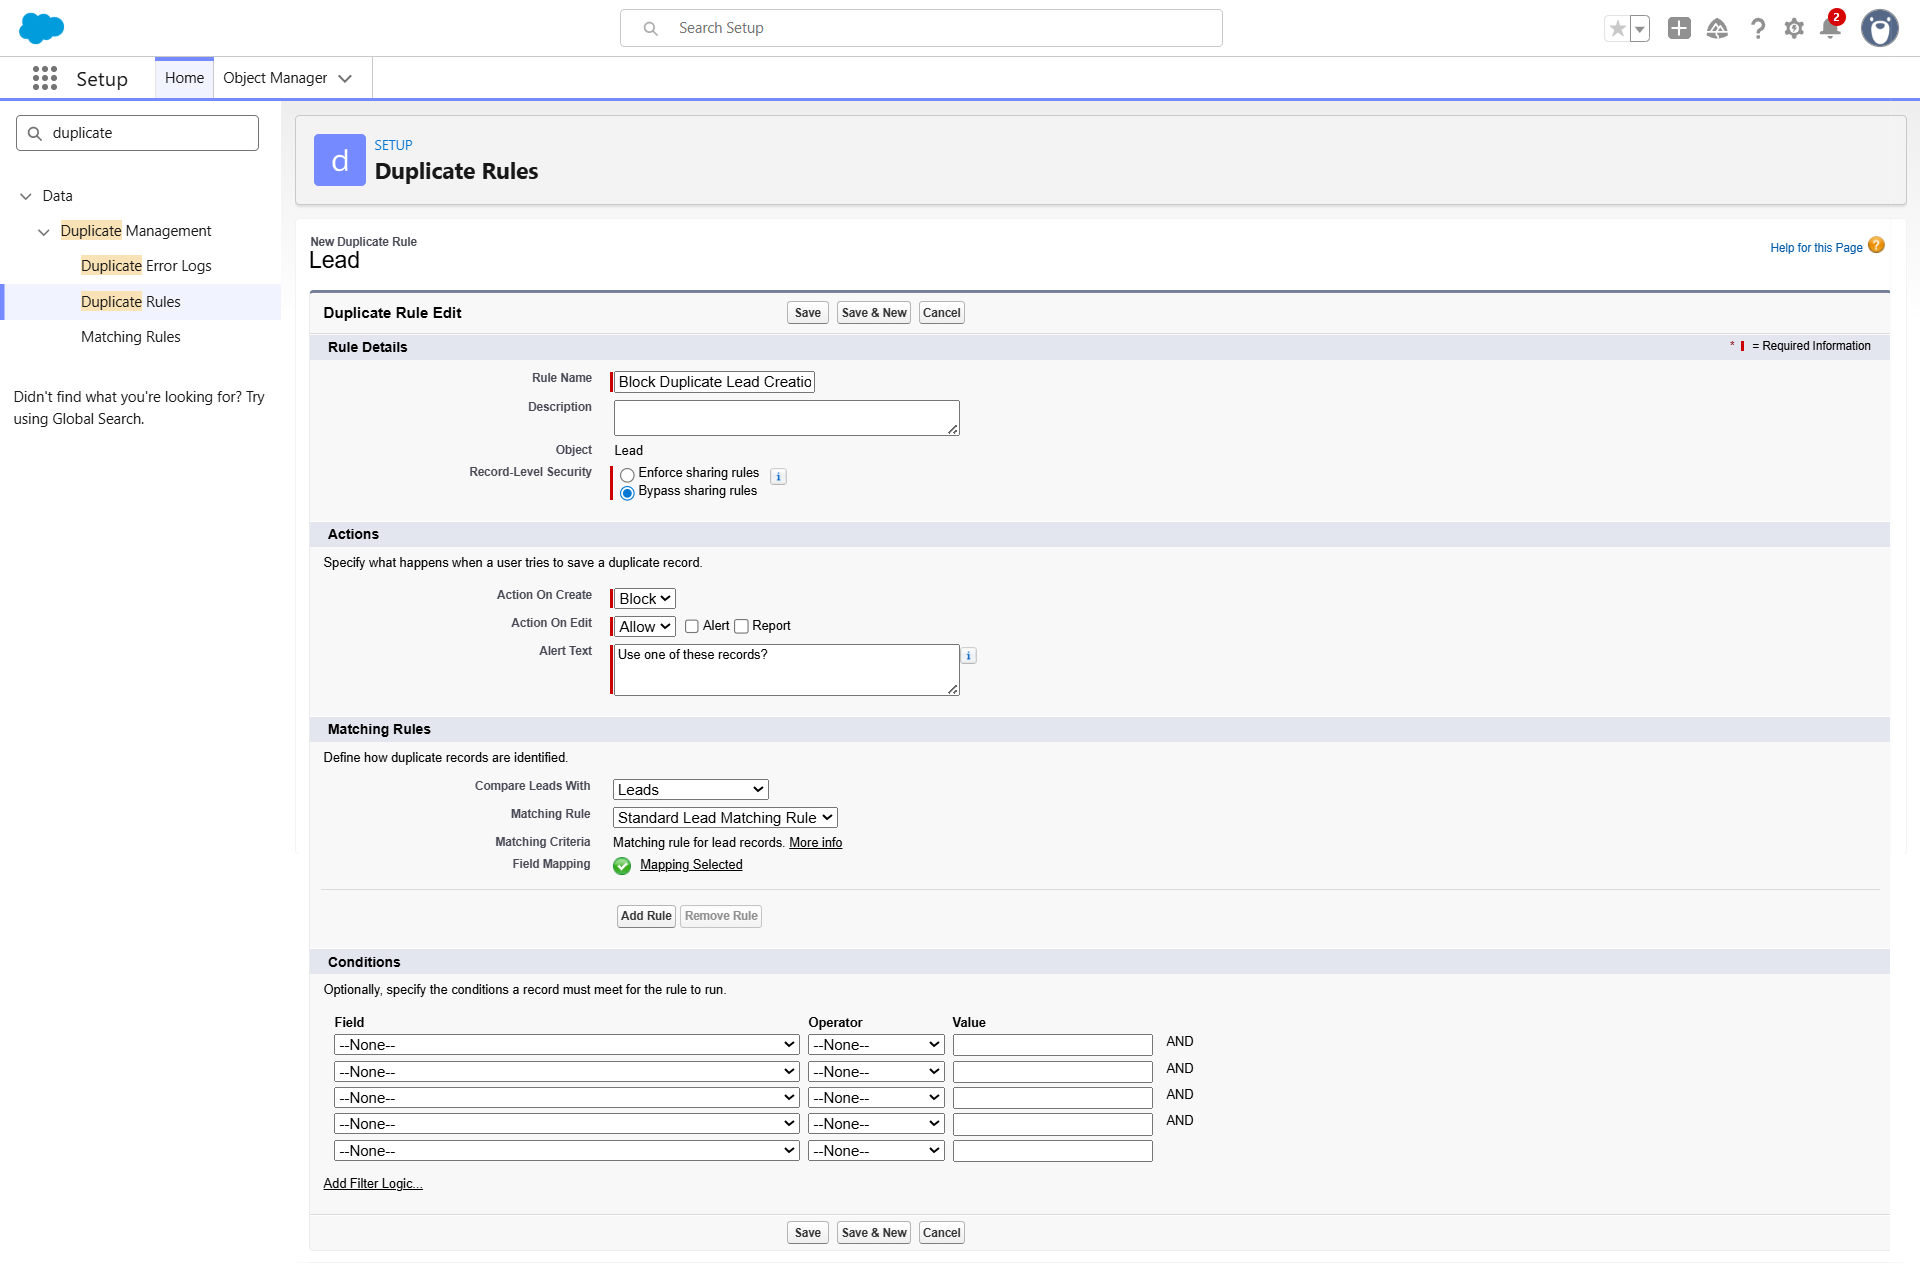
- Navigate to Duplicate Rules: In the Quick Find box, type Duplicate Rules and select it under Data.
- Create New: Click “New Rule” and select the Lead object.
- Define Actions:
- Name the Rule: Use a name that reflects the object and action (e.g., Block Duplicate Lead Creation).
- Security: Set the Security level (optimal to apply to all users).
- Set Action on Create:
- Alert: Show the user an alert that a duplicate exists but still allow them to save the record (soft warning).
- Block: Prevent the user from saving the new record entirely (strict control).
- Optimal Choice: Select “Block” to prevent duplicate data from entering the system.
- Set Action on Edit: Define the action if an existing record is edited and the changes create a duplicate.
- Select Matching Rule: Under Matching Rules, ensure the rule you created in Step 1 (e.g., Standard Lead Match – Email and Company) is selected.
- Customise Alert Text: Write a clear message that appears when a user triggers the alert/block (e.g., “This Lead appears to already exist. Please check existing records before proceeding.”).
- Click Save and then Activate the rule.
Step 3: Implement Custom Reporting
Once the rules are active, you can monitor the duplicates your users are (or are not) creating.
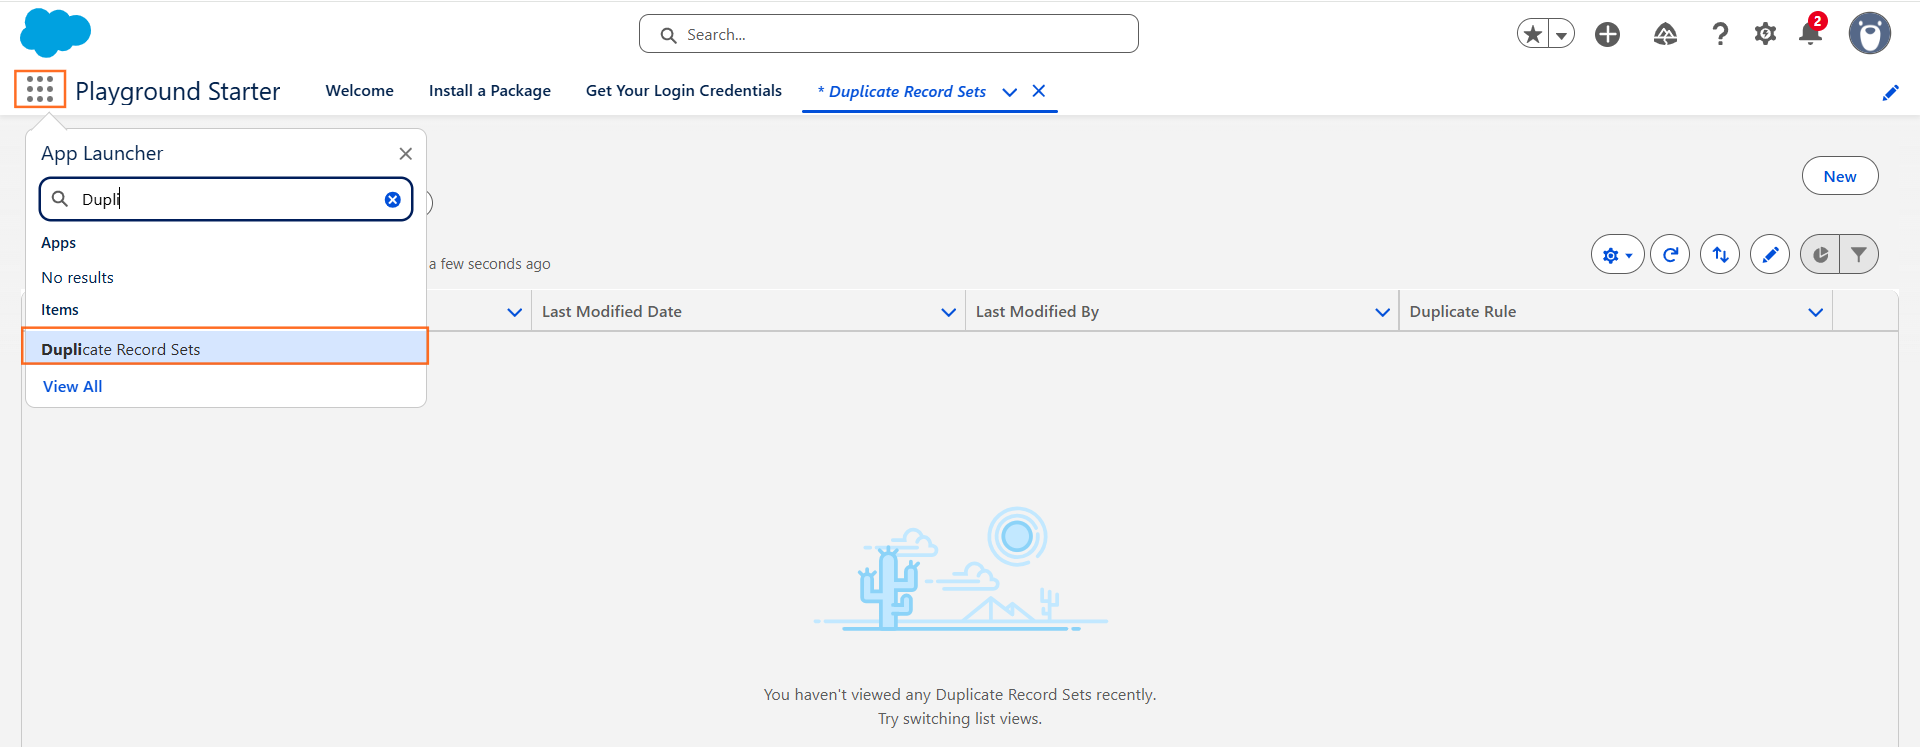
- Duplicate Record Sets: Salesforce automatically creates Duplicate Record Sets for records that match your rules.
- Click the App Launcher (the 3×3 grid ⠿) in the top-left corner.
- In the search box, type Duplicate Record Sets.
- Click on the resulting tab/item
- Review and Merge: Regularly review these sets. An administrator can use the Merge feature to combine duplicate records into one master record, preserving data integrity.
UTDS Optimal Tip: Always implement a “Block” action for critical objects like Leads and Contacts to stop duplicates at the point of entry.

 Salesforce

