


Creating custom fields on the Opportunity object allows you to track specific business data that Salesforce doesn’t capture by default, such as “Contract Start Date” or “Competitor Name.”
Step 1: Access the Object Manager
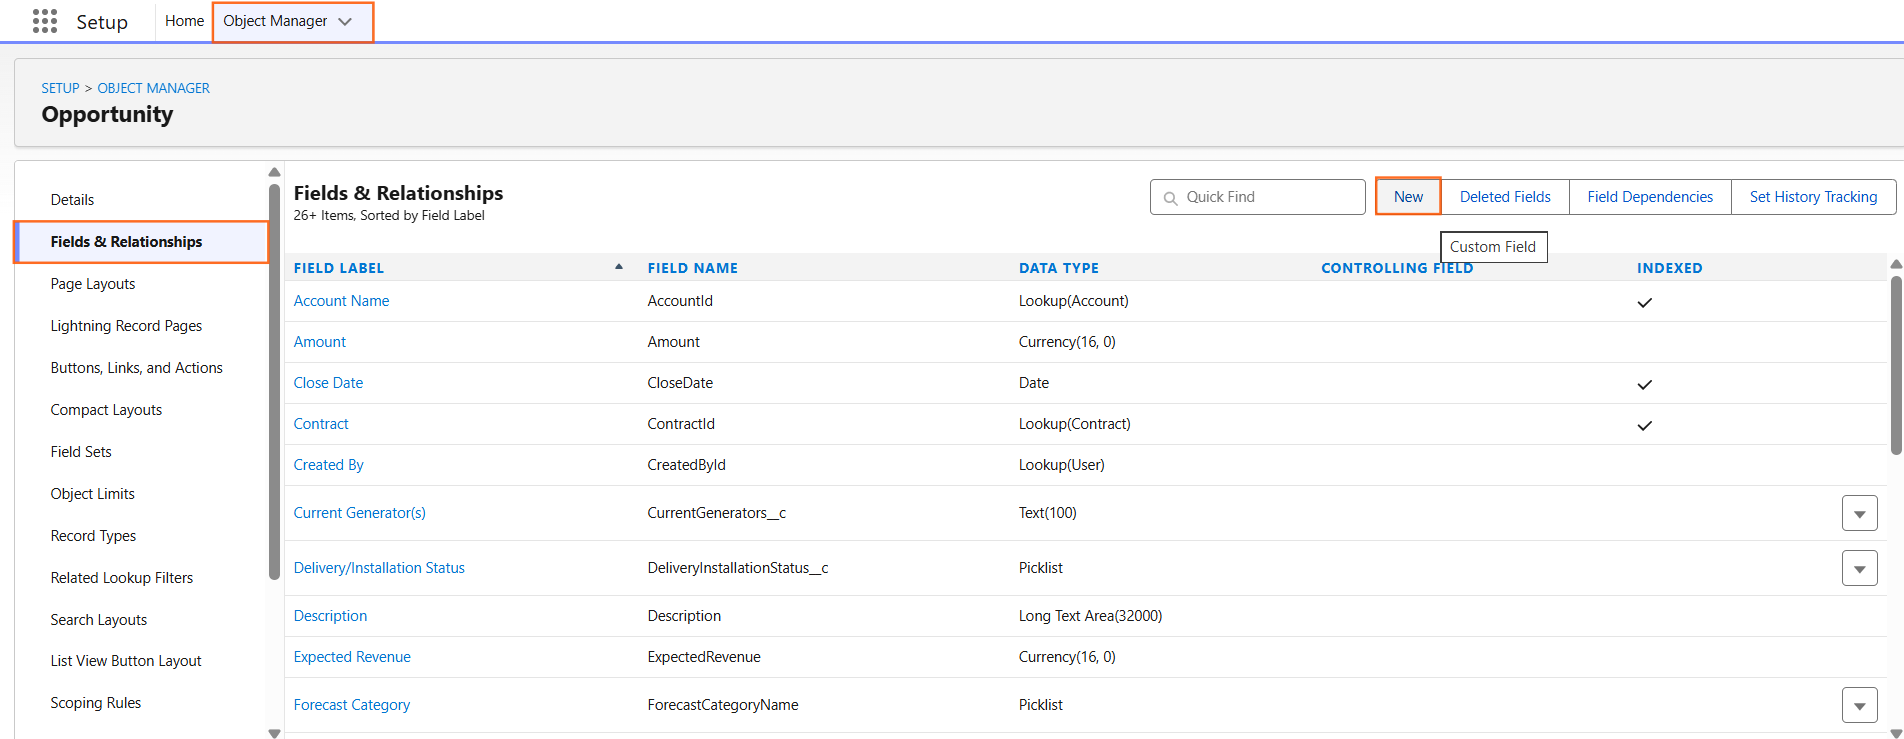
- Navigate to Setup (the gear icon).
- Click the Object Manager tab at the top of the page.
- Find and select Opportunity from the list.
- Click Fields & Relationships in the left-hand sidebar.
- Click the New button in the top-right corner.
Step 2: Select the Data Type
Salesforce will ask you to choose what kind of information the field will hold. Common types for Opportunities include:
- Currency: For tracking specific financial values (e.g., Renewal Amount).
- Date: For tracking milestones (e.g., Implementation Date).
- Picklist: For creating a dropdown menu of specific options (e.g., Reason for Loss).
- Text: For short notes or unique IDs.
Step 3: Enter Field Details
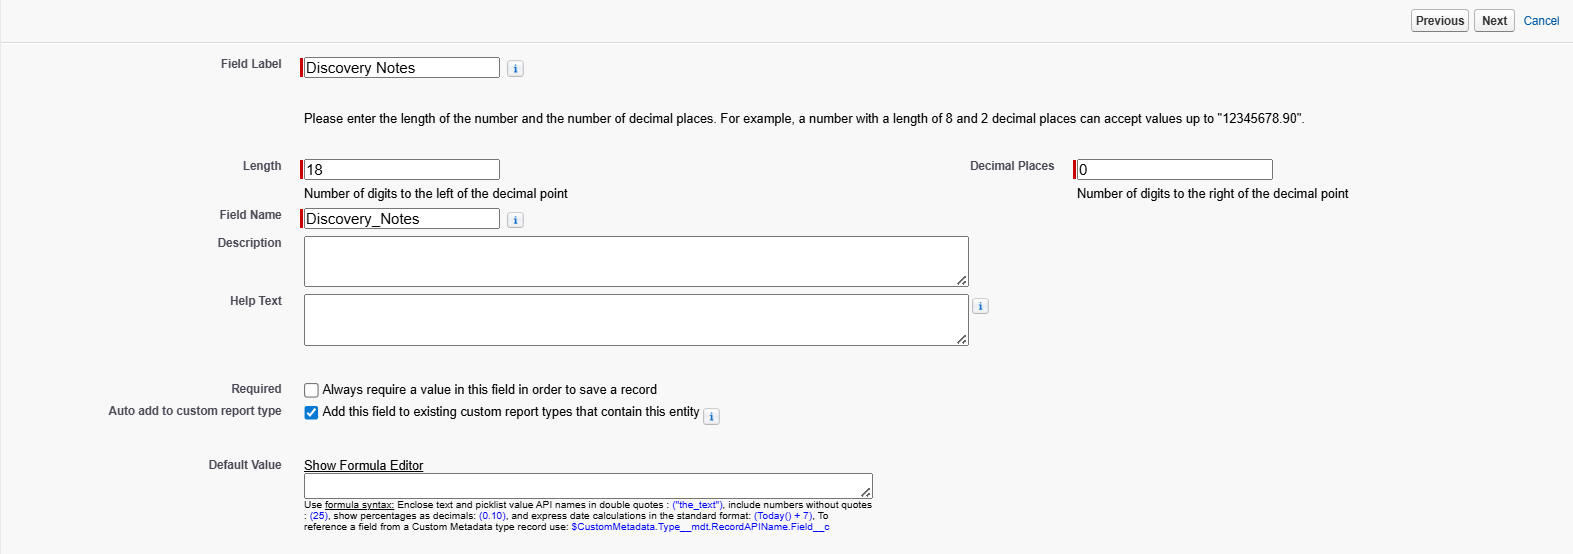
- Field Label: This is what the user sees on the screen (e.g., Discovery Notes).
- Field Name: This is the API name used for reports and coding. It populates automatically when you click out of the Label box.
- Description/Help Text: Always add Help Text to guide users on how to use the field.
- Required: Check this box if the field must be filled out before saving the record.
- Click Next.
Step 4: Set Field-Level Security (FLS)
This step determines who can see or edit the field based on their Profile.
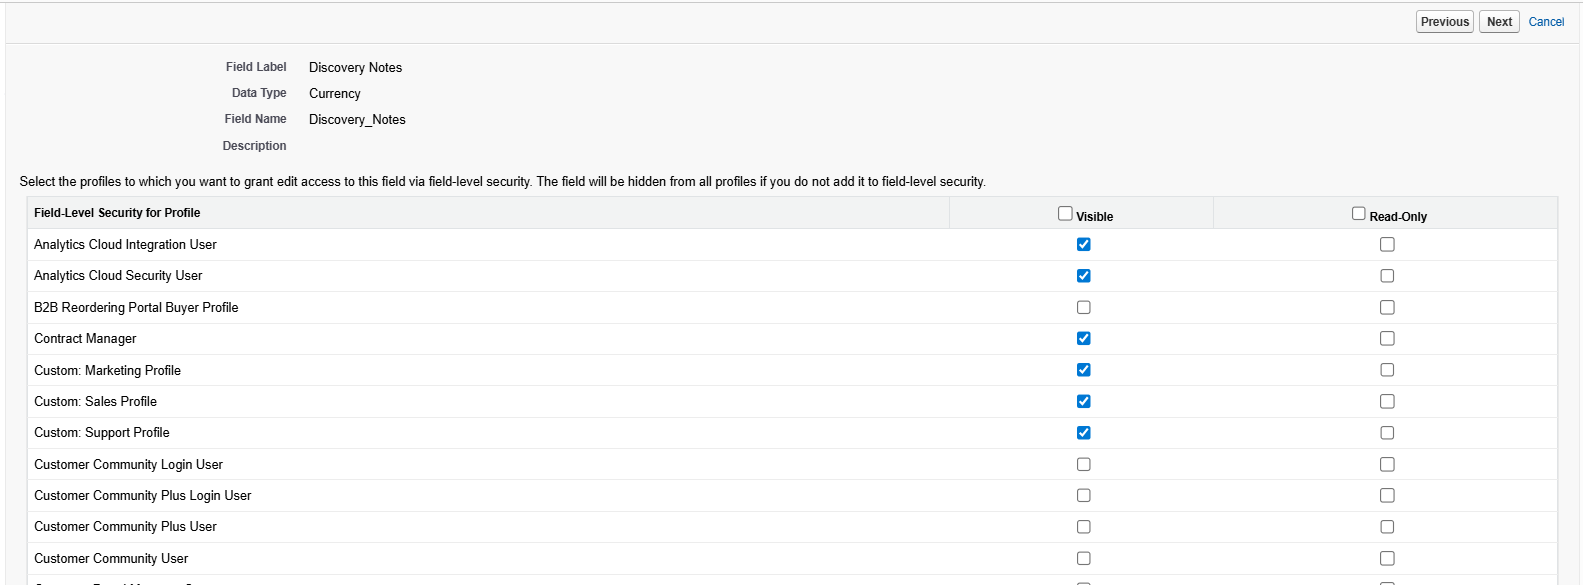
- Review the list of Profiles.
- Visible: Check this for the teams that need to see the field.
- Read-Only: Check this if a team should see the data but not change it.
- Click Next.
Step 5: Add to Page Layouts
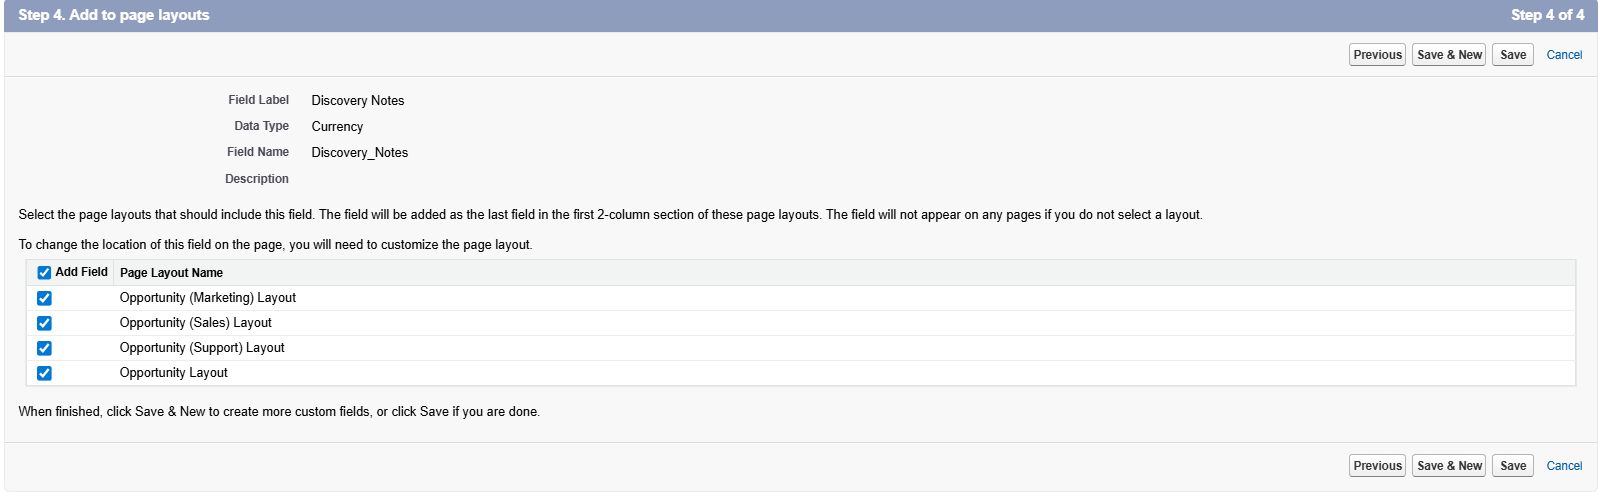
- Select the Page Layouts where you want the field to appear.
- If you have different layouts for different teams (e.g., SDR Layout vs. Sales Exec Layout), ensure only the relevant ones are checked.
- Click Save.
Step 6: Technical Tip: API Names
Custom fields always end in __c in the API name (e.g., Discovery_Notes__c). This distinguishes them from standard fields like Amount or StageName.

 Salesforce

