


Salesforce Flow Builder is the declarative tool used to automate complex business processes without writing code. Flows are now the preferred method for all automation tasks (replacing older tools like Workflow Rules and Process Builder).
Creating an automation rule involves selecting the right type of Flow, defining its trigger, and building the necessary logic (elements) and actions.
Step 1: Initiate Flow Creation
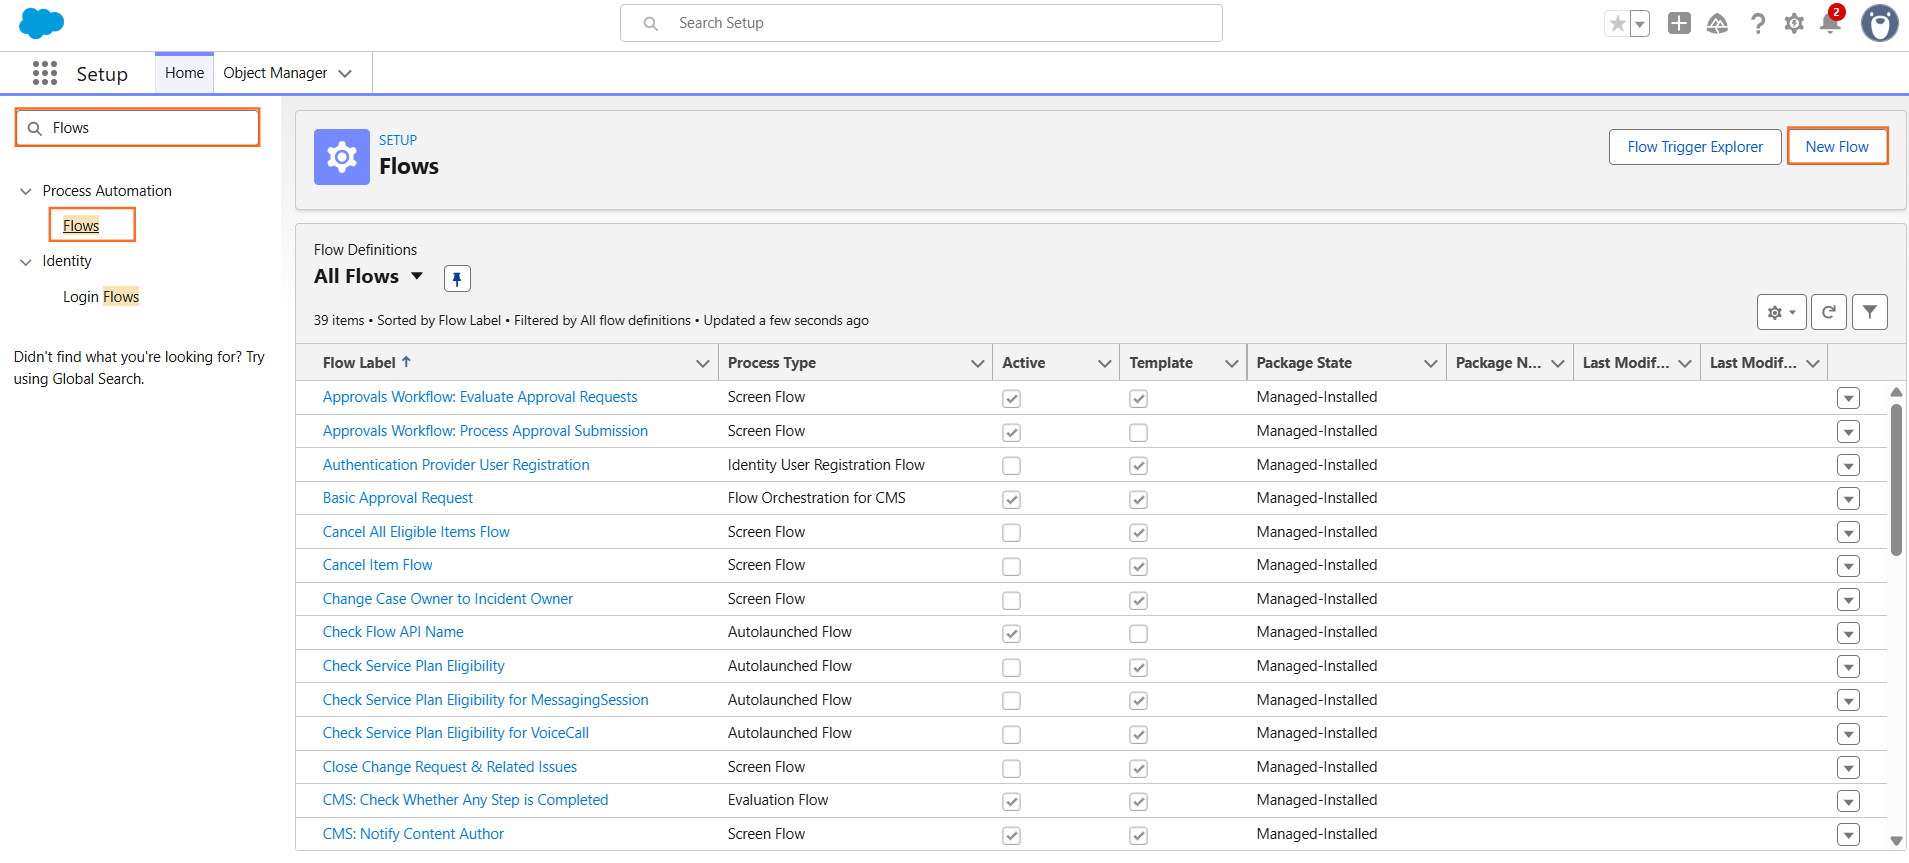
- Navigate to Setup: Click the gear icon (⚙️) to Setup.
- Find Flow Builder: In the Quick Find box, type Flows and select Flows under Process Automation.
- Create New: Click the “New Flow” button.
- Select Flow Type (The Crucial Choice): This defines when the automation runs.
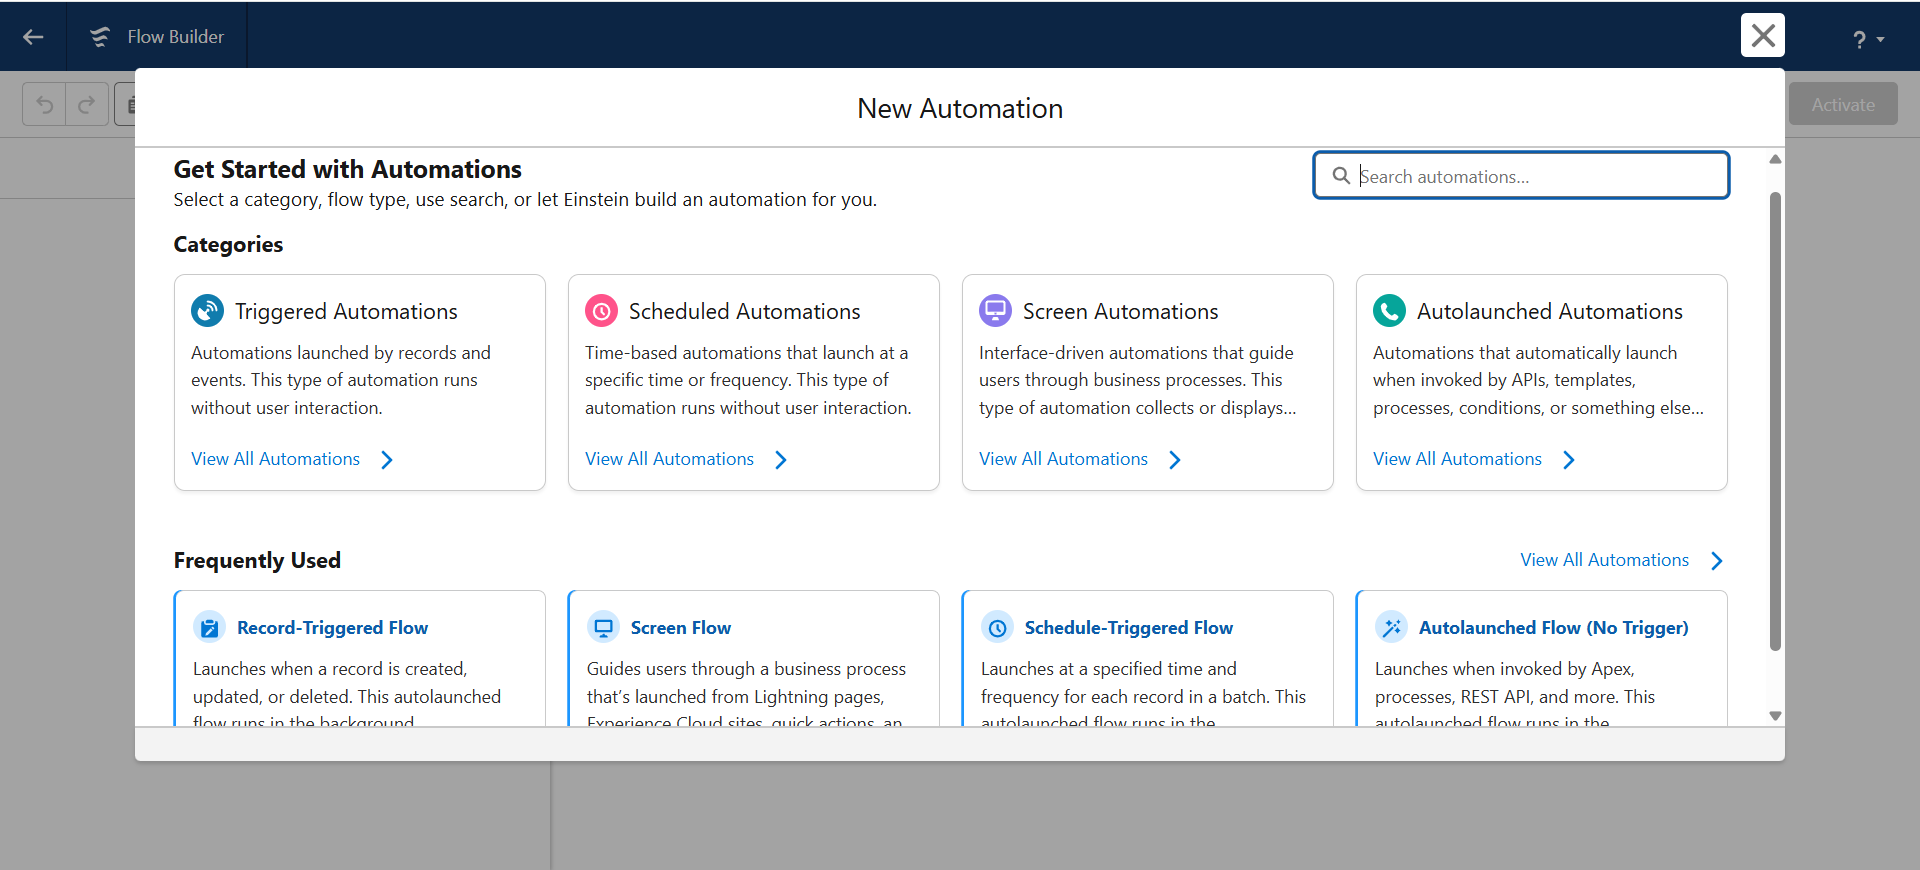
Flow Type | When It Runs | Use Case |
Record – Triggered Flow | Runs automatically when a record is created, updated, or deleted. | Automating Lead Assignment, updating an Opportunity field when a Contact field changes. Most common Flow type. |
Screen Flow | Runs when a user clicks a button or link, and requires user interaction. | Creating a guided step-by-step wizard for creating a new Project record or logging a customer service call. |
Scheduled-Triggered Flow | Runs automatically at a specific time and frequency (e.g., every night at 2:00 AM). | Sending daily reports, mass-updating old data (e.g., closing inactive Leads). |
Step 2: Define the Trigger (For Record-Triggered Flow)
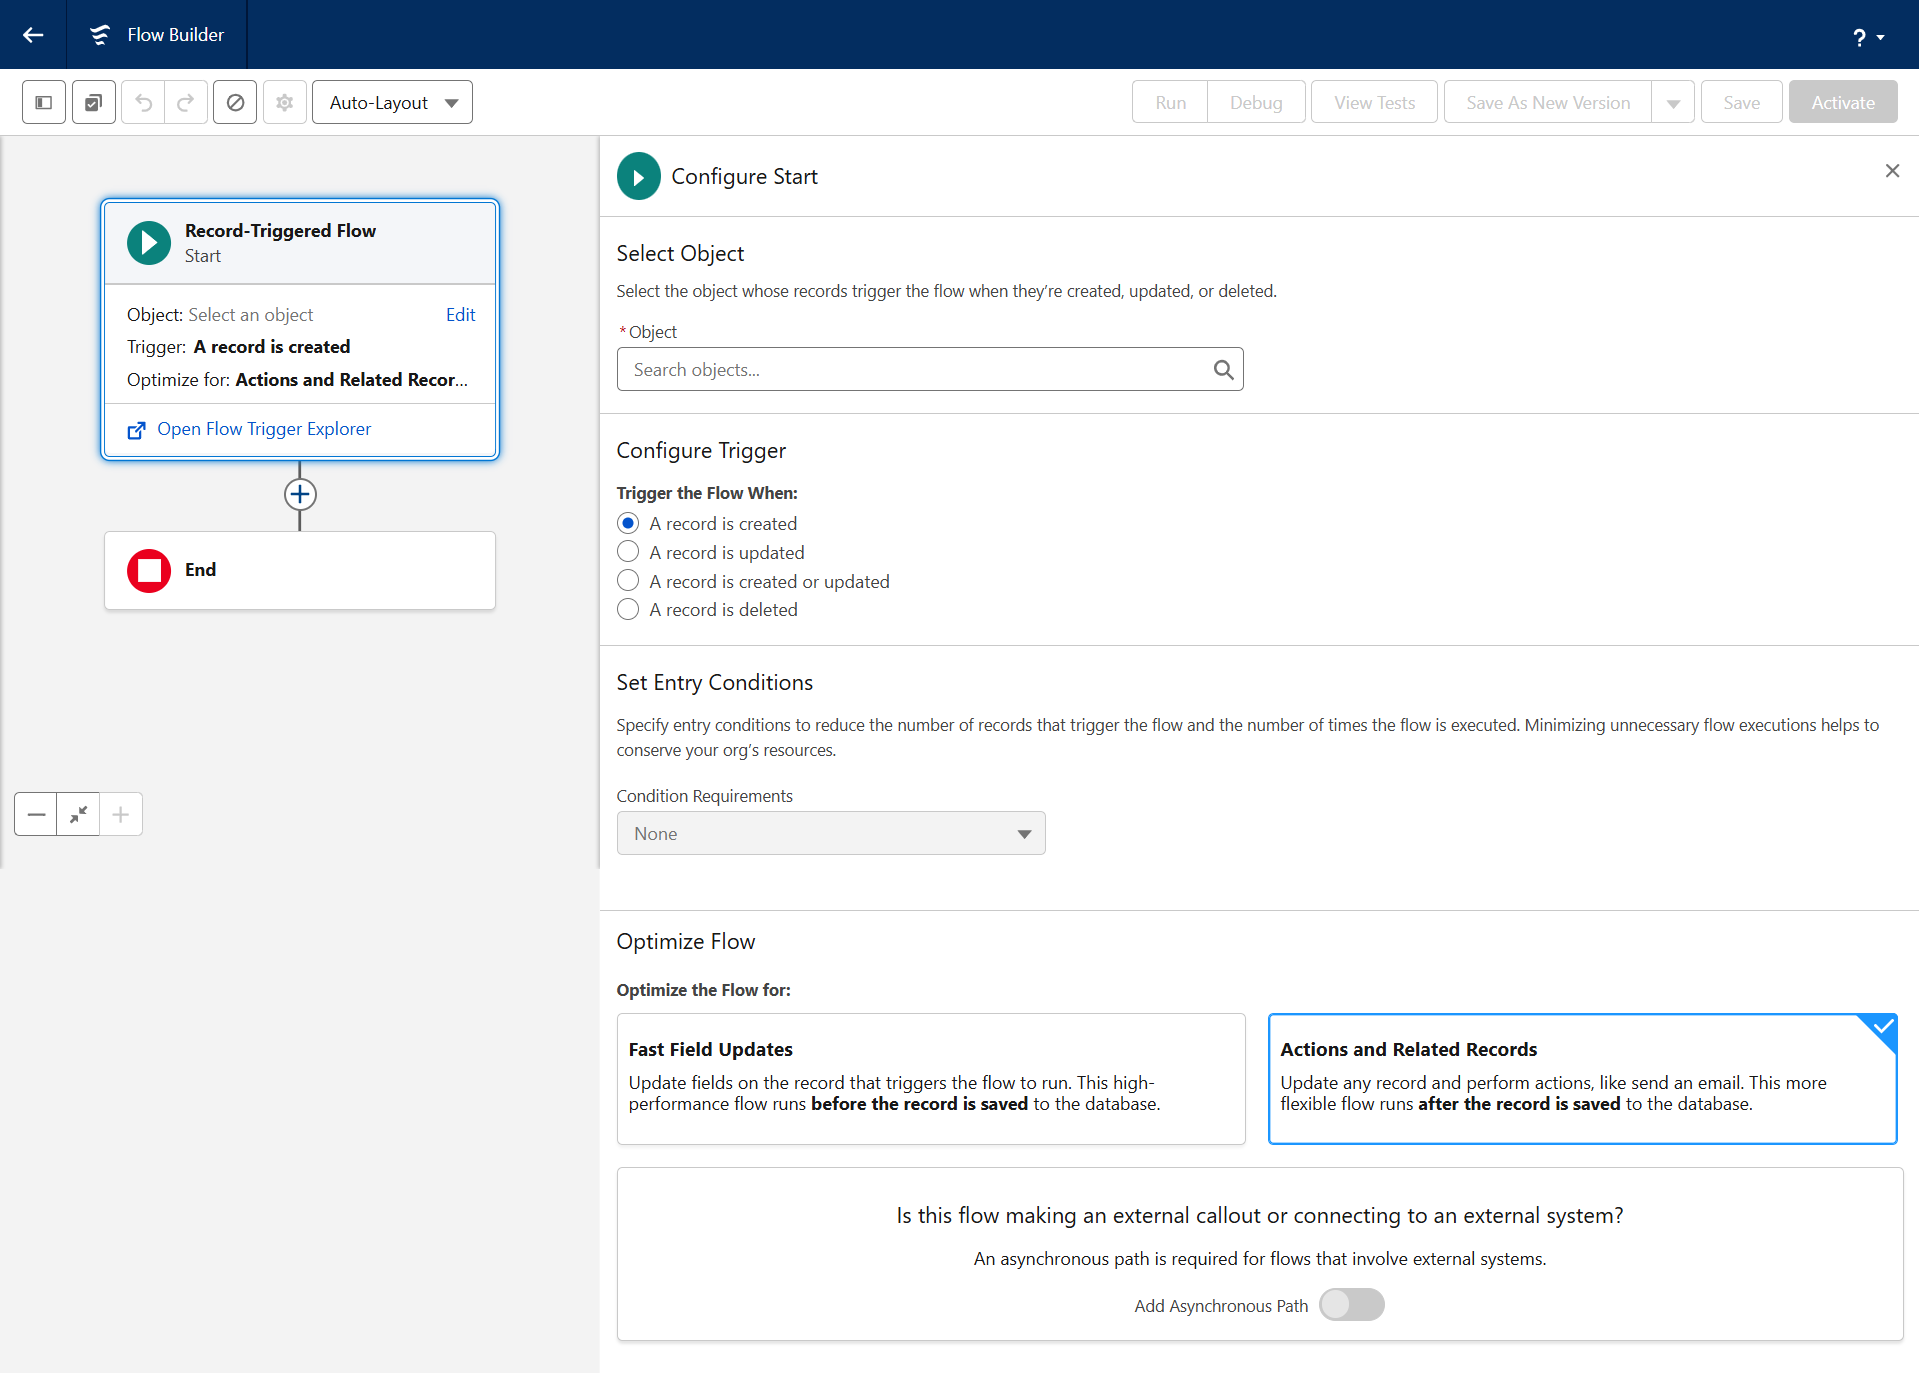
This step defines the context for your automation.
- Select Object: Choose the Salesforce object that starts the automation (e.g., Lead or Opportunity).
- Configure Trigger: Select when the flow should run:
- A record is created.
- A record is updated.
- A record is created or updated. (Most common choice)
- Set Entry Conditions (Optional but Optimal): Define criteria that must be met before the flow runs (e.g., Industry equals Technology AND Lead Source equals Organic Search). This prevents the flow from running unnecessarily.
Step 3: Build the Logic and Action Elements
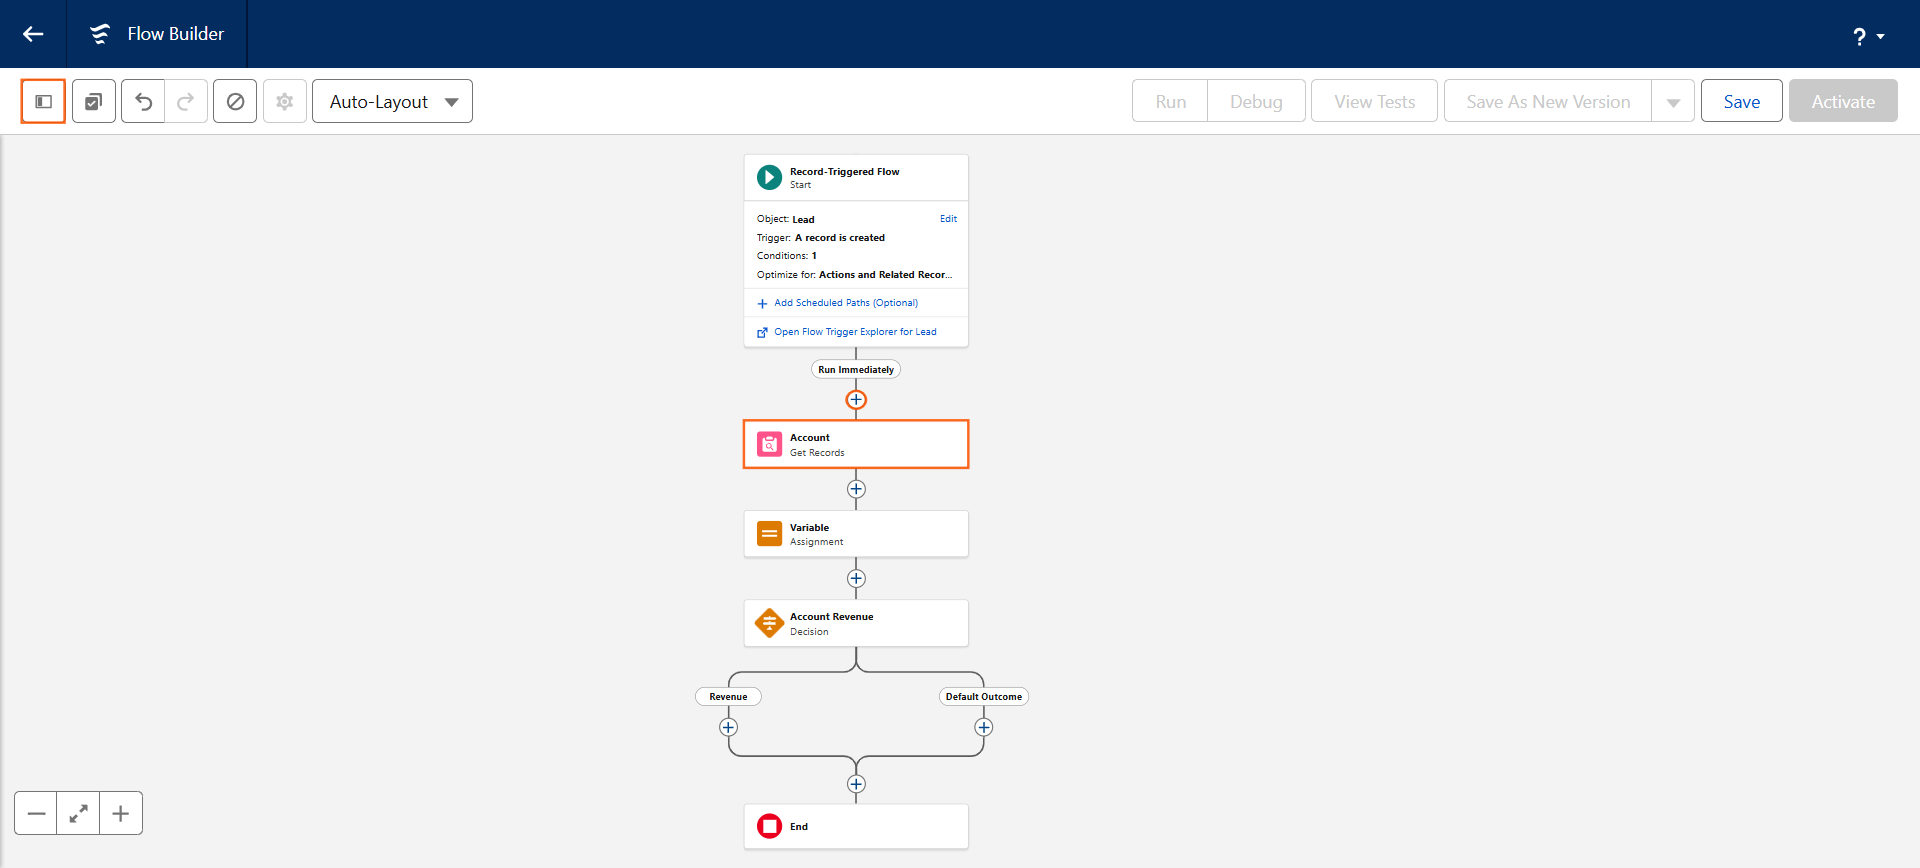
Use the Flow Builder canvas to add elements that perform the actual business logic.
- Click the + button to add elements.
- Add Get Records (Logic) by clicking +: Use this element to look up related records.
- Example: Get the related Account record to check its Annual Revenue.
- Add Decision (Logic) by clicking +: Use this to branch the flow path based on conditions.
- Example: Decision: If Account Revenue is greater than $1 million, take the High Priority path; otherwise, take the Standard Priority path.
- Adding Assignment (Logic) by clicking +: Use this to set the value of a variable.
- Update Records (Action): Use this to change data on the record that triggered the flow or related records.
- Optimal Action: In the High Priority path, use an Update Records element to set the triggering Lead’s Status to Hot and assign it to the VP of Sales.
Step 4: Save, Debug, and Activate
- Save: Click “Save,” give the Flow a clear Flow Label (e.g., Auto_Lead_Assignment_Tech_Organic), and a unique API Name.
- Debug: Crucially, click the “Debug” button to test the flow logic on an existing record without making permanent changes to your data.
- Activate: Once testing is complete and successful, click the “Activate” button. The automation rule is now live.
Optimal Tip: Salesforce recommends having only one Record-Triggered Flow per object (or one set of flows for Before Save and one for After Save). Consolidate all your automation logic for an object into these few main flows for simplified maintenance.

 Salesforce

