


Creating a Custom Object in Salesforce is the foundational step for extending the platform’s functionality to track and store data specific to your unique business processes (e.g., Project, Certification, Competitor).
The process involves defining the object’s properties, security, and integration settings.
Step 1: Initiate Custom Object Creation
- Navigate to Setup: Click the gear icon (⚙️) to Setup.
- Find Object Manager: In the Quick Find box, type Object Manager and select it.
- Create Custom Object: Click “Create” in the upper right corner, then select “Custom Object.”
Step 2: Define Object Details
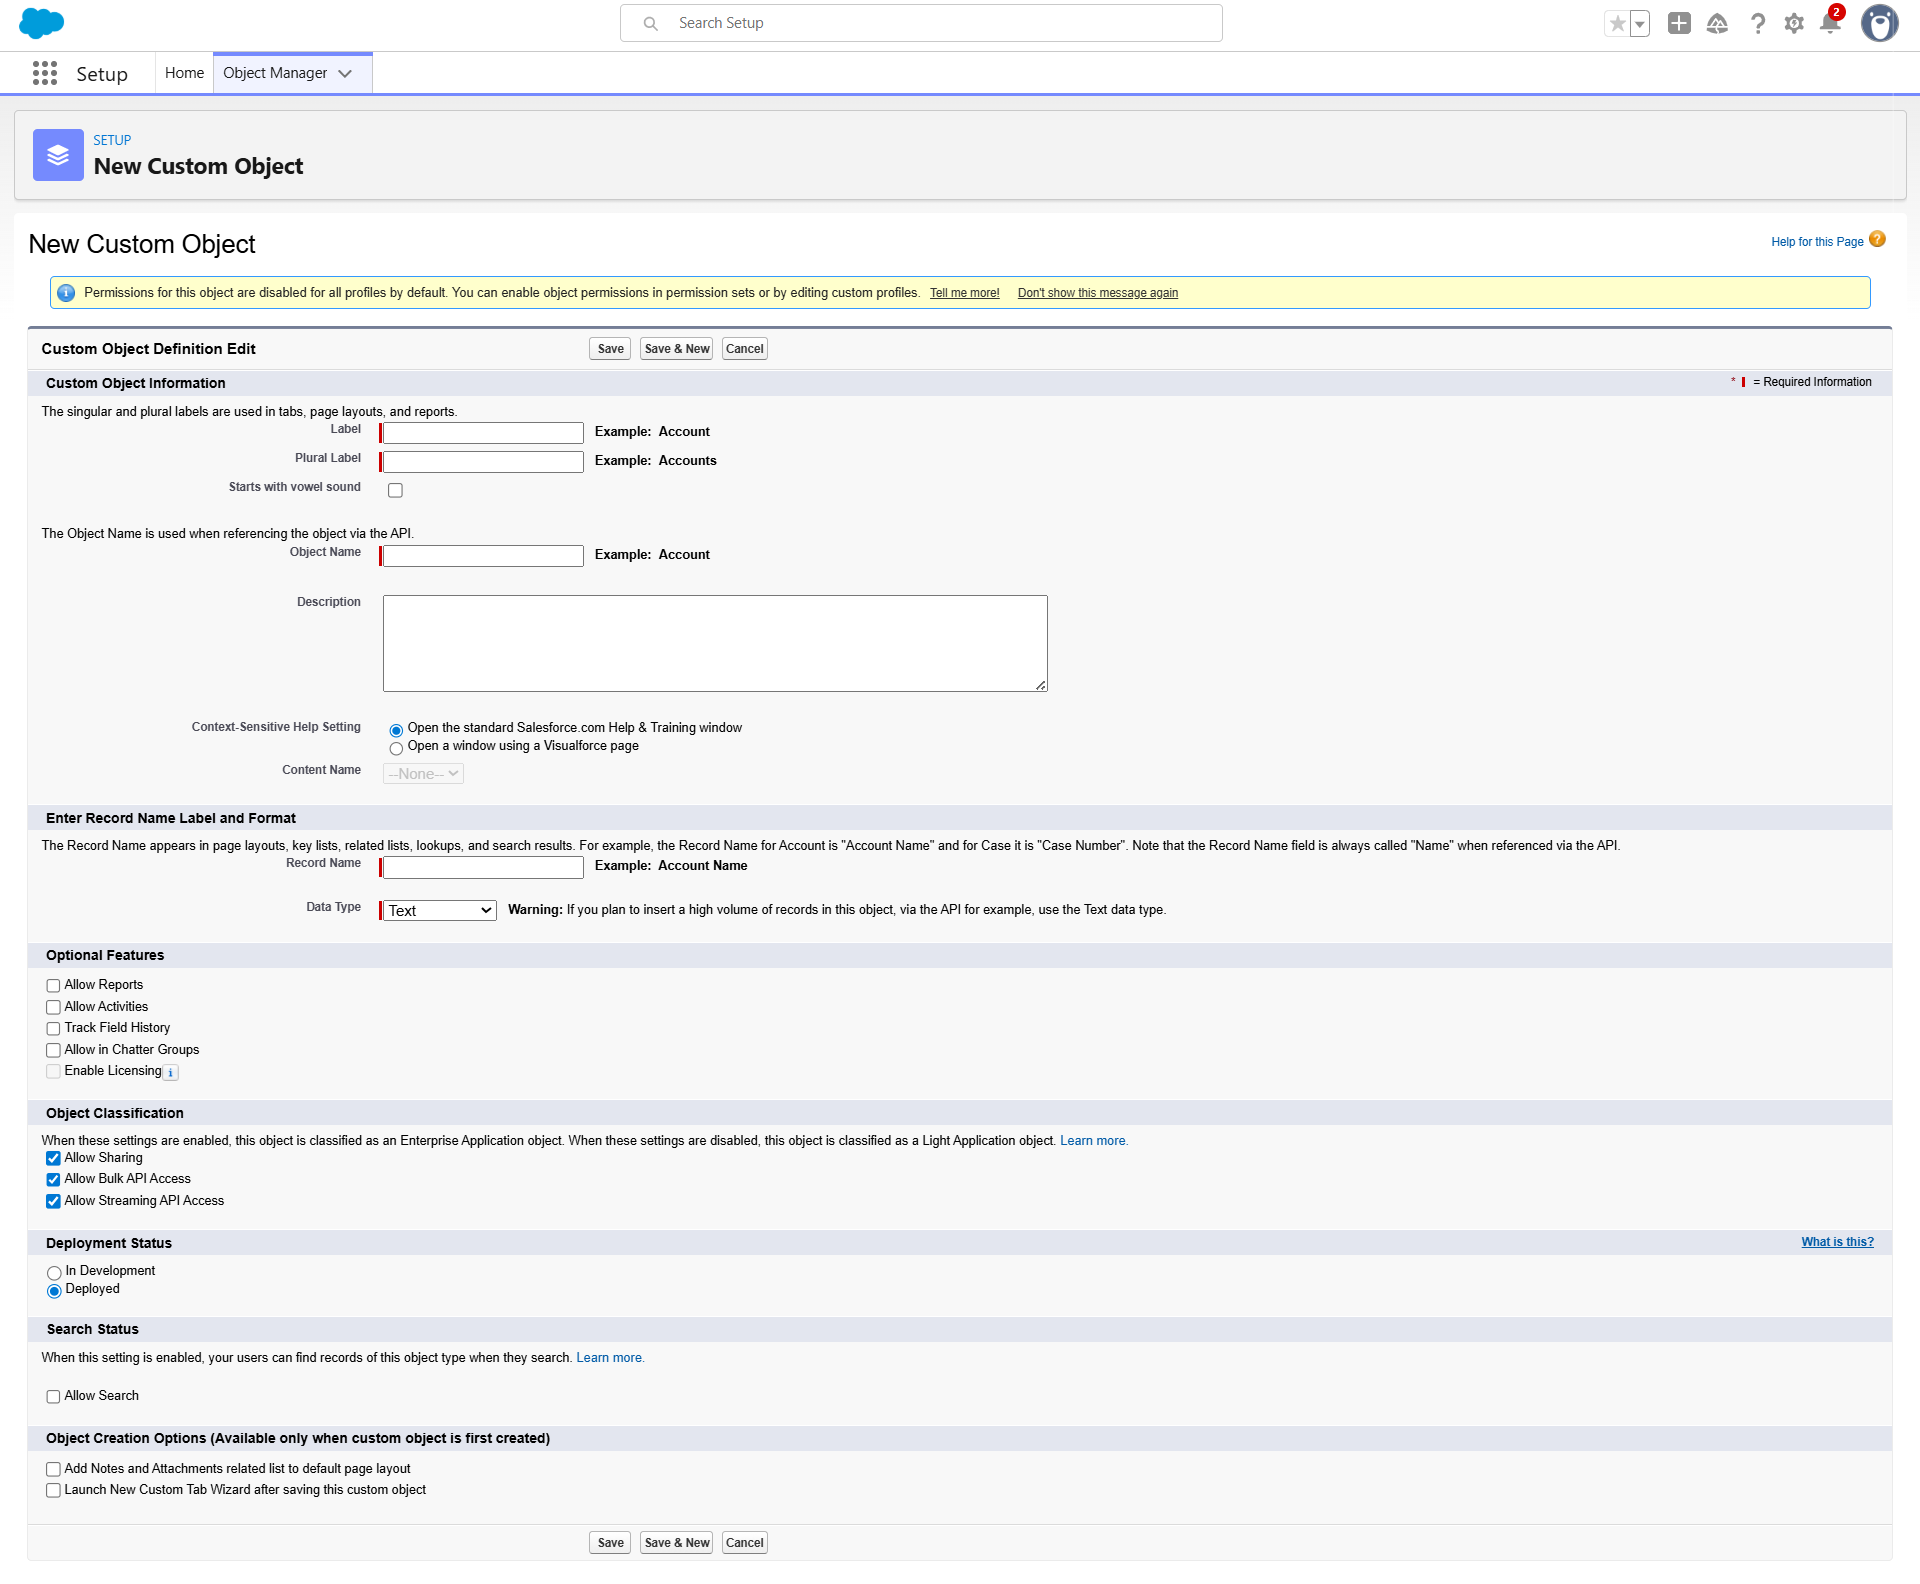
This step sets the object’s naming, visibility, and key functional properties.
Field Name | Requirement | Our Choice |
Label | The singular name users will see (e.g., Project). | Clear, descriptive, singular noun. |
Plural Label | The plural name used in tabs and lists (e.g., Projects). | Must be the correct plural of the label. |
Object Name | The unique API name (e.g., Project__c). | Automatically populated; used for development and integrations. |
Record Name | Defines the data field for the primary name of each record (e.g., Project Name). | Usually set as Text field. Best practice is to set it as Auto-Number if the record name should follow a specific sequence (e.g., CERT-{0000}). |
Step 3: Set Optional Features and Visibility
Scroll down to the Optional Features section to set how the object behaves.
- Allow Reports: Always check this box. It enables users to build reports using this object’s data (critical for business intelligence).
- Allow Activities: Check this if you need to track Tasks and Events (calls, meetings) against records of this object type (e.g., tracking tasks against a Project).
- Allow Search: Always check this box. It makes the object searchable through the global search bar, improving user experience.
Step 4: Configure Deployment and Security
In the Deployment Status and Object Creation Options sections:
- Deployment Status: Set to “Deployed” to make the object immediately visible to users with the correct permissions.
- Launch New Custom Tab Wizard: Always check this box. This is a crucial step that immediately takes you to the next screen to create a Custom Tab for your new object, allowing users to access records directly from the navigation bar.
Step 5: Finalize Tab Creation and Permissions
The system automatically launches the Custom Tab Wizard.
- Select Tab Style: Choose a distinct icon/color combination to visually represent the object in the navigation bar.
- Set Tab Visibility: Choose which User Profiles should see the tab:
- Default On: The tab is visible in the user’s primary navigation list.
- Default Off: The tab is available but hidden in the overflow menu.
- Tab Hidden: The user profile cannot see the tab at all.
- Add to Custom Apps: Select the specific Custom Applications (e.g., your Sales or Service App) where this new tab should appear.
- Save.
Your Custom Object is now created, secured, and ready to have Custom Fields and Page Layouts defined for it.

 Salesforce

