


Converting a Lead is the key transition in the Salesforce sales cycle. It means the Lead is qualified and ready to move forward. The conversion process automatically creates new Account, Contact, and Opportunity records from the Lead’s information, ensuring data integrity and a clear sales pipeline.
Step 1: Lead Qualification and Conversion Initiation
Conversion should only happen after the sales team has determined the lead meets the criteria (e.g., budget is confirmed, need is identified).
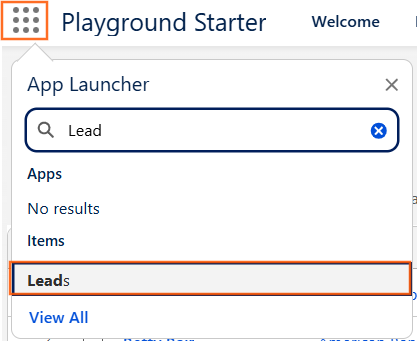
- Go To App Launcher: Search for leads and click it.
- Open the Lead Record: Navigate to the Lead you wish to convert.
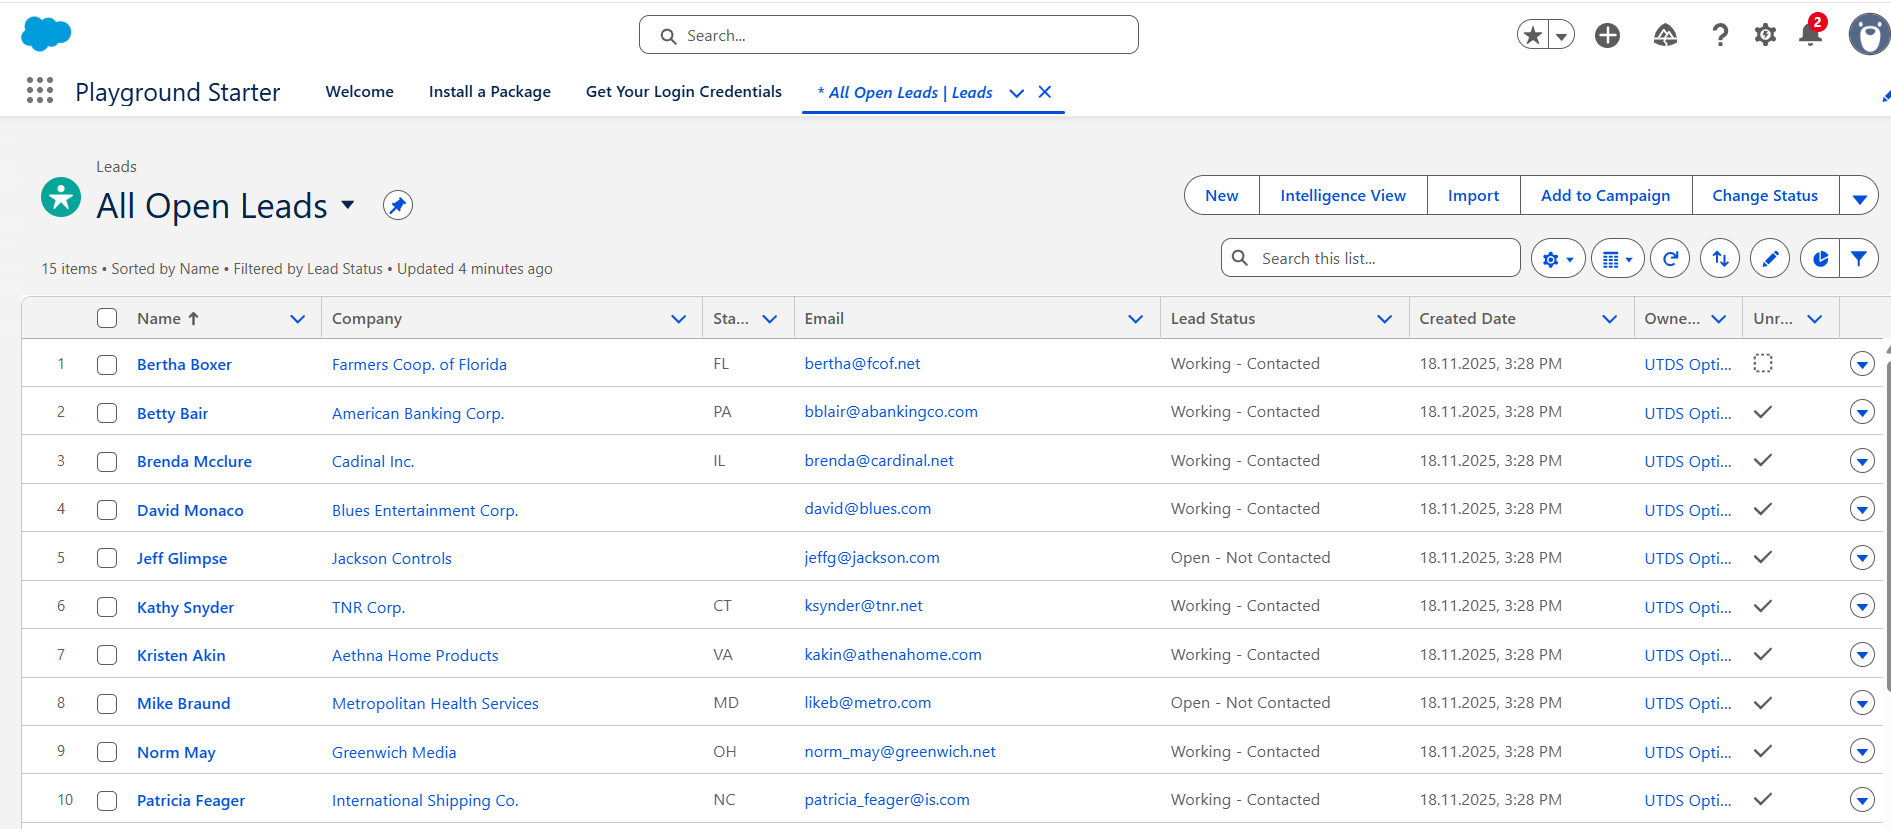
- Verify Lead Status: Ensure the Lead Status field is set to a working stage (e.g., “Contacted,” “Working”).
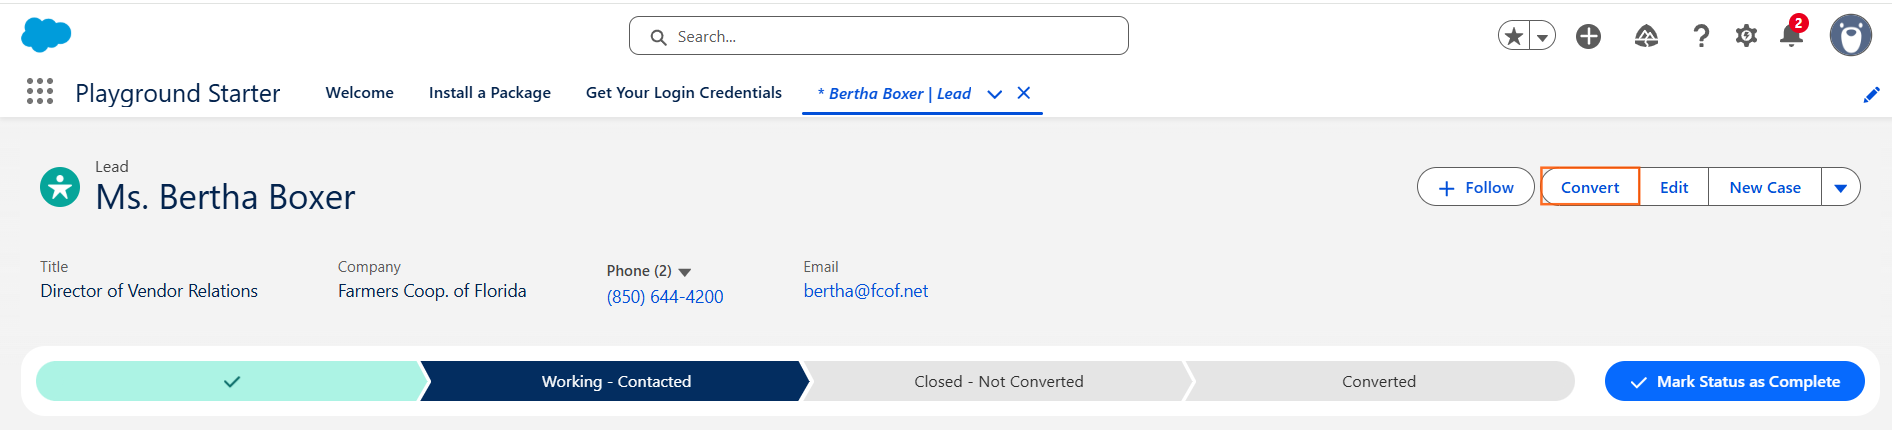
Click the Convert Button: Click the “Convert” button, usually found in the upper-right corner of the Lead detail page.
Step 2: Lead Creation and Mapping
The conversion window prompts you to decide which leads to create and where to map the data.
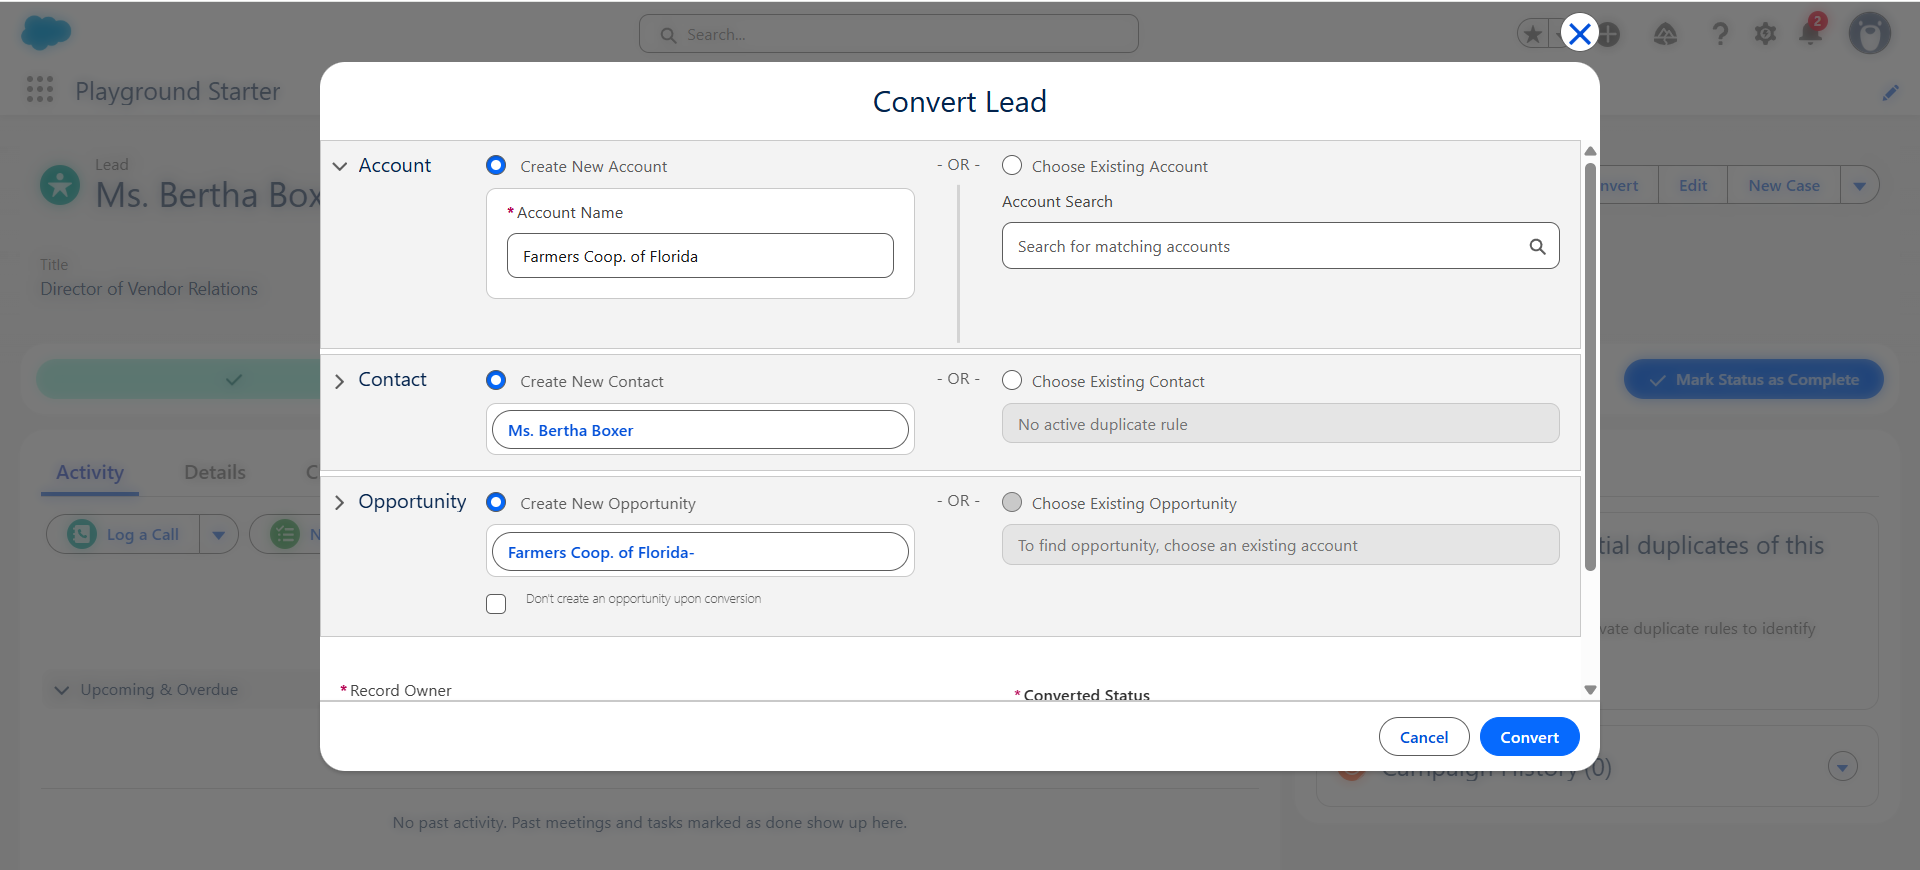
- Account Creation (Mandatory): Salesforce requires an Account for the business associated with the Lead.
- Choose “Create New” if the company doesn’t exist in Salesforce yet.
- If the company already exists as an Account, choose “Choose Existing” and search for the Account name. This prevents duplicate Accounts.
- Contact Creation (Mandatory): The Lead contact is converted into a Contact record.
- Choose “Create New” if the person doesn’t exist as a Contact.
- If the person exists as a Contact under the chosen Account, choose “Choose Existing” to prevent duplicate Contacts.
- Opportunity Creation (Optional but Recommended): This is the crucial step for pipeline management.
- Leave “Create a New Opportunity” selected.
- Edit the default Opportunity Name to be specific (e.g., “UTDS Digital Strategy Project – [Company Name]”).
- Do Not Create: If the Lead is qualified but the sale isn’t immediate, you can select “Do not create an opportunity at this time.”
Step 3: Finalize Conversion and Data Handling
- Converted Status: The Lead Status is automatically set to the final Converted status.
- Assign Records: Choose the Record Owner for the newly created Account, Contact, and Opportunity (usually the person performing the conversion).
- Click Convert: Click the final “Convert” button.
Optimal Conversion Results
- Lead is Hidden: The original Lead record remains in the system for historical reporting but is marked as “Converted” and is no longer editable by standard users.
- New Records are Created: The system immediately creates the new Account, Contact, and Opportunity records, linking all three.
- Activities Transfer: All past activities, emails, and tasks logged against the Lead are transferred to the new Contact and Opportunity records.

 Salesforce

