


Adding or modifying filters on an existing Salesforce report is the process of refining the data set to make the report results more precise and relevant to specific business questions (e.g., viewing only Qualified Leads or Opportunities over a certain Amount).
Step 1: Access the Report Builder
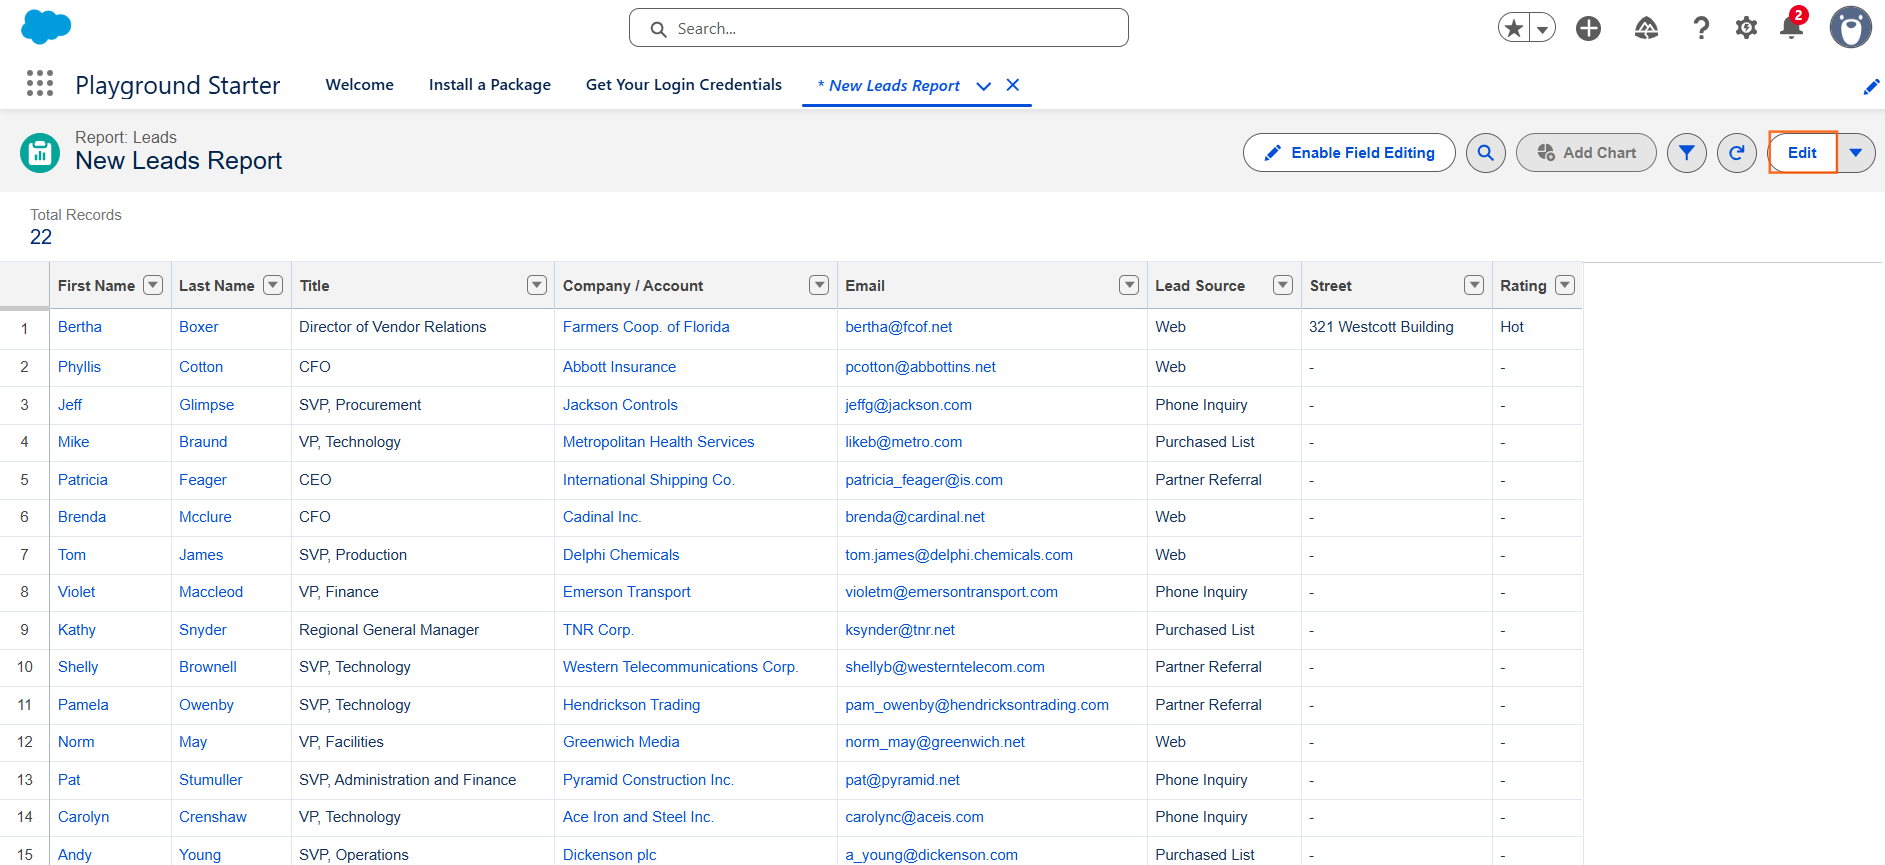
You must enter the Report Builder interface to make changes to the report’s filters, groupings, or columns.
- Navigate to Reports: Click the App Launcher, search for reports and click it.
- Locate the Report: Find the saved report you wish to modify in its designated folder.
- Open the Report: Click the name of the report to run it and view the results.
- Edit Report: Click the “Edit” button (usually in the upper-right corner of the run report view). This opens the Report Builder interface.
Step 2: Utilize the Filters Panel
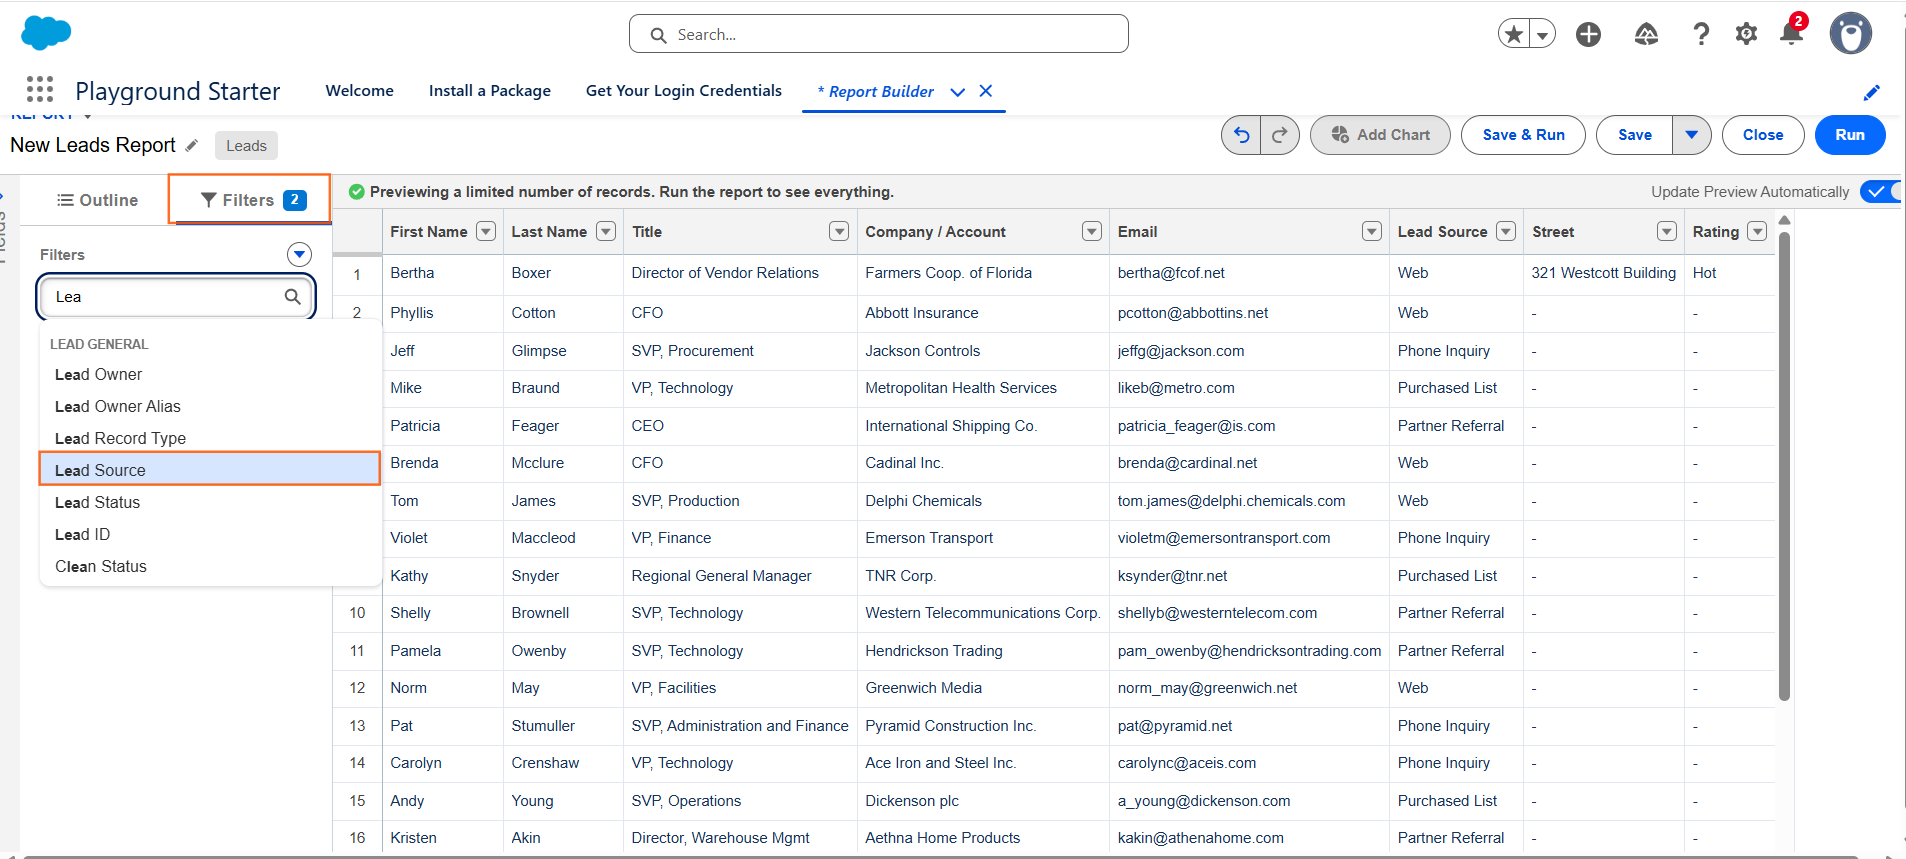
The Filter panel on the left side of the Report Builder is where all changes to the data scope are made.
- Locate Filters: On the left side of the screen, click the “Filters” panel (if not already selected).
- Date Filter: Review the existing default filters:
- Date Field: The Date Field filter controls the primary time frame (e.g., using the Created Date for “Last 30 Days”). You can change the date field or the time period here.
- Add New Field Filters:
- Click the “+ Add Filter” button.
- Select Field: Search for the field you want to filter on (e.g., Lead Source, Industry, Opportunity Stage).
- Select Operator: Choose how the filter should operate (e.g., equals, not equal to, contains, greater than).
- Enter Value(s): Input the specific value(s) for the filter (e.g., equals Website Form and Referral).
Step 3: Apply Filter Logic (Optimal Choice)
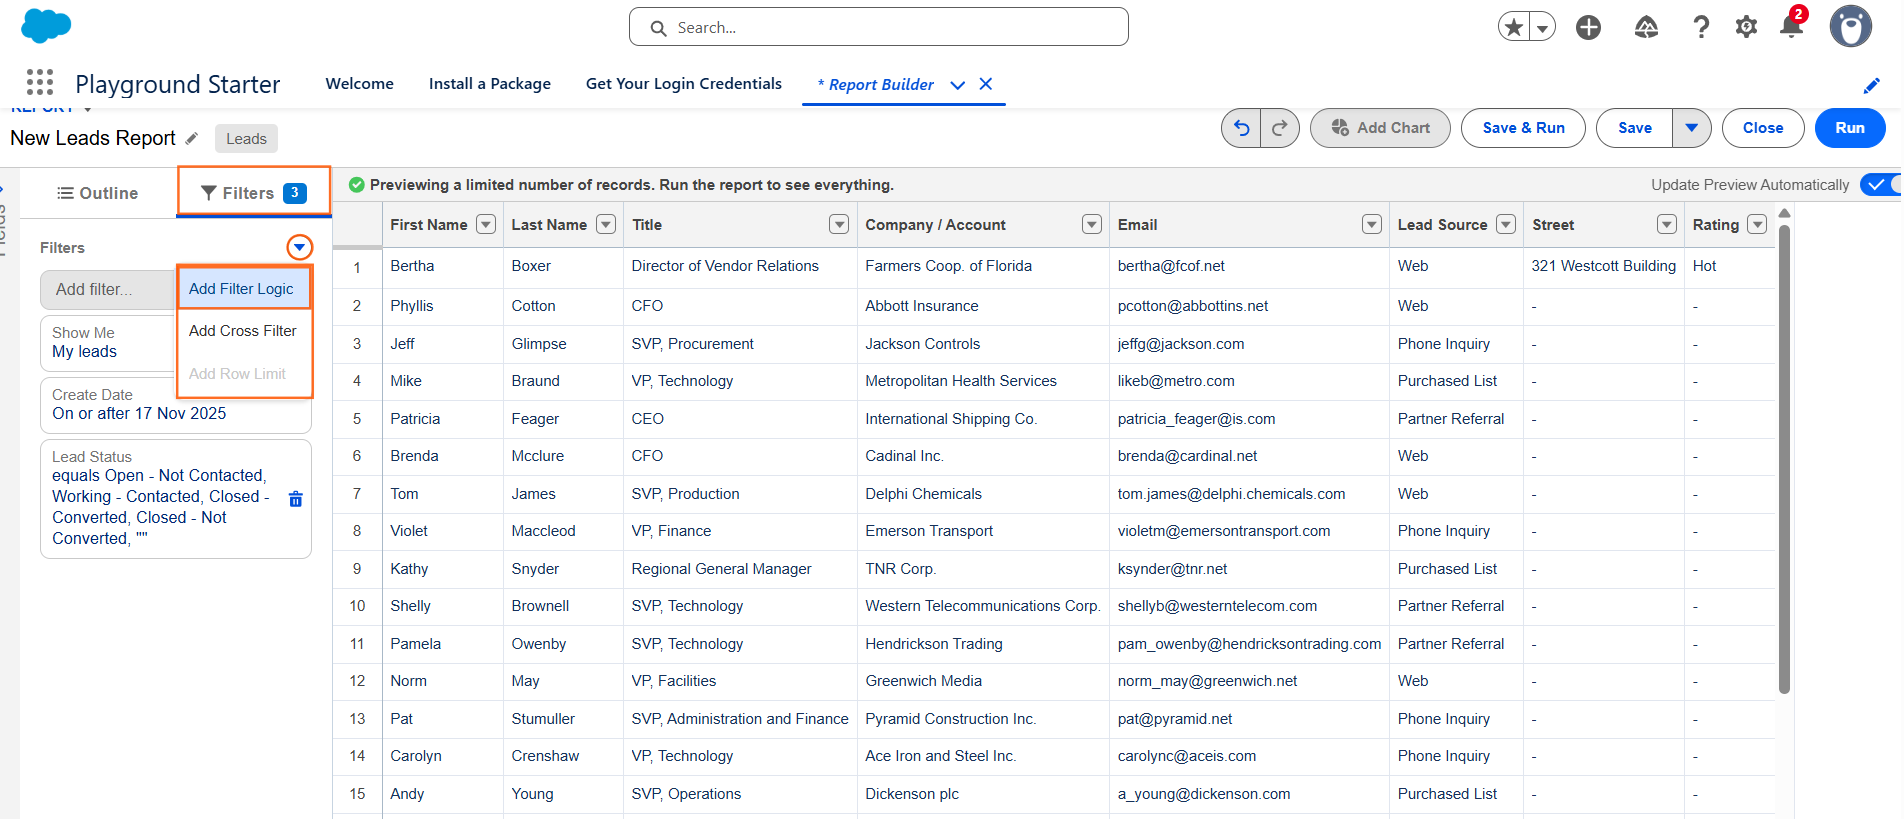
Filter Logic is essential for advanced analysis where you need to combine multiple filters using AND or OR logic.
- Access Logic: Once you have created several filters, click the ” Add Filter Logic” button near the top of the Filters panel.
- Define Logic: Use the filter numbers (e.g., 1, 2, 3) to define the relationship:
- Example Logic: (1 AND 2) OR 3
- Interpretation: Show me records where Filter 1 AND Filter 2 are true, OR show me any records where Filter 3 is true.
- Click Apply.
Step 4: Run and Save Changes
- Test Results: Click the “Run” button to view the report with the new filters applied. Always verify that the filtered data set is correct.
- Save Changes: If the results are correct, click the “Save” button at the top to permanently update the report with your new filters.
UTDS Optimal Tip: Use Relative Date Filters (e.g., “Last 7 Days,” “This Year”) instead of fixed date ranges. Relative filters ensure the report is always current when users run it.

 Salesforce

