


Validation Rules ensure that data entered by users meets specific standards before a record can be saved. If the condition in the rule is met, Salesforce displays an error message and prevents the save operation.
Step 1: Navigating to Validation Rules
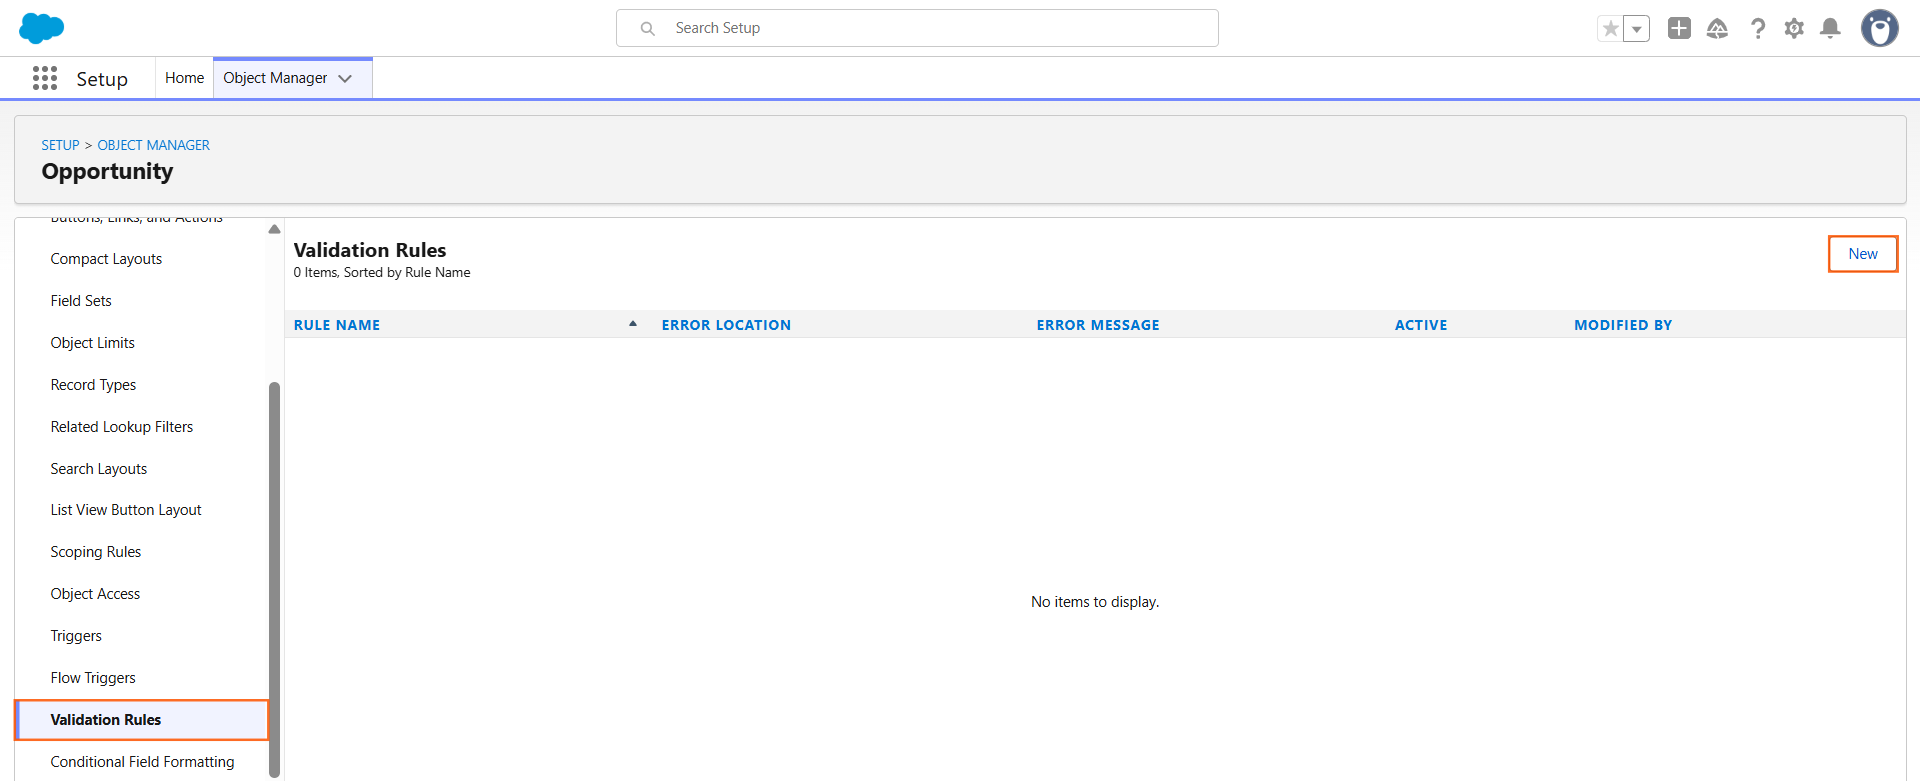
- Go to Setup > Object Manager.
- Select the Object where you want the rule to apply (e.g., Opportunity or Lead).
- Click Validation Rules in the left-hand sidebar.
- Click New.
Step 2: Configuring the Rule
Every validation rule requires four primary components:
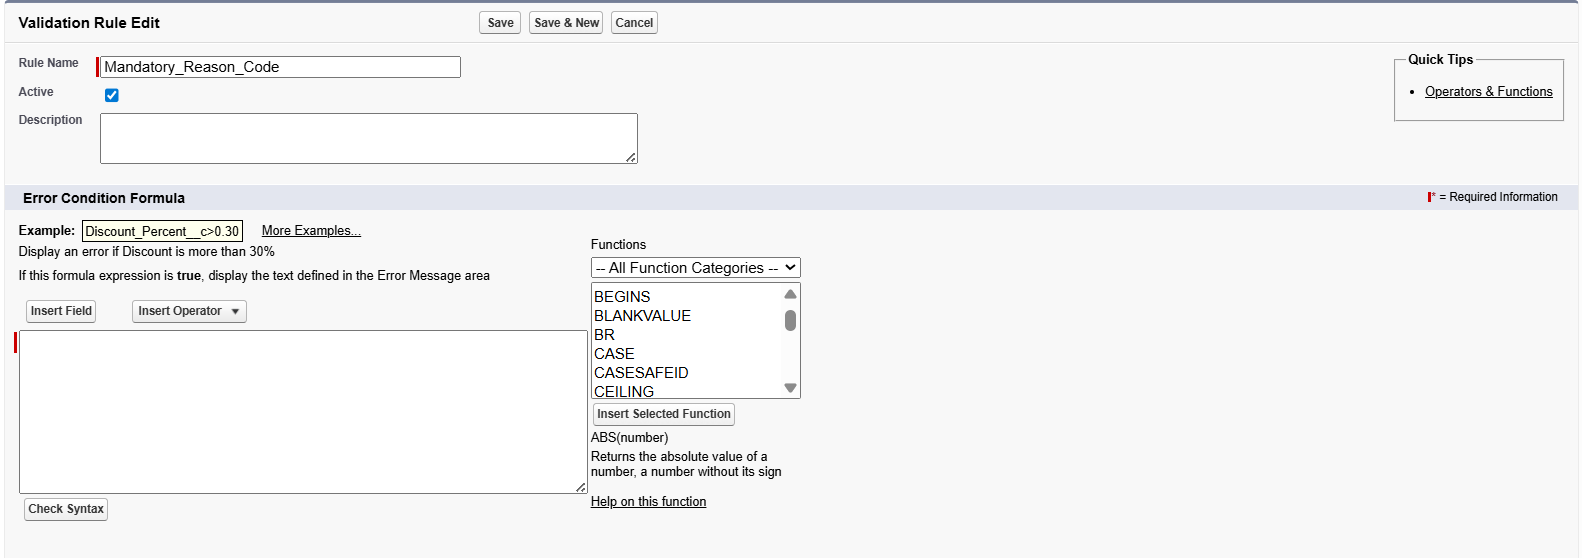

- Rule Name: A unique identifier (use underscores instead of spaces, e.g., Mandatory_Reason_Code).
- Active Checkbox: Ensure this is checked for the rule to run.
- Error Condition Formula: This is the logic that triggers the error. The rule “fires” when the formula evaluates to True.
- Error Message: The text shown to the user explaining why the record didn’t save.
Step 3: Writing the Formula
Use the Insert Field and Insert Operator buttons to build your logic accurately.
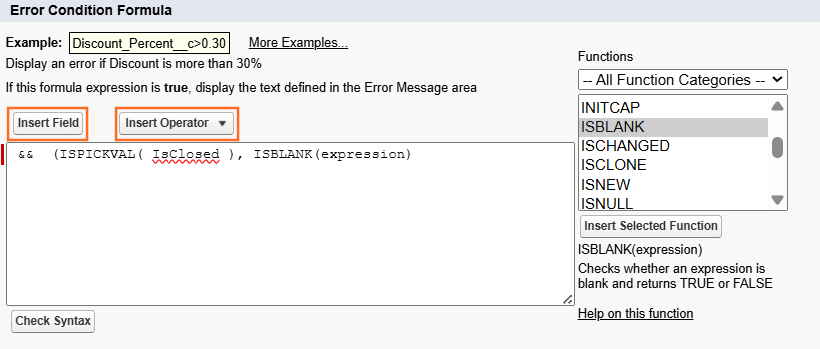
Example: Ensuring a field is not empty
If you want to make a “Reason” field mandatory when a Lead is “Closed – Lost”:
AND( ISPICKVAL(Status, “Closed – Lost”), ISBLANK(Reason__c) )
- Check Syntax: Always click this button before saving to catch typos or logic errors.
Step 4: Setting the Error Location
You must choose where the error message appears:
- Top of Page: Best for errors involving multiple fields or general record logic.
- Field: Places the error directly under a specific field. This is most user-friendly as it highlights exactly what needs to be fixed.
Step 5: Best Practices for Technical Guides
- The “Rule of True”: Remind users that the formula describes the bad data, not the good data. If the formula is “True,” the user sees an error.
- Bypass Logic: To prevent the rule from blocking automated system updates or specific administrators, add a bypass:
- && $Permission.Ignore_Validation_Rules = False
- Testing: Always advise testing the rule in a Sandbox before activating it in Production to avoid locking users out of their records.

 Salesforce

