


Adding a Custom Field to an existing object (Standard like Account or Custom like Project) is the way you collect specific, tailored data for your business processes within Salesforce. This involves selecting the correct data type, defining security, and placing the field on the relevant page layouts.
Step 1: Initiate Custom Field Creation
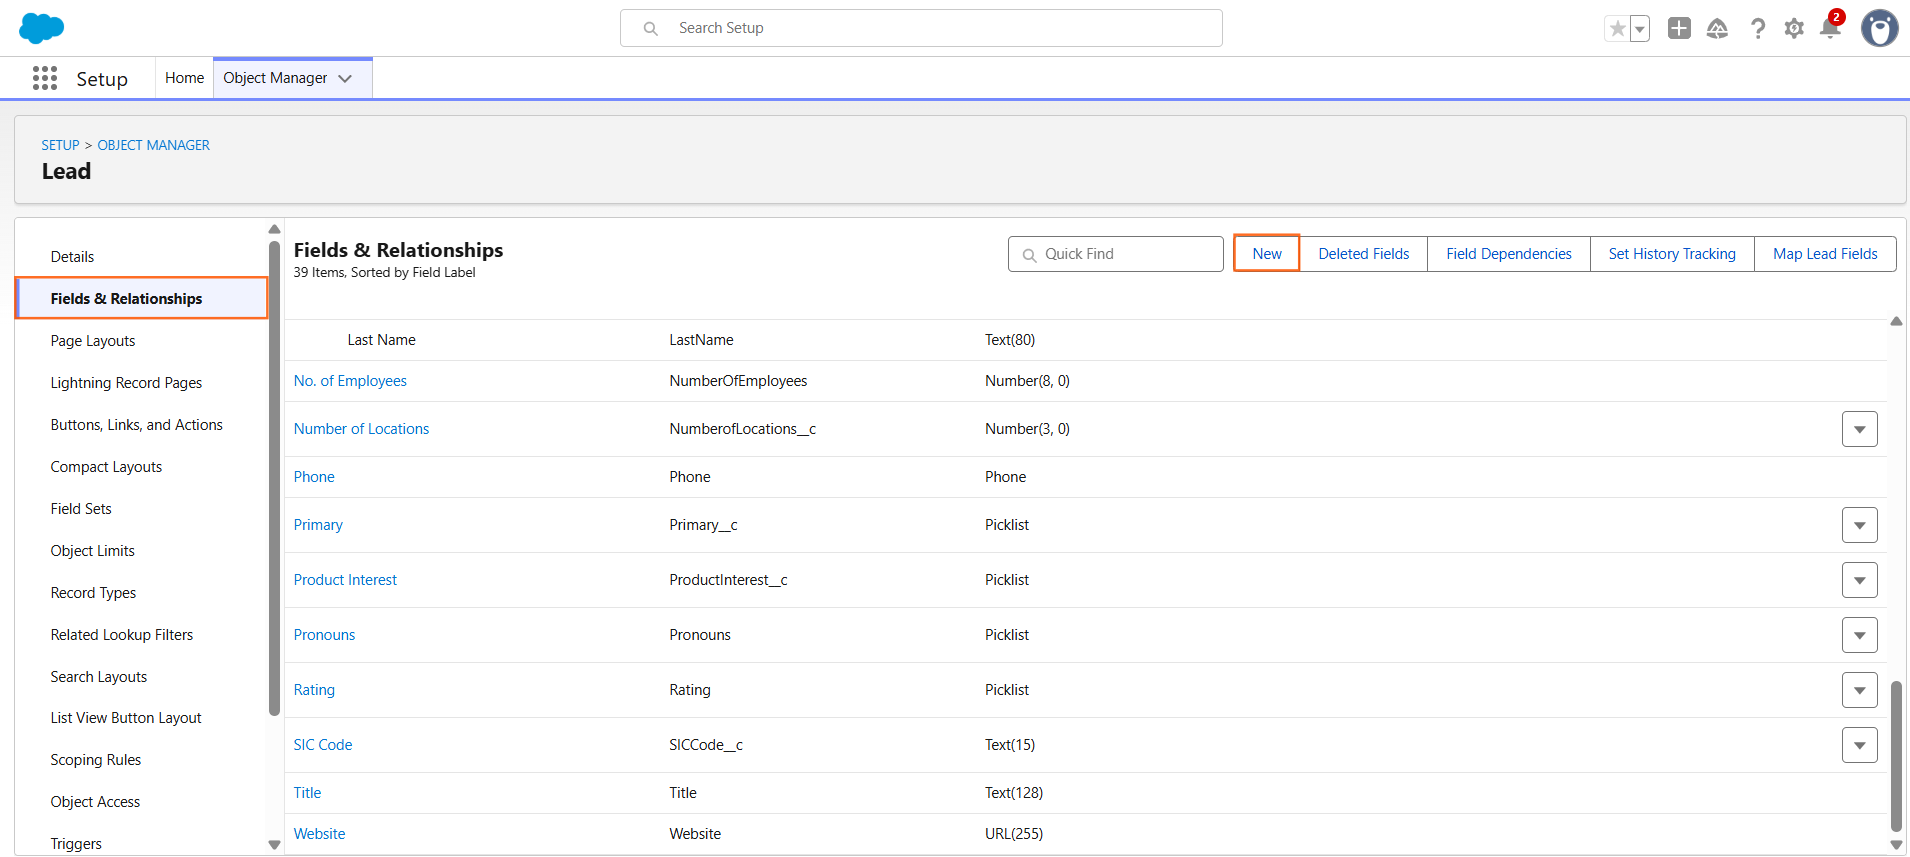
- Navigate to Setup: Click the gear icon (⚙️) to Setup.
- Access Object Manager: In the Quick Find box, type Object Manager and select it.
- Select the Object: Find and click on the object where you want to add the field (e.g., Lead, Opportunity, or your custom Project object).
- Go to Fields & Relationships: In the left sidebar, click “Fields & Relationships”.
- Create New: Click the “New” button.
Step 2: Choose the Optimal Data Type
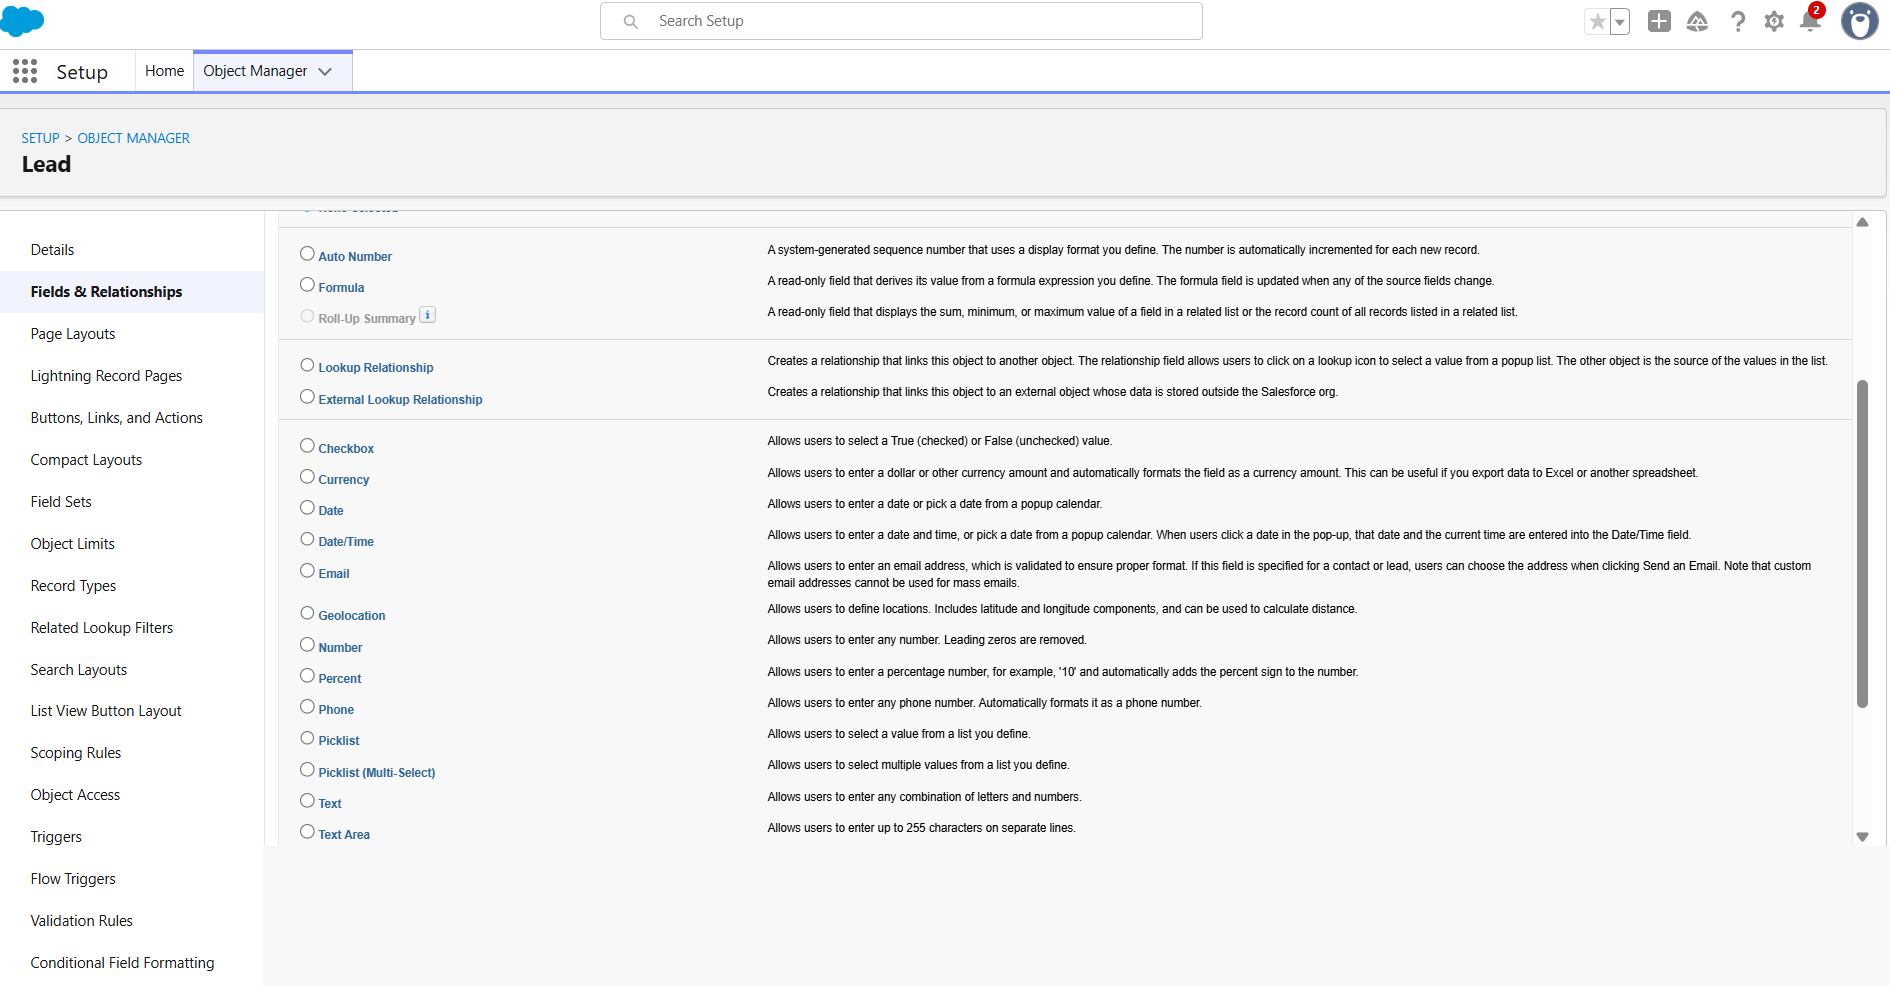
This is the most critical decision, as the data type determines the kind of information the field can store (text, number, date, etc.).
Data Type | Optimal Use Case for UTDS Clients | Example |
Text | Short, alphanumeric data (e.g., specific codes, short notes). | Competitor Reference Code |
Picklist | A predefined list of values for consistent data entry. | Lead Generation Channel (e.g., Organic, Referral, Paid) |
Date | To store a calendar date. | Project Go-Live Date |
Number | Whole numbers without currency symbols. | Estimated Project Hours |
Currency | Monetary values with currency symbols. | Marketing Budget Spend |
Lookup Relationship | To link the record to a Standard or Custom Object (e.g., linking an Opportunity to a Lead). | Link the Project object to the Account object. |
Formula | To calculate a value based on other fields (read-only). | Opportunity Close Rate Percentage |
Once done choosing the data type, click Next
Step 3: Define Details and Field-Level Security
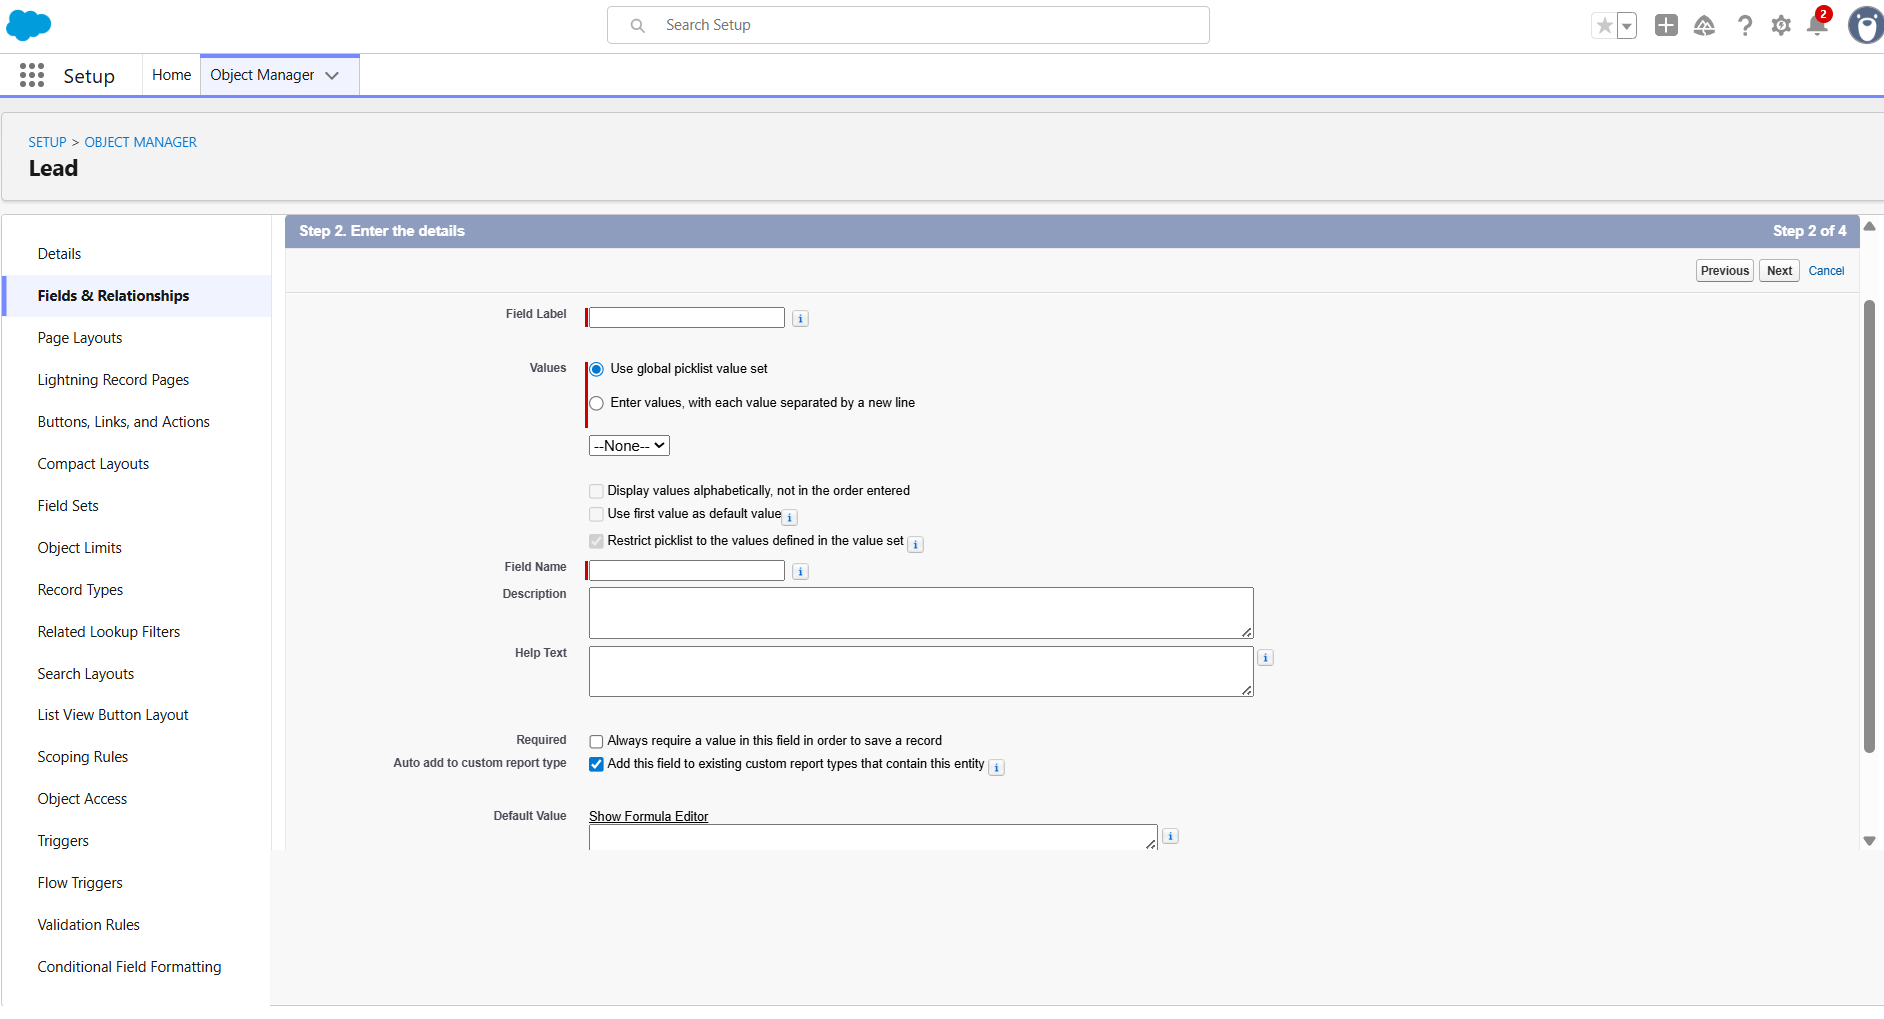
- Enter Details:
- Field Label: The user-facing name (e.g., Client Engagement Score).
- Field Name: The API name, which is used for development (auto-populated with Client_Engagement_Score).
- Length/Decimals: Define the necessary length (for Text fields) or the number of decimal places (for Number/Currency fields).
- Establish Field-Level Security: This step determines which User Profiles can see and/or edit the field.
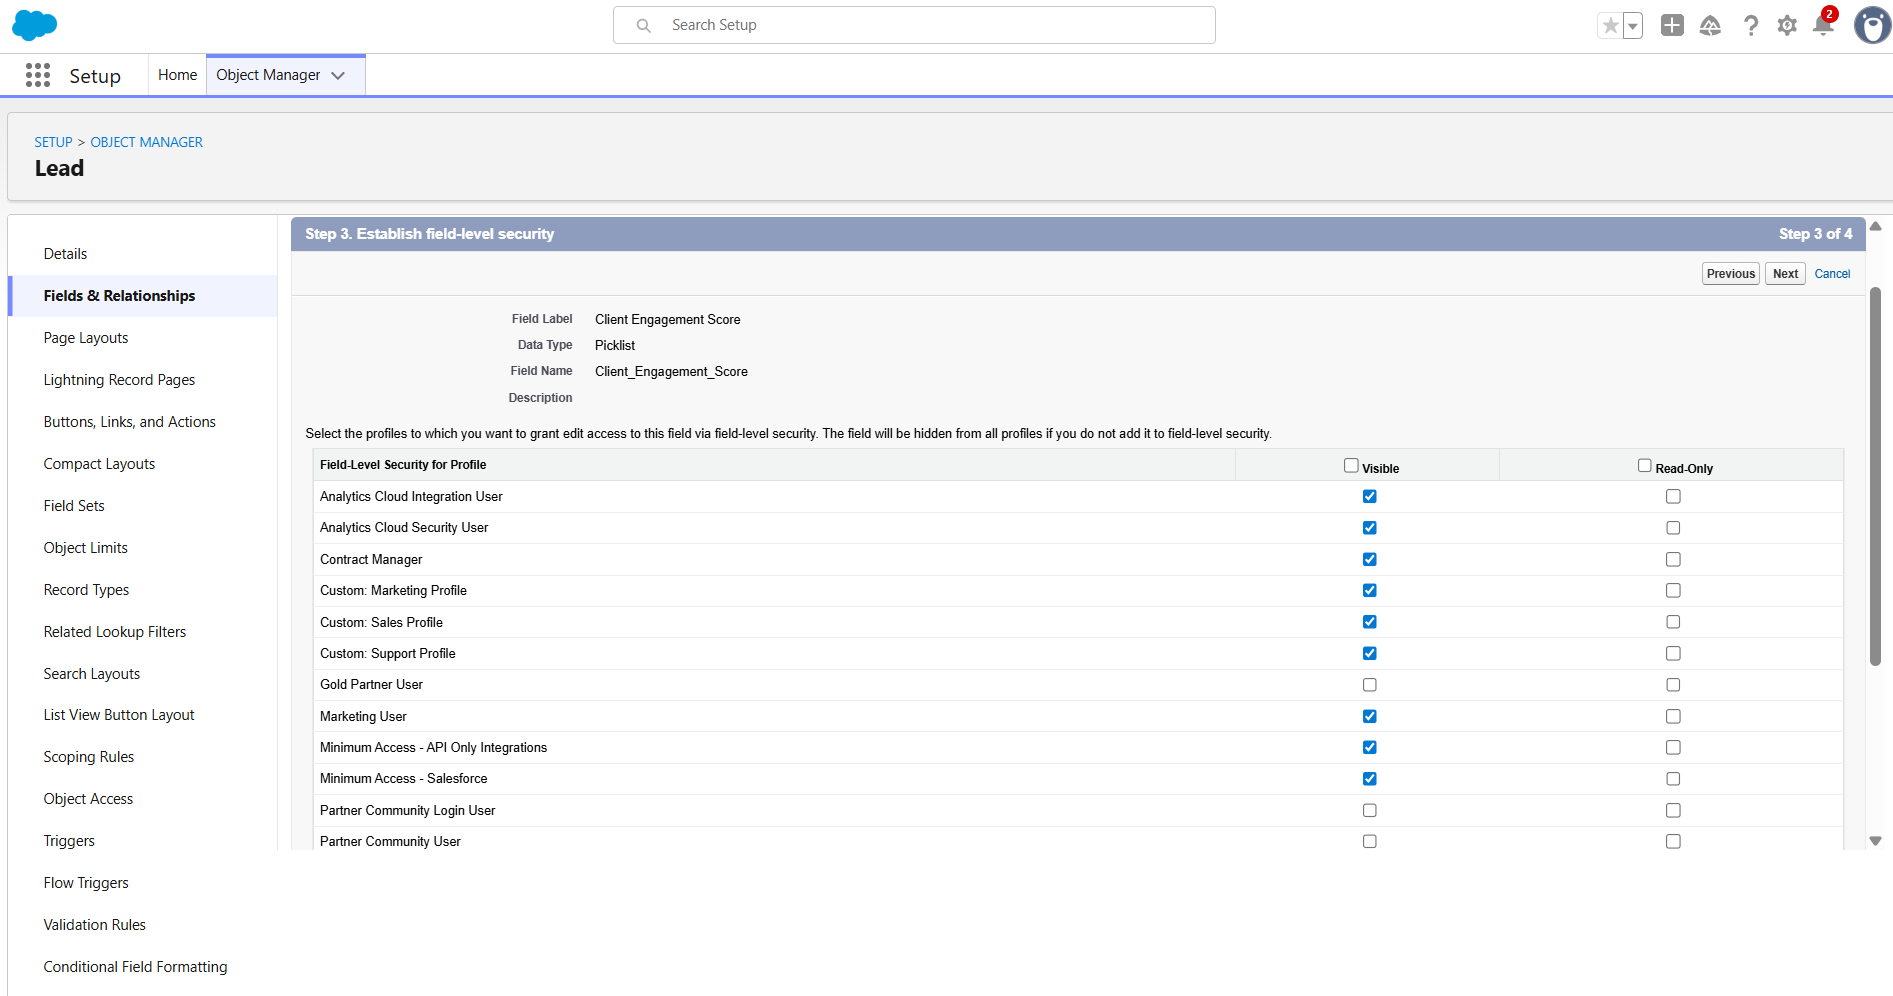
- Visible: Check this box for every profile that needs to see the field.
- Read-Only: If you check this, the profile can see the data but cannot edit it (optimal for auditing or system fields).
3. Click Next.
Step 4: Add the Field to Page Layouts
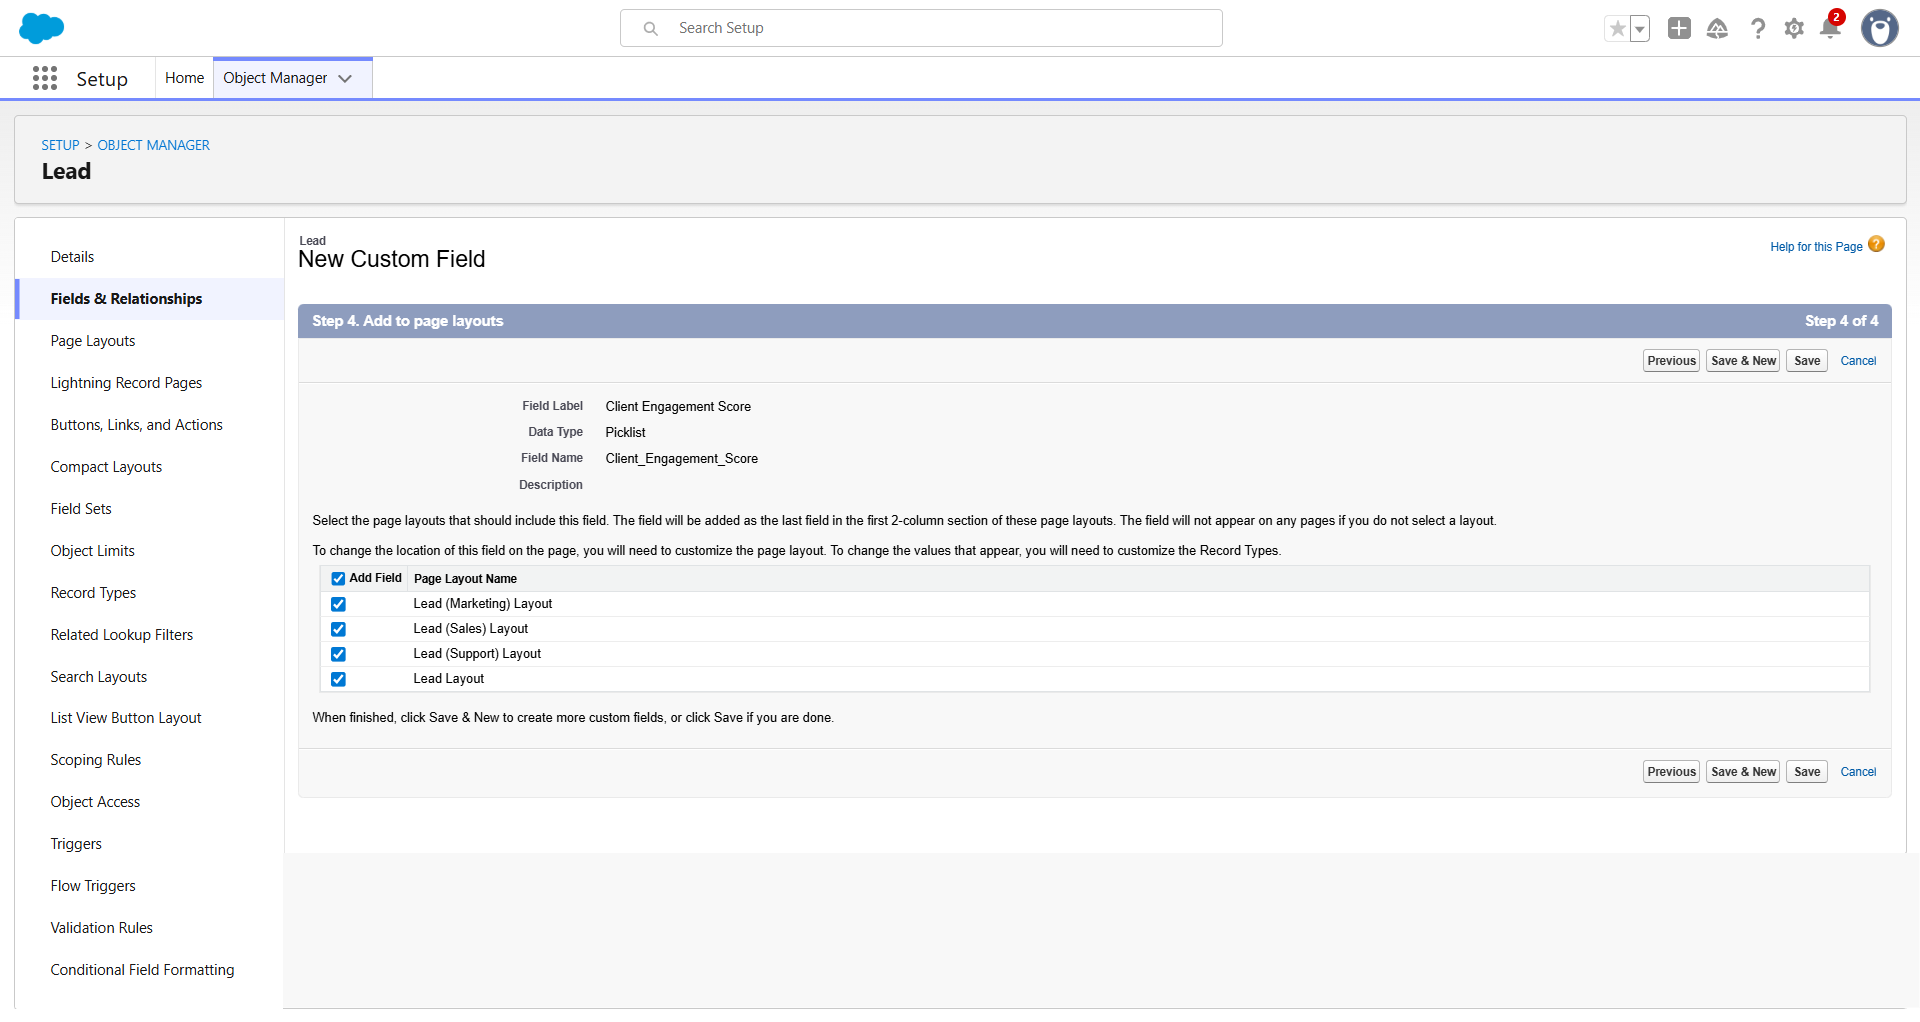
This final step ensures users can actually see and interact with the field when viewing a record.
- Select Layouts: You will see a list of all existing Page Layouts for that object (e.g., Sales Lead Layout, Marketing Lead Layout).
- Check the Box: By default, the field is added to the last section of all layouts. Uncheck any layouts where the field is not relevant to the user profile (e.g., if the field is for Sales, remove it from the Marketing layout).
- Adjust Placement (Optional but Optimal): After saving, go to Page Layouts for the object, open the relevant layout (e.g., Sales Lead Layout), and drag the new field from the bottom section to the most logical place on the layout.
- Click Save.

 Salesforce

