


A WordPress plugin adds specific features or functionality to your website. You can install plugins from the WordPress dashboard or upload a plugin package when appropriate.
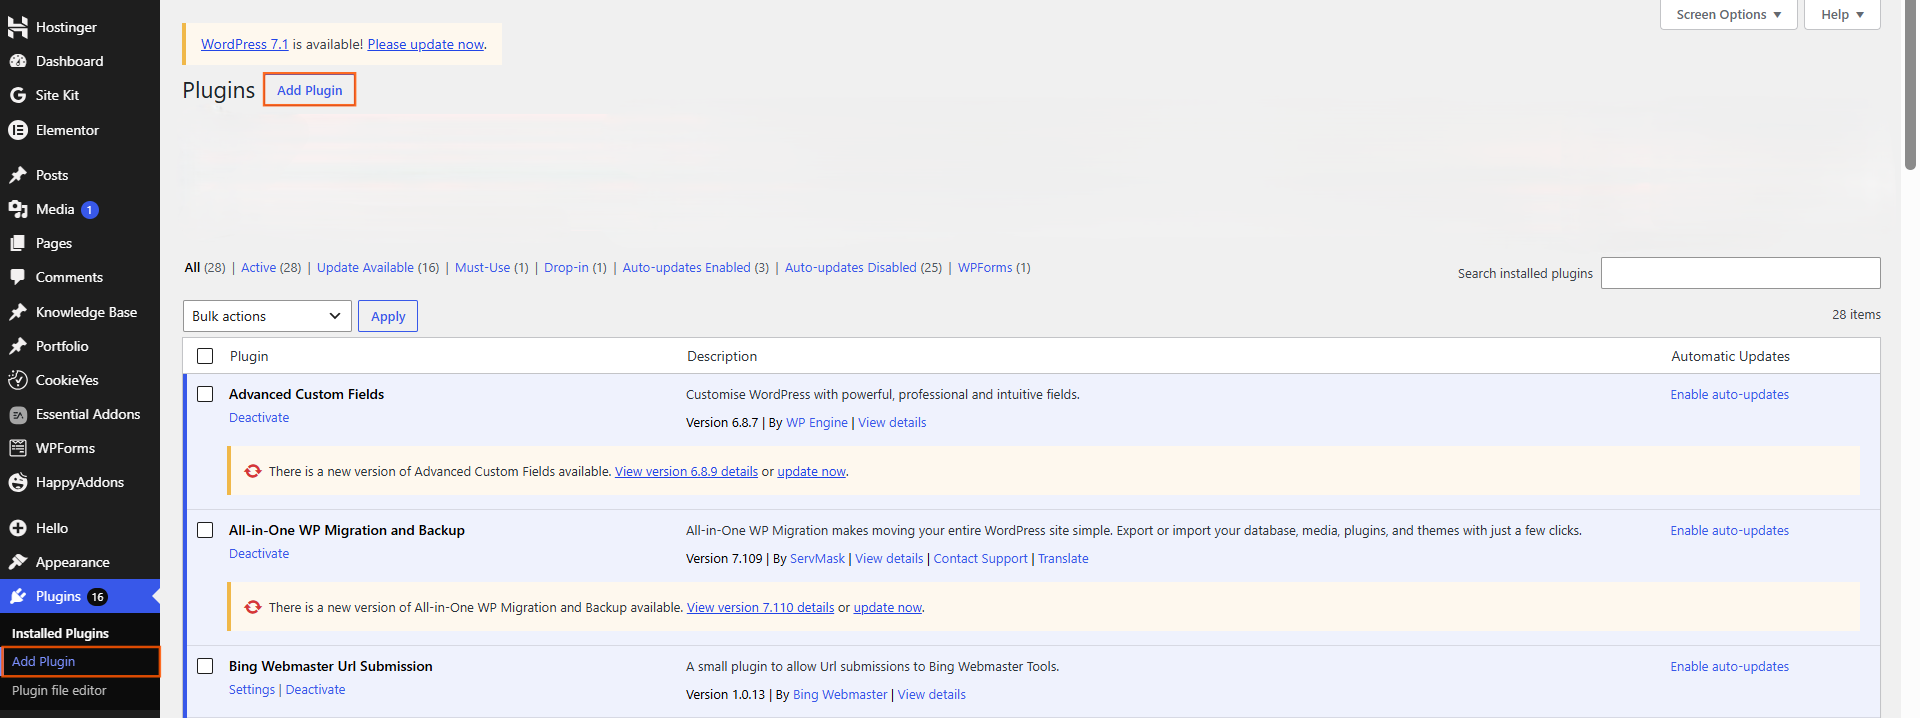
1. Choose a suitable plugin
Before installing a plugin, check that it provides the feature you need. Review its compatibility, update history, support information and reputation.
Avoid installing unnecessary or untrusted plugins, as they can introduce security, performance or compatibility problems.
2. Install a plugin from WordPress
From your WordPress dashboard, go to Plugins → Add New Plugin.
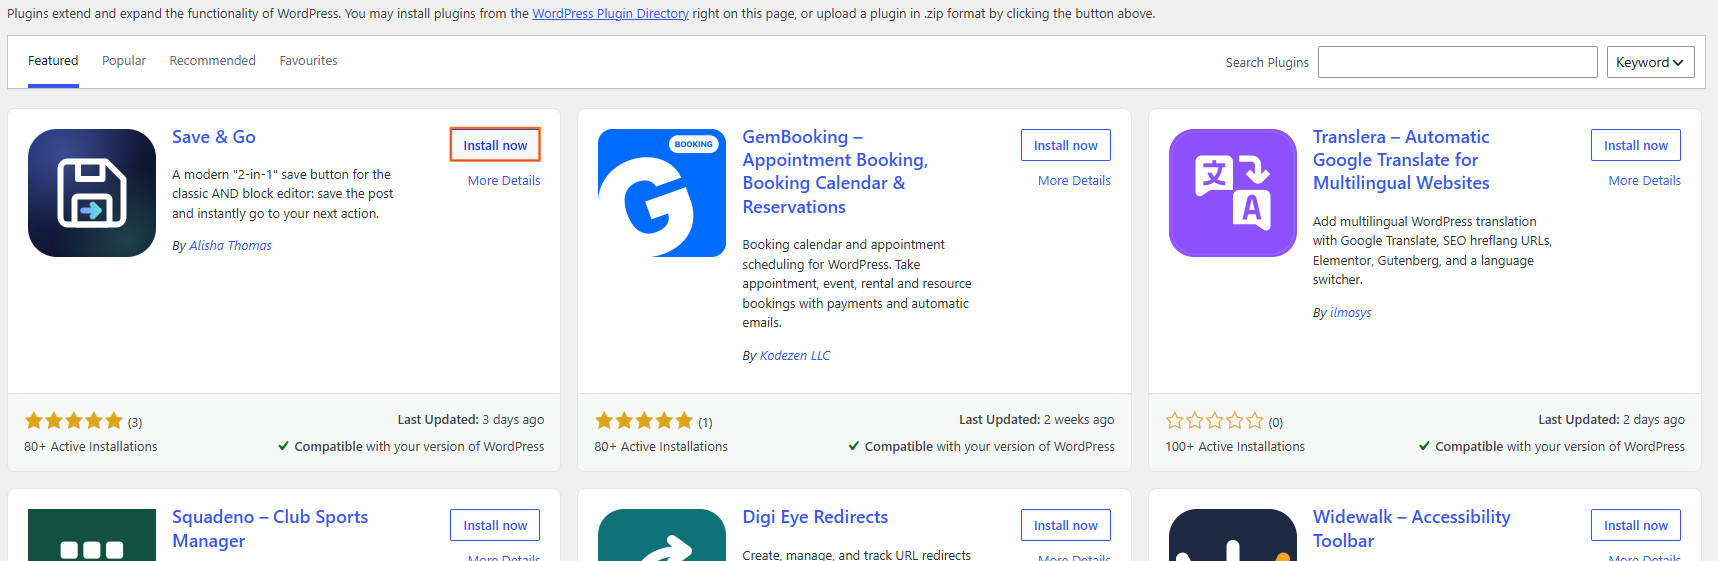
Search for the plugin you want and review its details. When you have selected the appropriate plugin, choose Install Now.
3. Activate the plugin
After installation, select Activate.
Installing a plugin and activating it are separate steps. Some plugins begin working immediately after activation, while others require additional configuration.
4. Configure the plugin
Open the plugin’s settings or setup screen and configure only the options you need.
Follow the plugin developer’s documentation for settings that affect your website’s functionality, security or other technical behaviour.
5. Upload a plugin when necessary
If you have a plugin package from a trusted source, WordPress may allow you to upload it through Plugins → Add New Plugin → Upload Plugin.
Upload the appropriate plugin ZIP file and follow the installation instructions. Do not upload plugin files from sources you do not trust.

 Salesforce

