


Comparing date ranges is a crucial analytical step in Google Ads, as it helps you understand performance trends, measure the impact of recent changes, and spot seasonal shifts.
The comparison feature is built into the main date range selector at the top right of the Google Ads interface.
Step-by-Step Guide
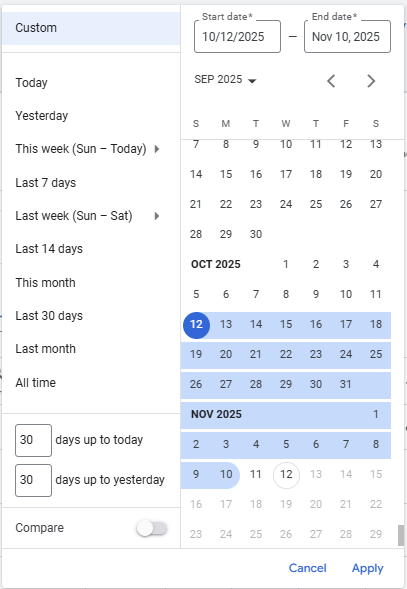
Step 1: Select the Date Range
- Sign in to your Google Ads account and navigate to any reporting page (e.g., Campaigns, Ad groups, or Search keywords).
- In the top-right corner of the screen, click the date range picker (the calendar icon or the text showing the current date range).
Step 2: Activate the Comparison Feature
- In the date range pop-up window, look for the toggle switch labelled Compare. Click the toggle to turn the comparison feature On.
Step 3: Choose the Comparison Period
Once the comparison is active, you can choose from the following options:
- Previous period: This is the default and most common option. It compares your currently selected date range (the Primary range) to the immediately preceding time frame of equal length.
- Example: If your primary range is the last 7 days, the secondary period will be the 7 days before that.
- Previous year: This compares your primary date range to the exact same period one year ago. This is essential for accounting for seasonality (e.g., comparing Christmas sales this year to Christmas sales last year).
- Custom: This allows you to manually select any start and end dates for your secondary comparison period.
Step 4: Apply the Comparison
- Select your preferred comparison option (e.g., Previous period).
- Click Apply.

 Salesforce

