


Importing Campaign data from a CSV file is typically done when migrating historical marketing data, bulk-adding campaign members, or updating campaign fields. The optimal tool for this depends on whether you are creating new Campaign records or linking existing Leads/Contacts to an existing Campaign.
Step 1: Prepare Your CSV File
The CSV file must contain the necessary data fields and identifiers for the import to succeed.
- For Creating New Campaign Records:
- Required Fields: The CSV must include a column for Campaign Name (which is mandatory) and any other required fields (e.g., Status, Start Date).
- For Adding Campaign Members:
- Required Fields: The CSV must include a column that uniquely identifies the existing Campaign (e.g., Campaign Name or Campaign ID).
- Required Member Identifiers: The CSV must contain fields that match existing Leads or Contacts (e.g., Email, Lead ID, or Contact ID).
Step 2: Choose the Import Tool
Tool | Optimal Use Case | Primary Data Focus |
Data Import Wizard | Best for importing up to 50,000 records, especially when adding new Campaign Members to an existing Campaign. | Campaign Members (Leads/Contacts). |
Data Loader | Optimal for bulk operations on the Campaign object itself (creating thousands of new Campaigns) or complex imports. | Campaign Records or large-scale Member updates. |
Step 3: Importing New Campaign Members (Data Import Wizard)
This is the most common use case for marketers: linking existing Leads and Contacts to a Campaign.
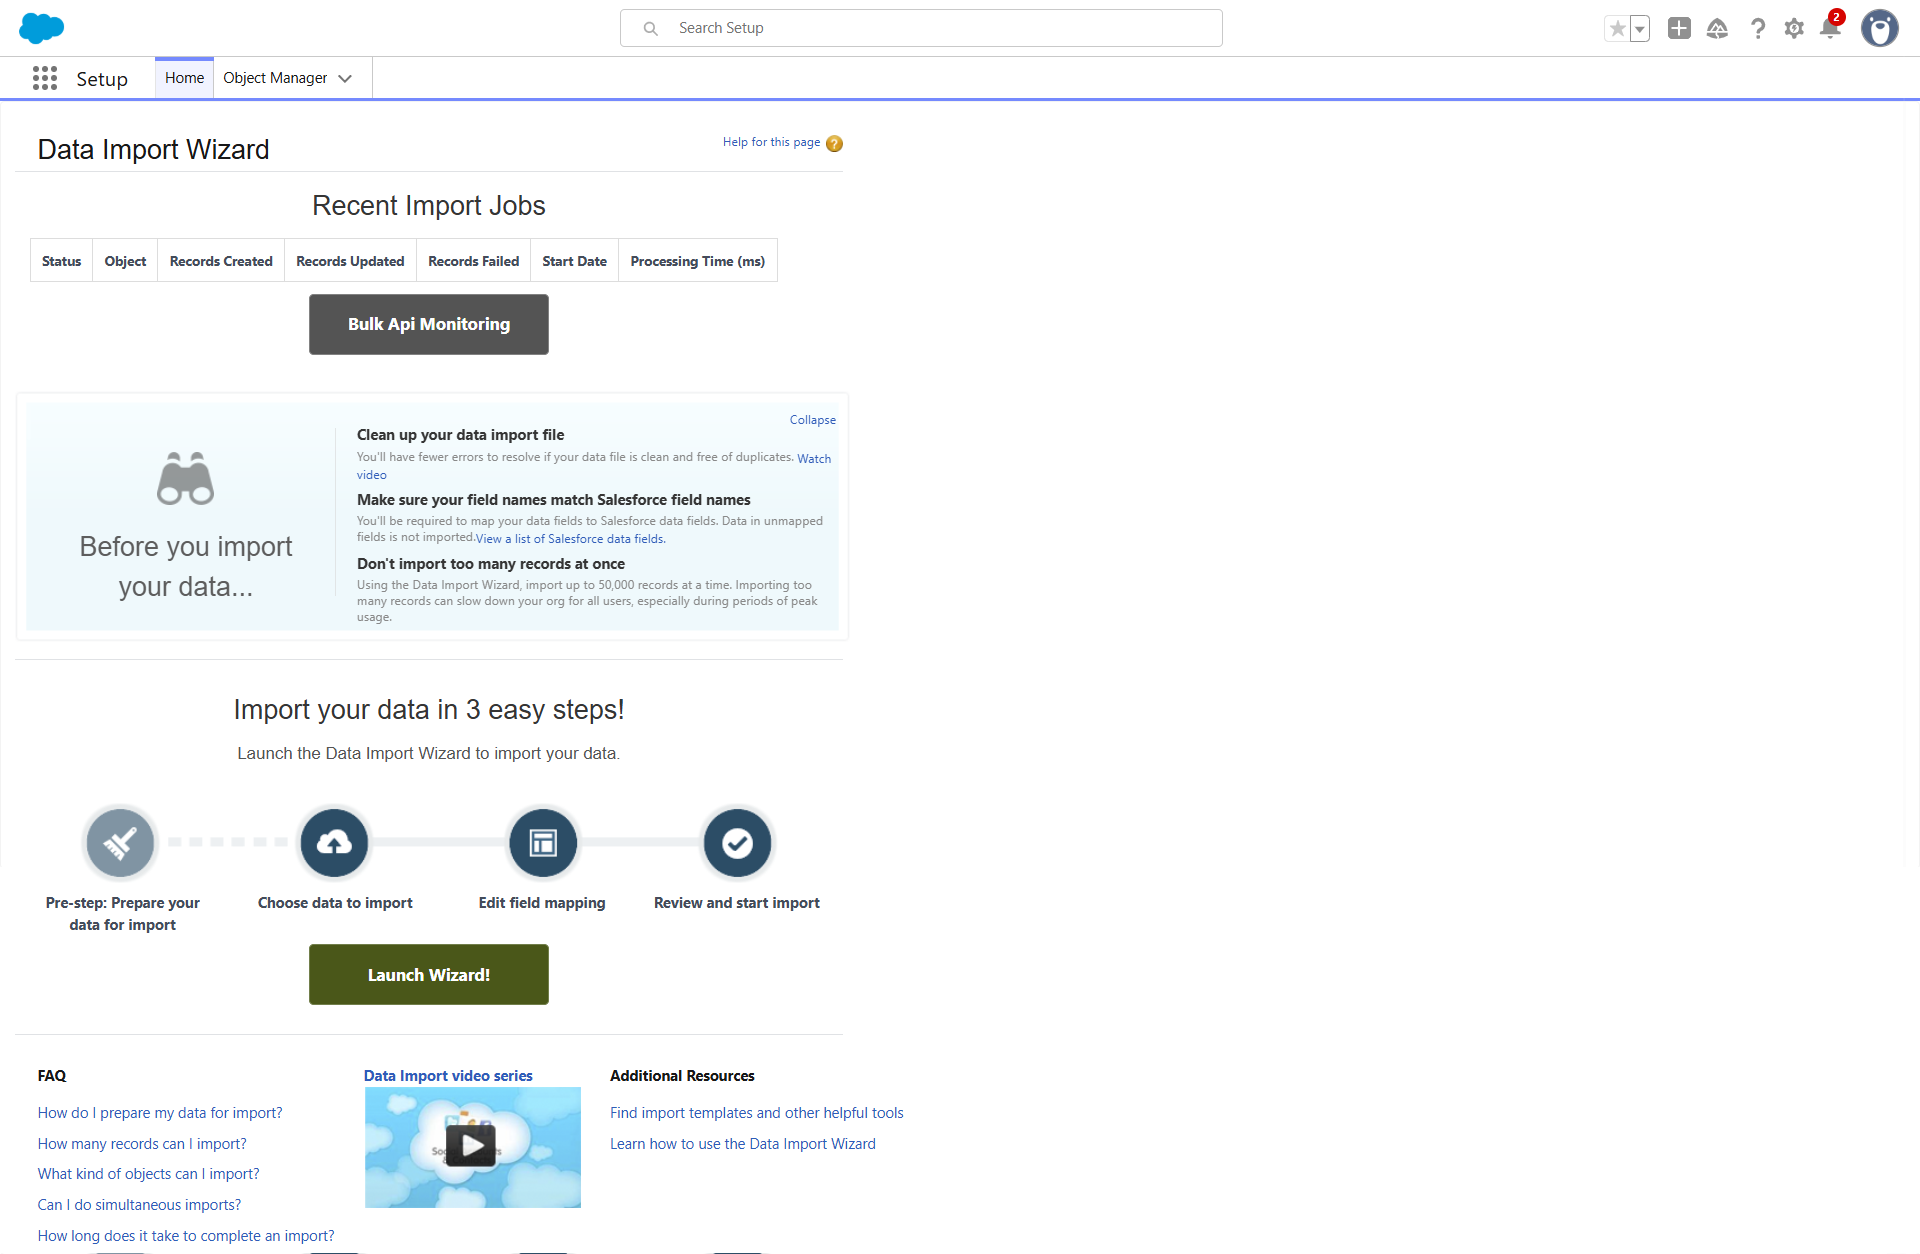
- Navigate to Wizard: Click the gear icon (⚙️) to Setup. In Quick Find, type Data Import Wizard.
- Launch Wizard: Click “Launch Wizard”.
- Select Object: Select “Campaign Members” as the object you want to import data into.
- Select Action: Choose “Add new records, Update existing records, or Add new and update existing records” (if you need to update existing members’ status).
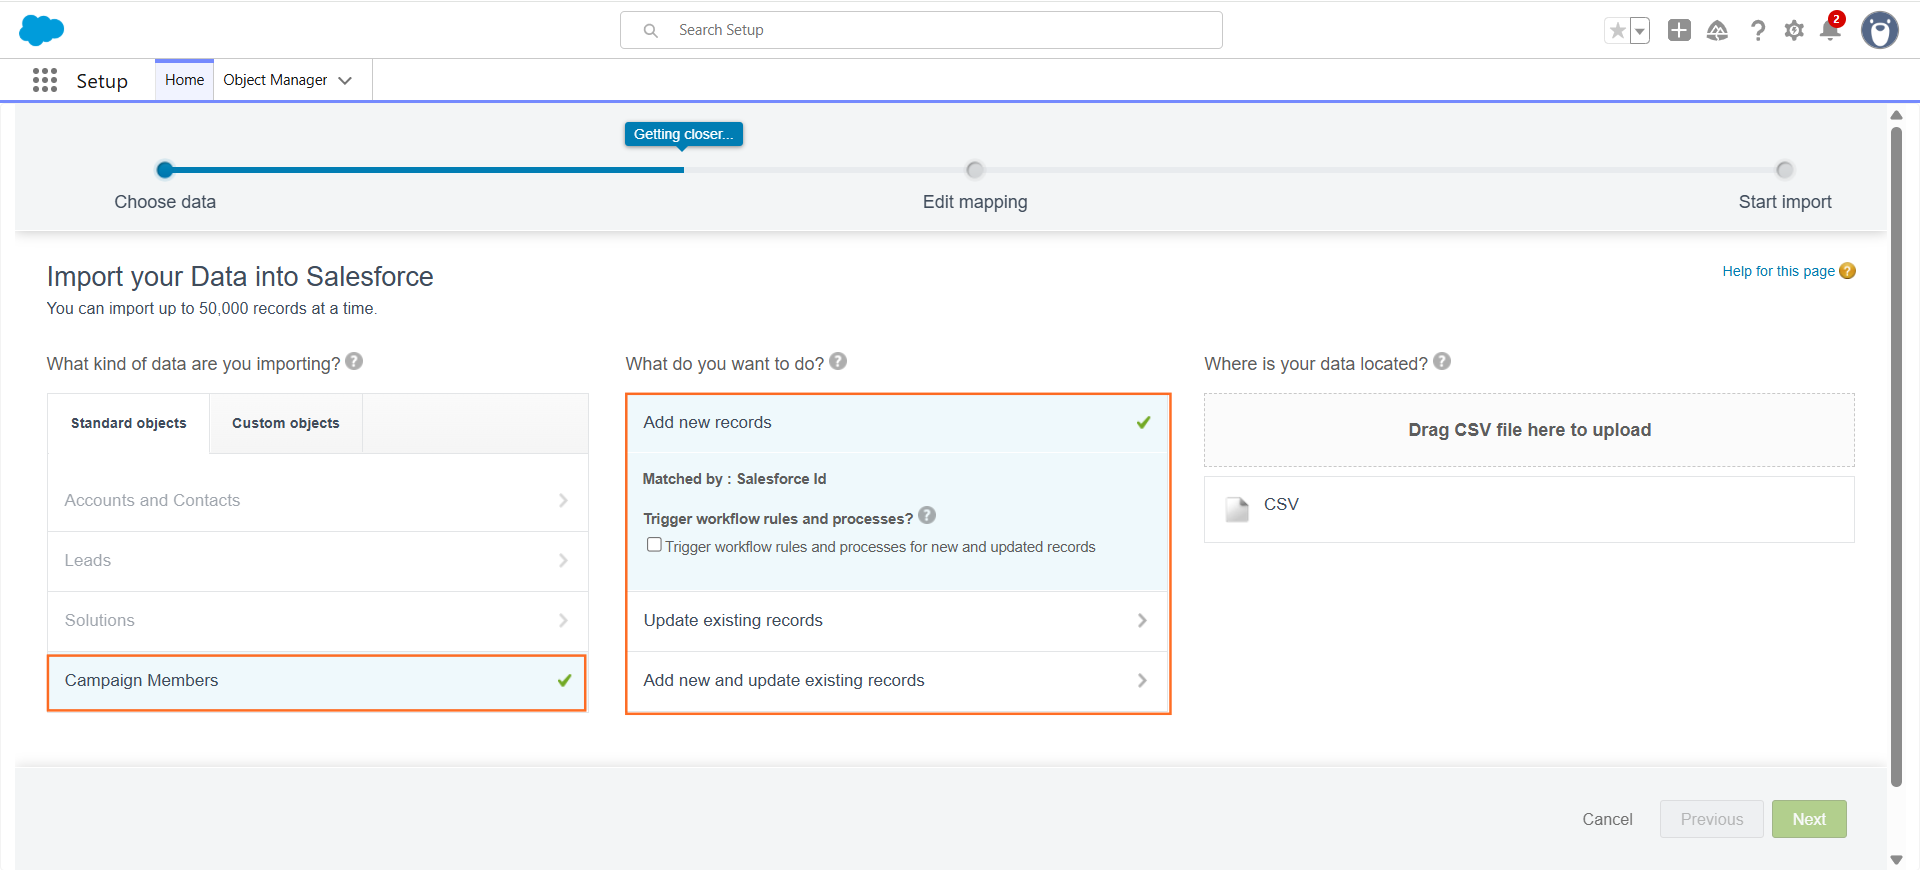
- Identify Matching: Set your matching criteria for the Lead and/or Contact object (e.g., match by Email or Salesforce ID).
- Upload File: Upload your prepared CSV file.
- Map Fields (Crucial):
- Map your CSV column for the Lead/Contact identifier to the correct Salesforce ID field.
- Map your CSV column for Campaign Identifier (Name or ID) to the correct Campaign lookup field.
- Map any Status field (e.g., Responded) from your CSV to the Status field on the Campaign Member object.
- Start Import: Click “Start Import.”
Step 4: Importing New Campaign Records (Data Loader)
If you are creating the actual top-level Campaign records in bulk:
- Open Data Loader: Launch the desktop application and click “Insert.”
- Select Object: Select the Campaign object.
- Select CSV: Choose your CSV file (which must contain the required Campaign Name column).
- Map Fields: Map the CSV headers (like Campaign Name, Budget, Start Date) to the correct Salesforce Campaign fields.
- Run: Click “Finish” to insert the new Campaign records.

 Salesforce

