


Connecting Salesforce with Slack creates a powerful collaboration hub, allowing sales, service, and project teams to access, update, and receive real-time alerts about Salesforce records (like Leads, Opportunities, and Cases) directly within their Slack channels.
The integration is a two-way process requiring installation in both platforms and user-level authentication.
Step 1: Install and Configure the Slack Package in Salesforce (Admin)
A Salesforce System Administrator must first install the necessary managed package to enable the connection.
- Install from AppExchange: Navigate to the Salesforce AppExchange and install the “Salesforce for Slack” managed package (or specialized apps like “Sales Cloud for Slack”).
- Run Setup Assistant: After installation, open the App Launcher (the waffle icon 🧇) and search for the Slack Setup Assistant app.
- Grant Access: Follow the assistant’s steps to:
- Authorize the connection between your Salesforce Org and Slack.
- Assign Permission Sets: Assign the required permission sets (e.g., Slack Standard User) to all users who need to connect their accounts.
- Configure Custom Objects: Enable and configure which Custom Objects (like your Project object) users can interact with from Slack.
- Add Actions to Layouts: Add the “Send to Slack” quick action button to your critical Lightning Page Layouts (like Opportunity and Lead) so users can easily share records.
Step 2: Install the Salesforce App in Slack (Slack Admin)
A Slack Administrator must approve and install the app in the workspace.
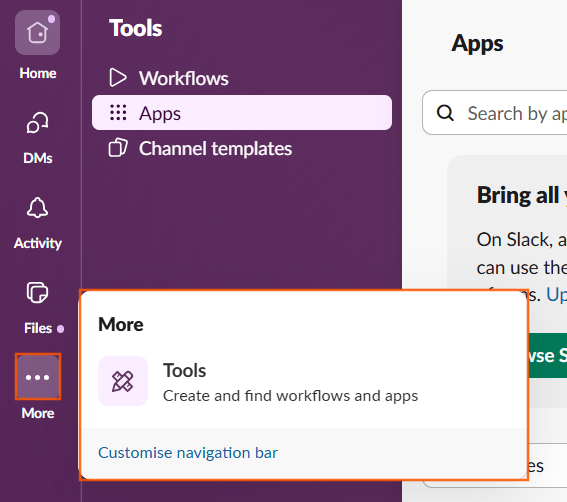
- Access App Directory: Open your Slack desktop application and click “Apps” (or “More” to “Apps”).
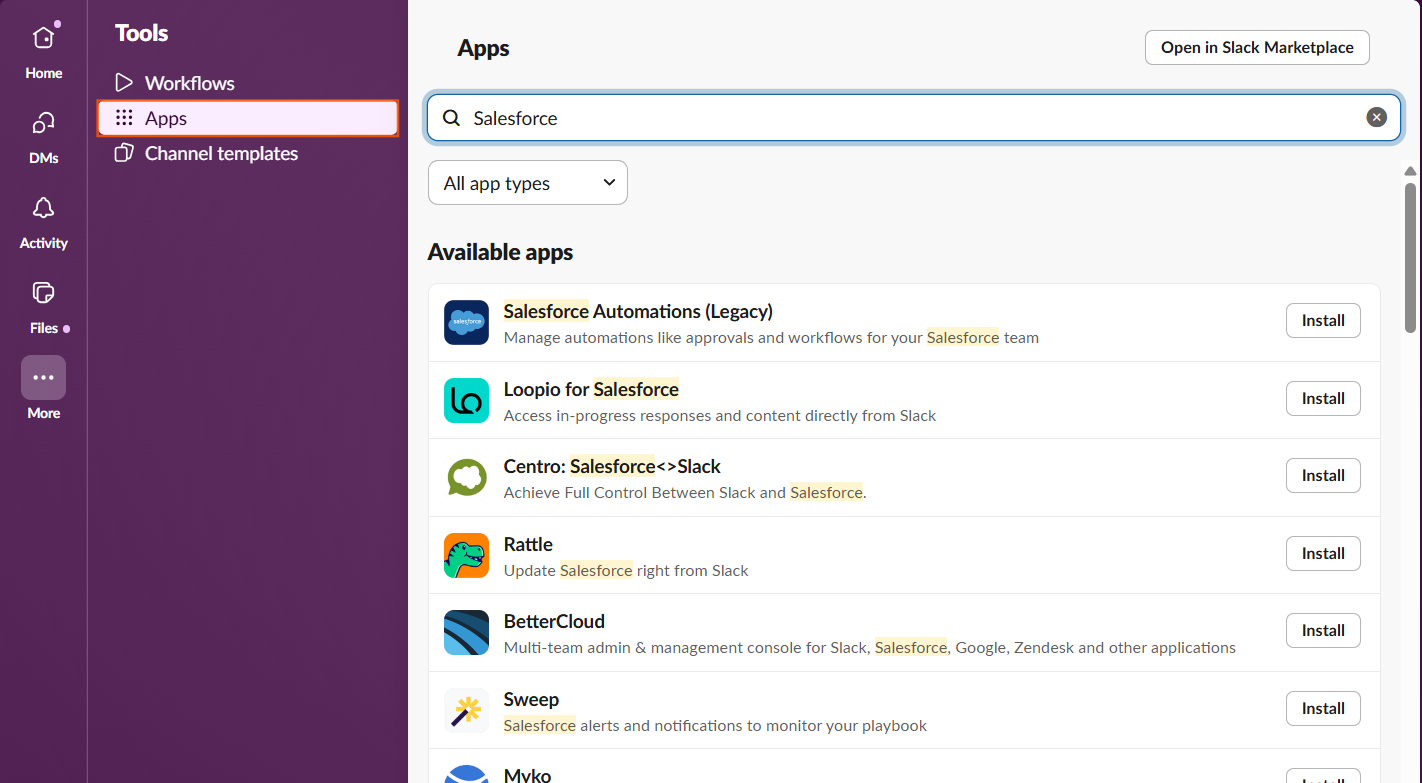
- Search and Install: Search the Slack App Directory for the Salesforce app (or the specialized version you installed, like Sales Cloud for Slack).
- Add to Slack: Click “Add to Slack” and grant the necessary permissions for the app to access your Slack workspace.
Step 3: Connect Individual User Accounts
Each user must manually link their Slack identity to their Salesforce account.
- Find the App: In the Slack desktop app, locate the Salesforce app in the left sidebar under the Apps section.
- Connect Account: Click the app to open its Home tab and click the “Connect Account” button.
- Authenticate: A browser window will open. Log in using your Salesforce username and password, then grant permission for Slack to access your Salesforce data.
Step 4: Optimal Use and Automation
Once connected, teams can use the following features to collaborate efficiently:
Feature | Action | Benefit for UTDS Optimal Choice |
Search & Share | Type the slash command /salesforce [record name] in any Slack channel. | Quickly pull up a Lead or Opportunity record’s details and share a rich preview with the team instantly. |
Real-Time Alerts | Set up My Alerts in the Slack app’s Home tab (or Channel Alerts in Flow Builder). | Users receive a direct Slack notification when a record assigned to them changes (e.g., an Opportunity Stage changes to ‘Negotiation’). |
Flow Automation | Use the Slack: Post Message action in a Record-Triggered Flow. | Optimal Action: Automatically send a notification to a dedicated channel (e.g., #new-opportunities) whenever a Lead is Converted or an Opportunity is Closed Won. |
Attach Messages | Use the three-dot menu on a Slack message and select “Add to Salesforce.” | Logs the important Slack conversation history directly to the relevant Account or Opportunity record in Salesforce. |

 Salesforce

