


To automate a process when a record is created or updated in Salesforce, you use a Record-Triggered Flow.This is the most common type of automation and has replaced Process Builder and Workflow Rules for this purpose.
The key to creating this automation is defining the Trigger and the Optimization (When to Run) criteria correctly in the Flow’s Start Element.
Step 1: Start a New Record-Triggered Flow
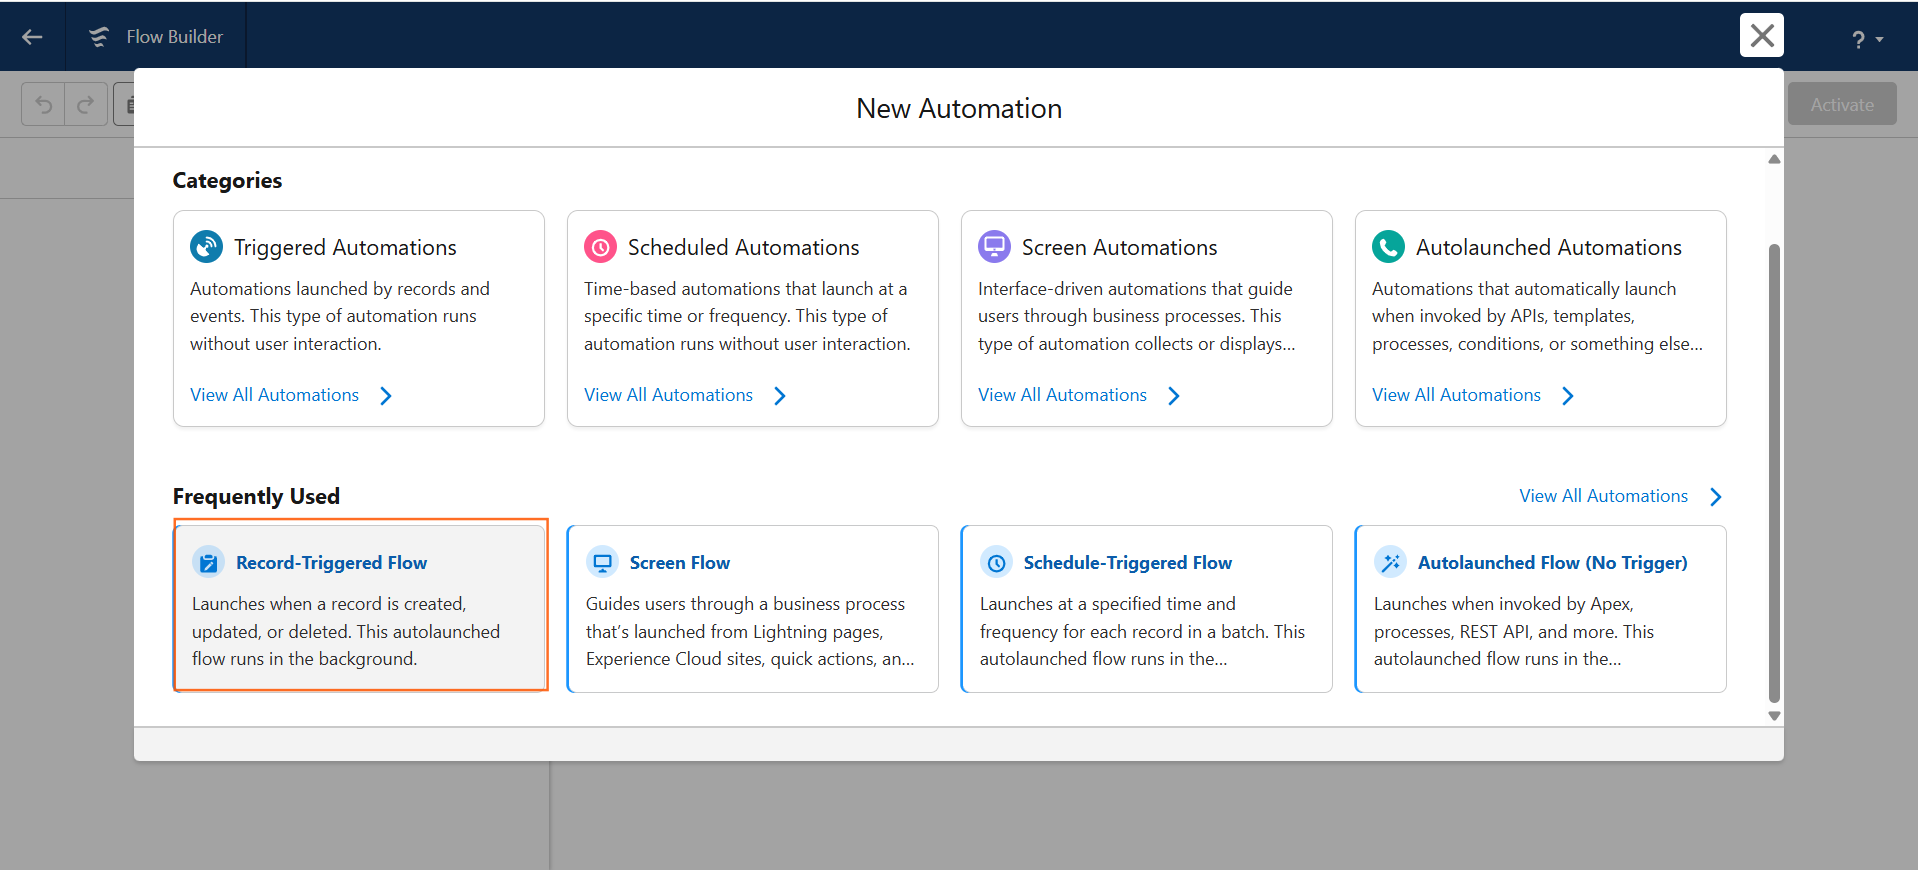
- Navigate to Flow Builder: Go to Setup to Flows to New Flow.
- Select Flow Type: Choose “Record-Triggered Flow” and click “Create.”
Step 2: Define the Triggering Record and Conditions
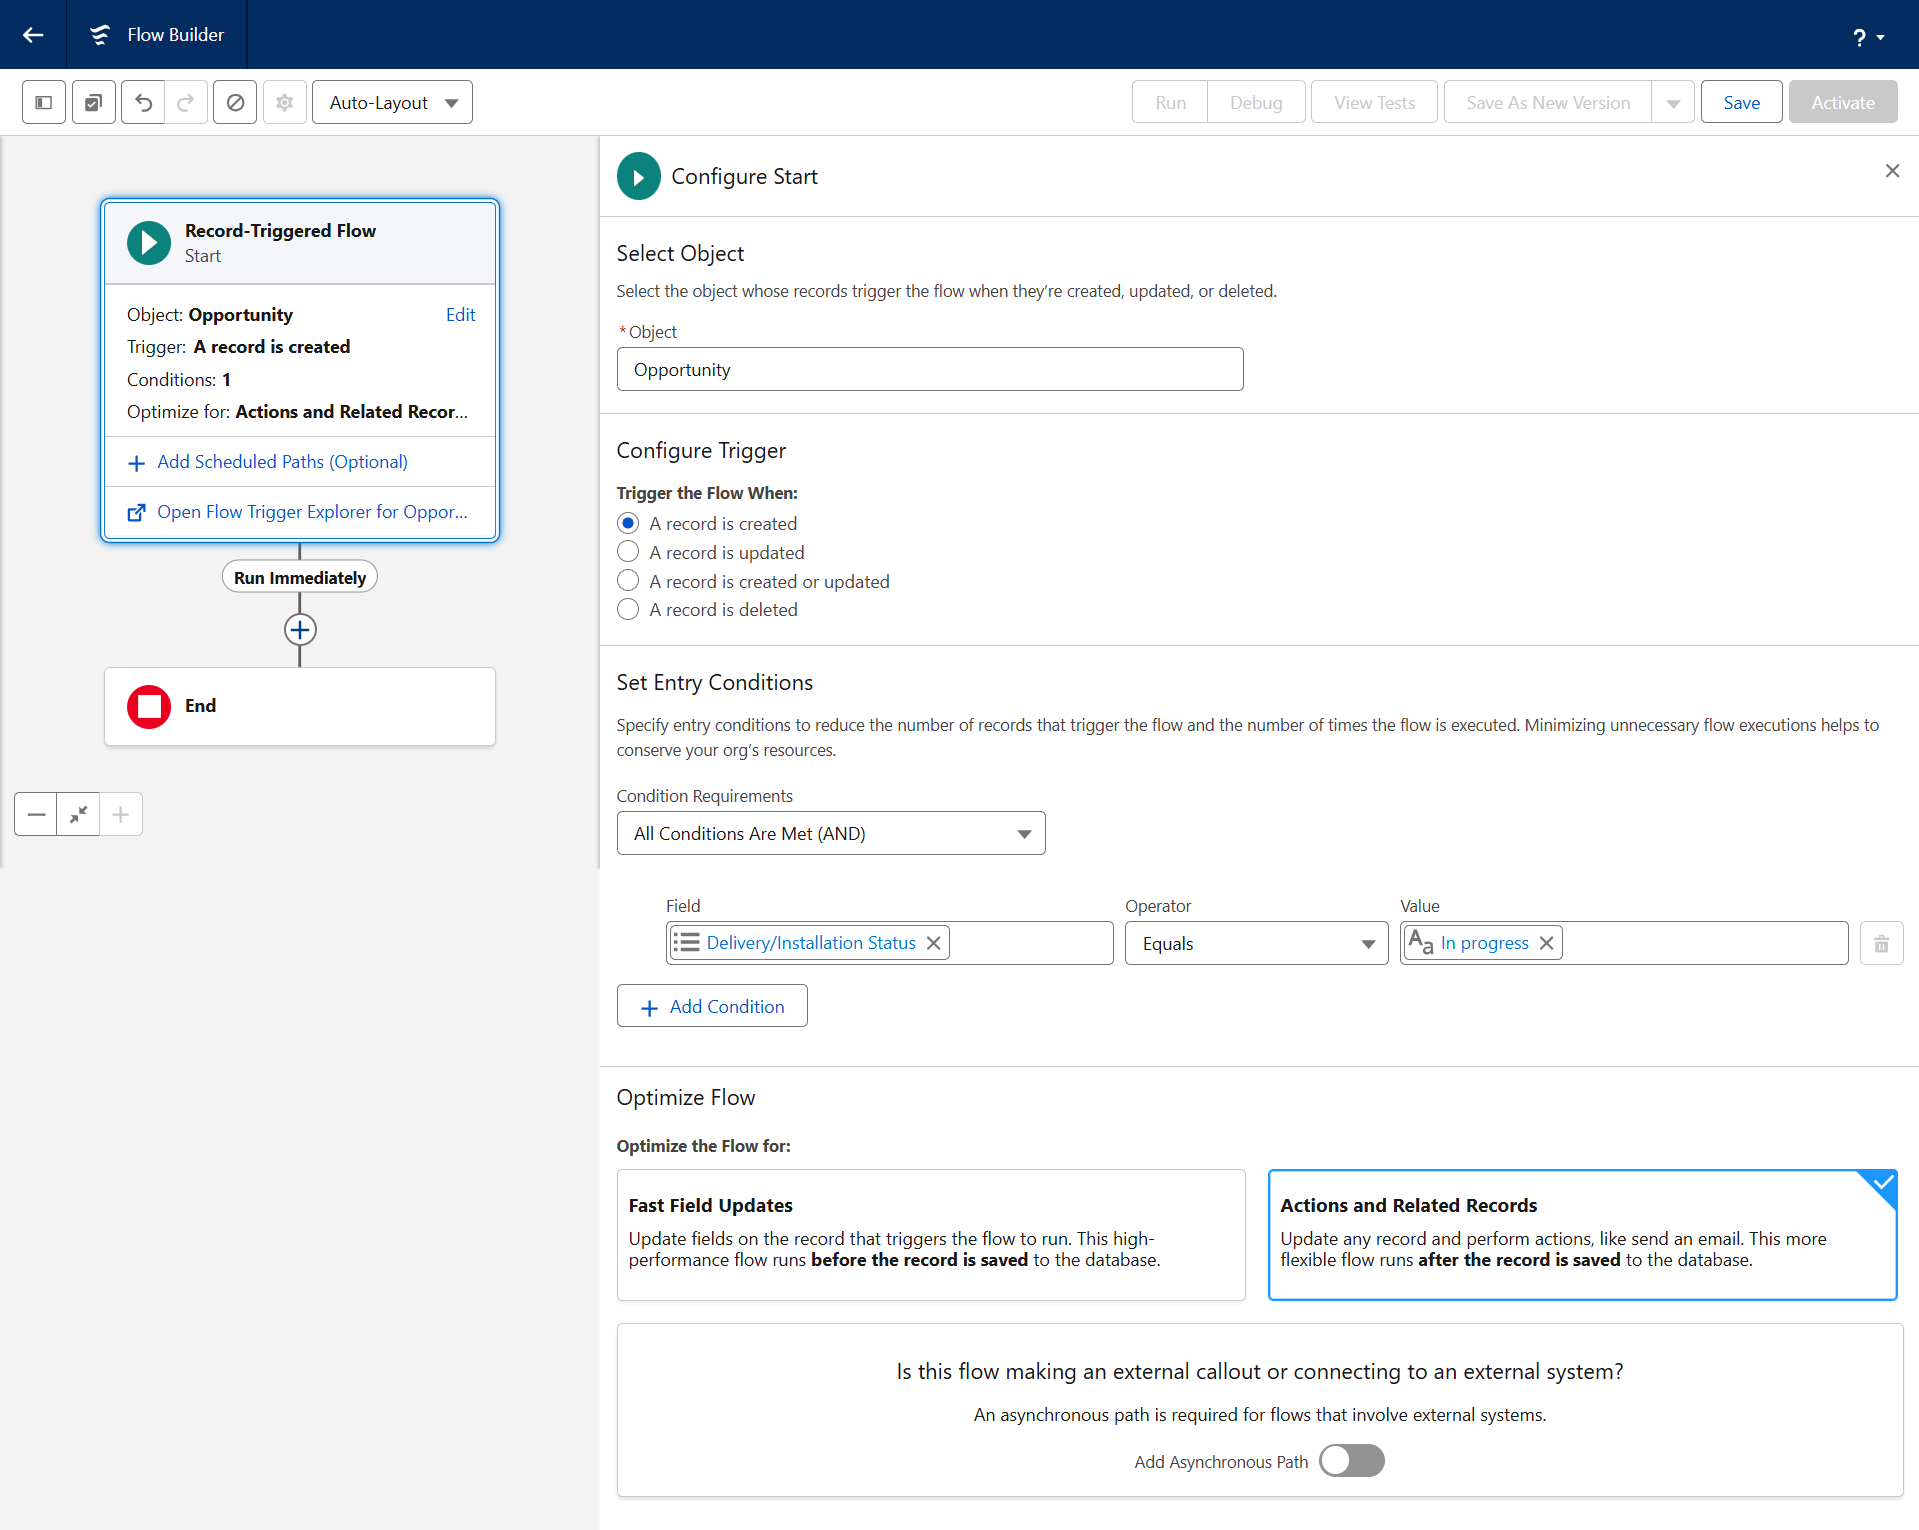
This is the most critical setup step, as it determines what object the flow listens to and when it fires.
A. Configure the Trigger
- Object: Select the Salesforce object that the automation should monitor (e.g., Opportunity, Case, Custom Object).
- Trigger: Define the action that should start the flow:
- A record is created.
- A record is updated.(For changes to existing records)
- A record is created or updated.(Most versatile choice)
- A record is deleted. (Less common, but available for post-delete actions)
B. Set Entry Conditions (The “When to Start” Rule)
This field acts as the traditional “Criteria” or “Rule.” The flow will only run if these conditions are met when the record is saved.
- Example: If you only want the flow to run for Cases where the status changes to Escalated:
- Condition Requirement: Case Status Equals Escalated
C. Choose When to Run (Optimization for Speed)
This setting dictates when the flow runs during the save process, which is crucial for performance.
- Fast Field Updates (Before Save):
- Purpose: Use this for flows that only need to update fields on the same record that triggered the flow.
- Optimal Choice: This is significantly faster because it doesn’t require a database transaction.
- Actions and Related Records (After Save):
- Purpose: Use this when you need to perform actions on related records (e.g., update the parent Account), create new records, or execute external actions (like sending an email).
Step 3: Build the Logic for Record Changes
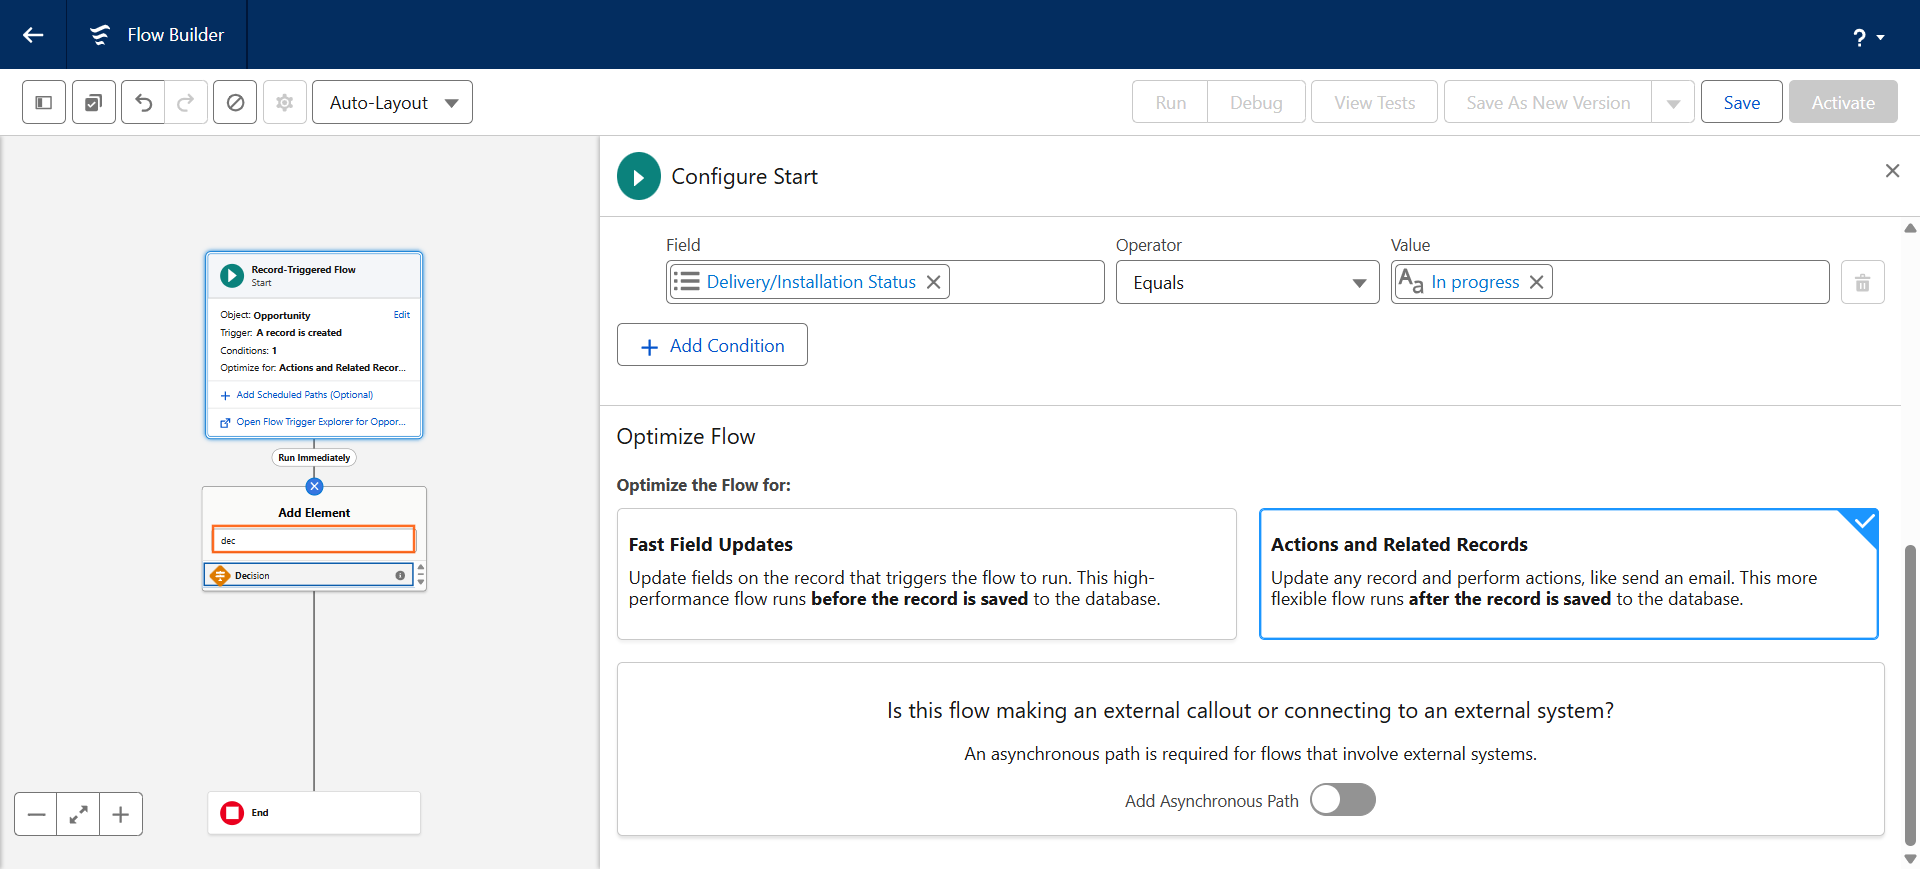
Once the flow starts, you often need to check if a specific field value has changed. You do this using a Decision element and the $Record Global Variable.
- Add a Decision Element: Click the (+) icon on the canvas and choose “Decision.”
- Define the Check: Compare the new value of the field to its old value. Salesforce provides access to the record before the change using the $Record_Prior variable.9
- Label: Did Status Change to Closed?
- Condition: {!$Record.Status} Equals Closed AND {!$Record_Prior.Status} Does Not Equal Closed
- Perform the Action: Connect the successful path of the Decision to an action element (like Update Records or Action (Send Email)) to execute your automation logic only when that change occurs.
This combination of a Record-Triggered Flow and a Decision Element checking $Record_Prior ensures your automation rule runs only when the record changes in the way you need.

 Salesforce

