


In Salesforce, an Opportunity Stage Path is a visual representation of the sales process. It guides users through each stage of a deal and provides “Key Fields” and “Guidance for Success” at every step.
Step 1: Enable Path’
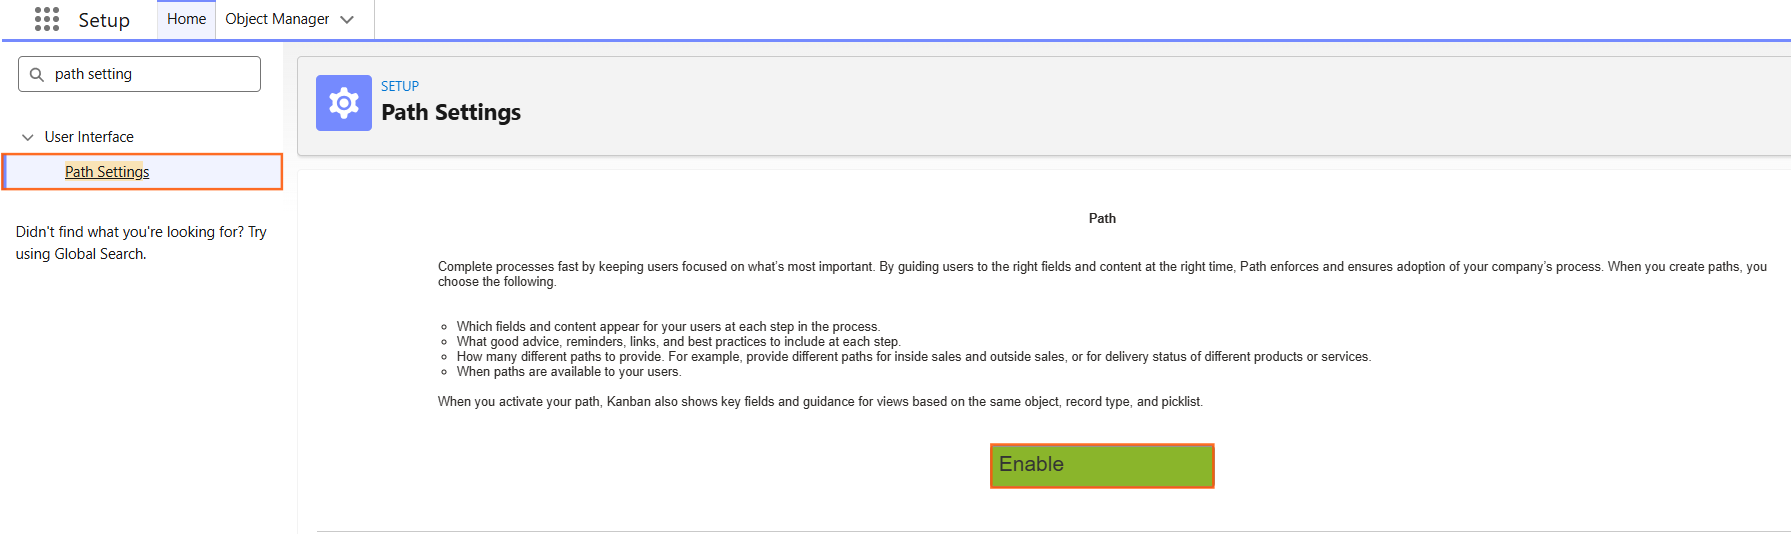
Before creating a specific path, you must ensure the Path feature is turned on for your organization.
- Navigate to Setup.
- In the Quick Find box, type Path Settings.
- Click Enable (if not already enabled) and then click New Path.
Step 2: Configure the Path Details
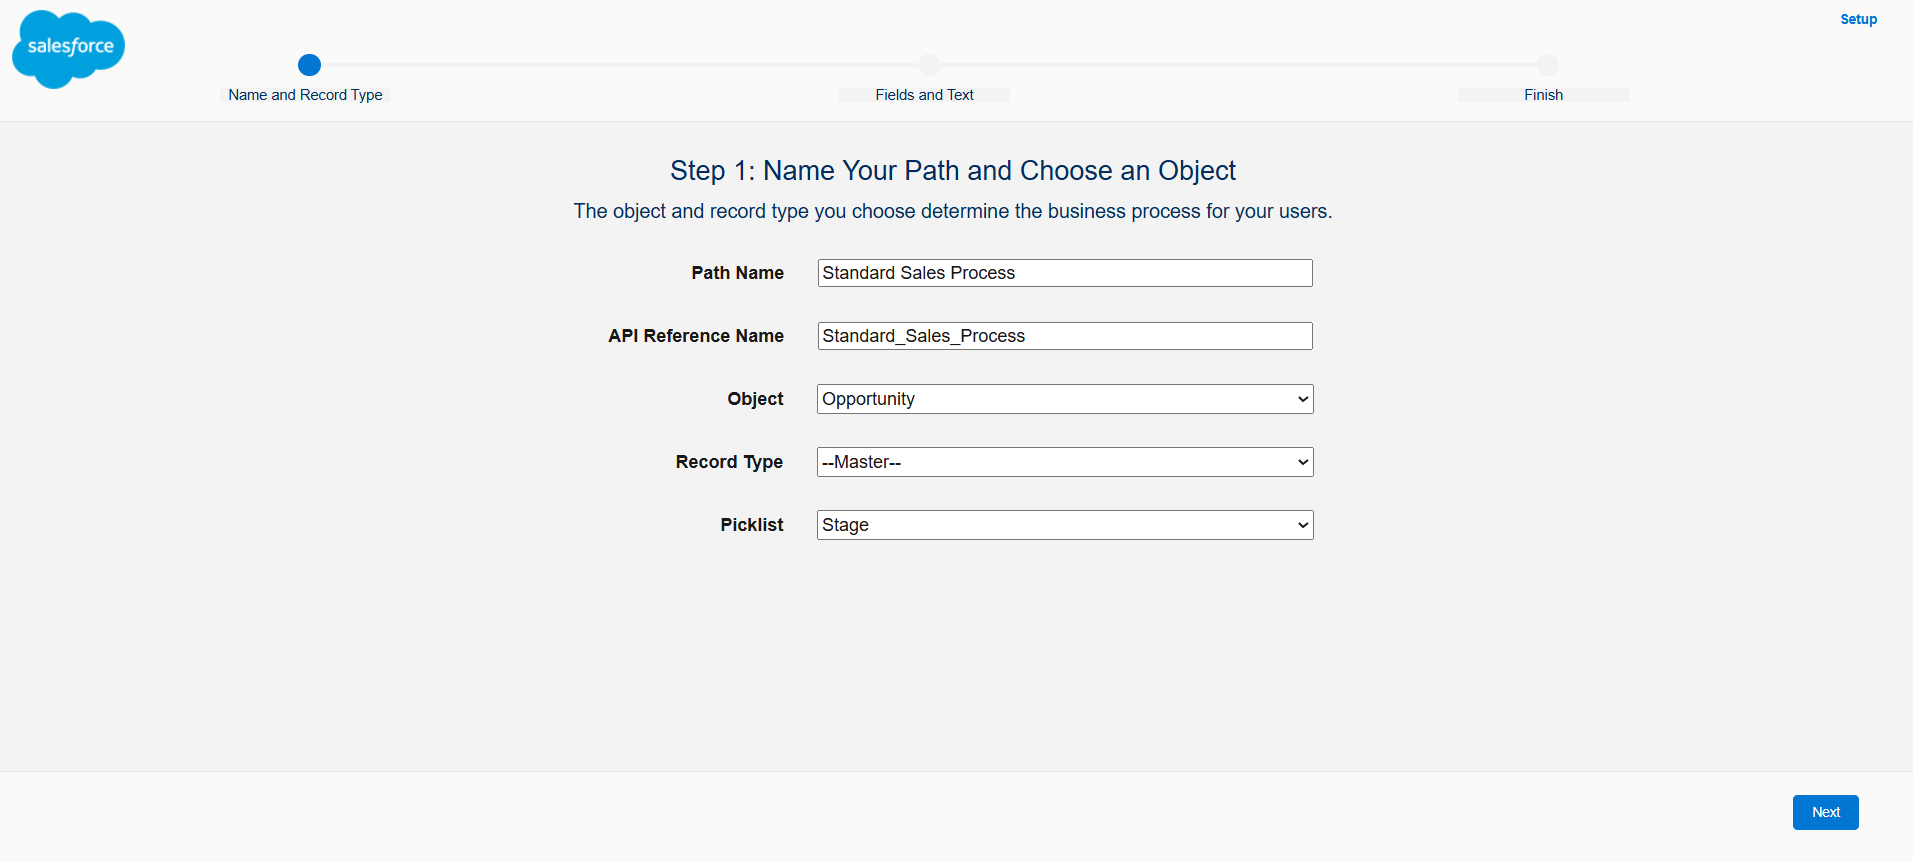
- Path Name: Enter a label (e.g., Standard Sales Process).
- Object: Select Opportunity.
- Record Type: If you have multiple sales processes, select the specific Record Type this path applies to. If not, select Master.
- Picklist: Select Stage.
- Click Next.
Step 3: Select Fields and Guidance
For each stage in your sales process (e.g., Prospecting, Qualification, Closed Won), you can customize what the user sees.
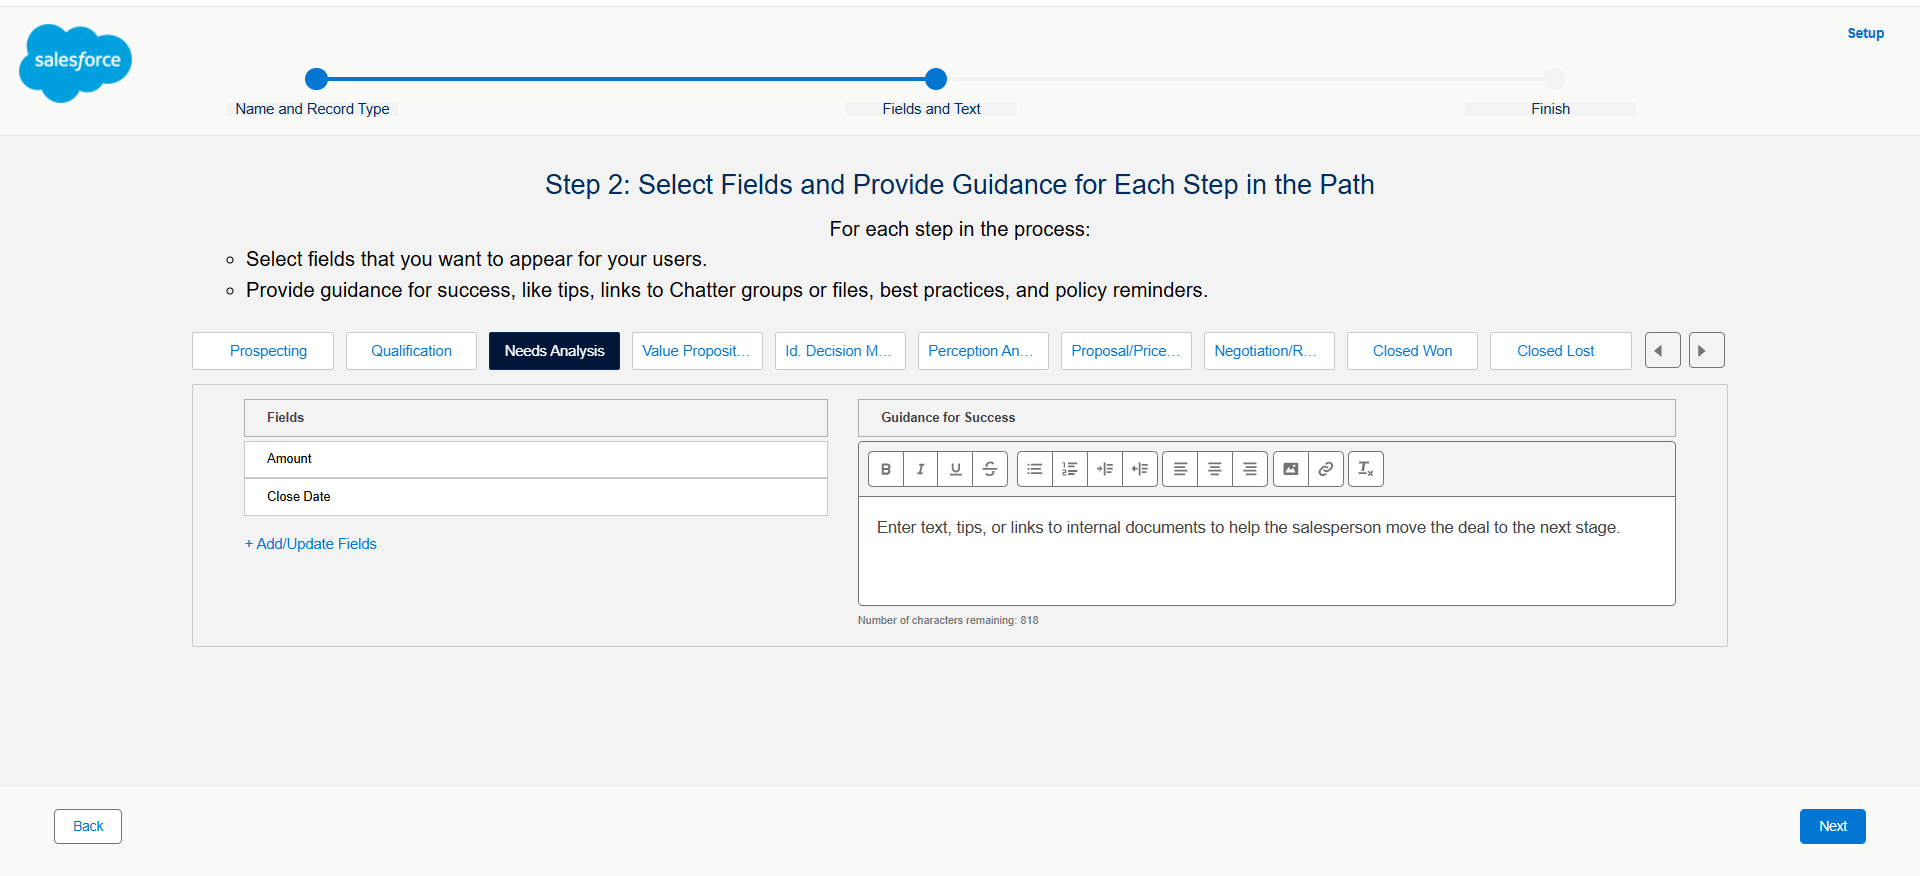
- Select a Stage: Click on a stage name at the top of the screen.
- Fields: Click Add/Update Fields to select up to five critical fields the user should fill out during this specific stage (e.g., Amount or Close Date).
- Guidance for Success: Enter text, tips, or links to internal documents to help the salesperson move the deal to the next stage.
- Repeat this process for every stage in the path.
- Click Next.
Step 4: Activate the Path
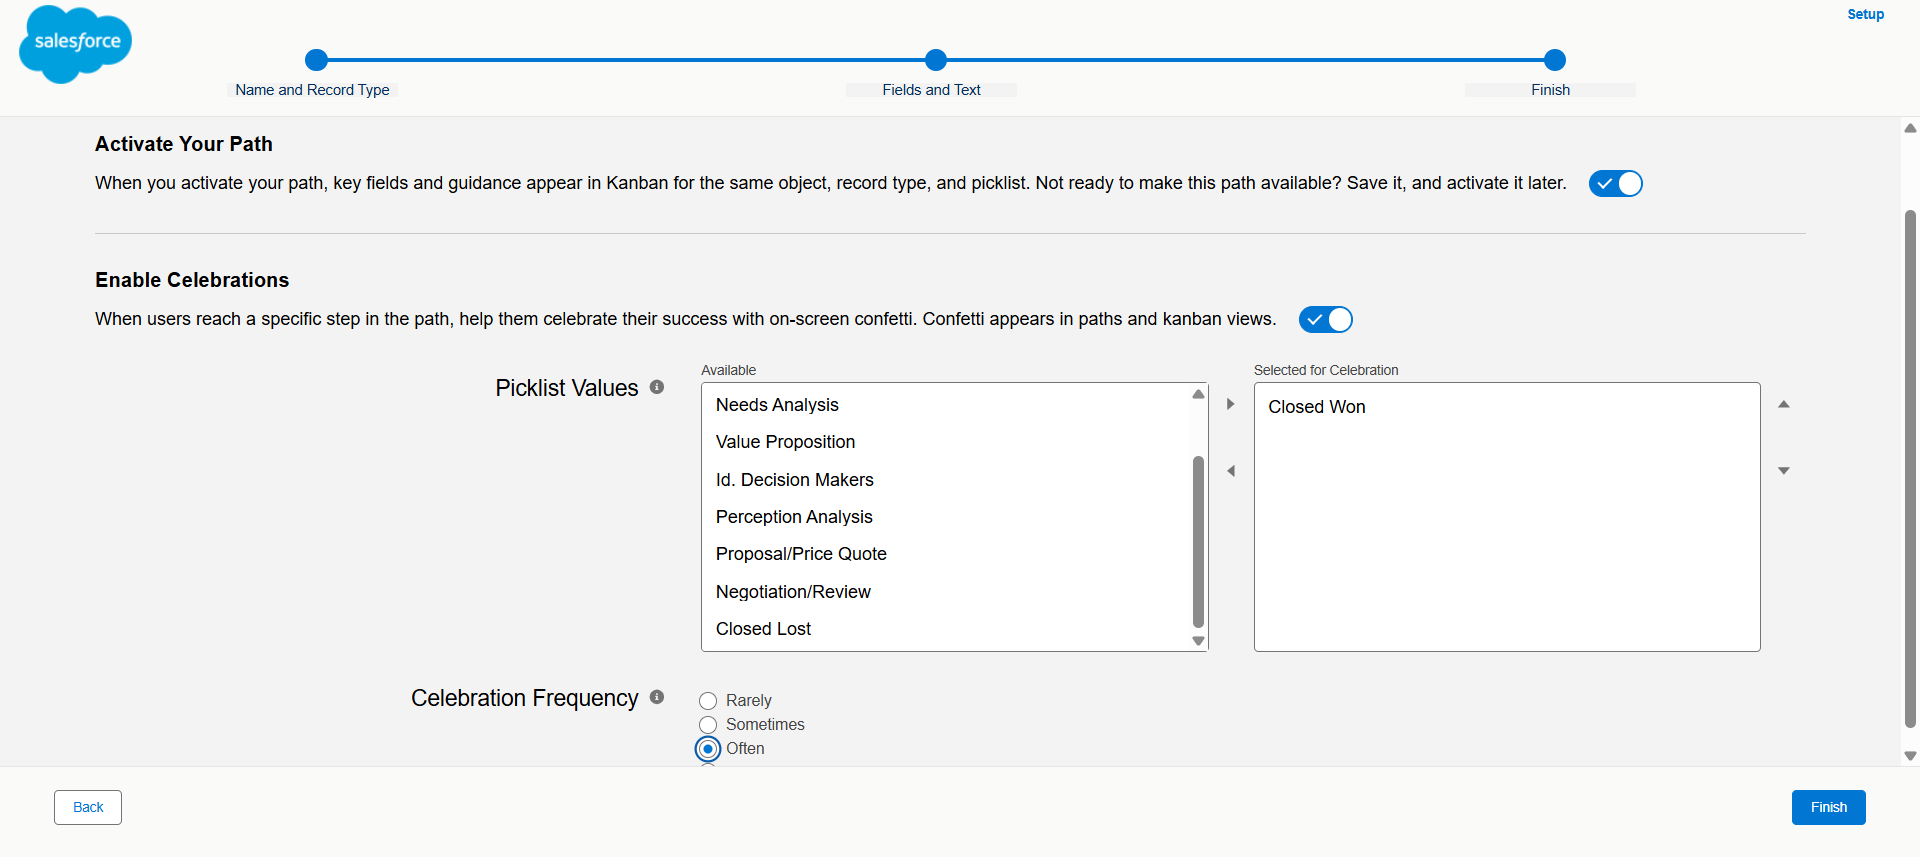
- Activate: Toggle the switch to Active.
- Celebration (Optional): You can enable “Confetti” to trigger when a user reaches a specific stage (like Closed Won). Choose the frequency (e.g., Always or Often).
- Click Finish.
Step 5: Add the Path to the Page Layout
If the path does not appear on your Opportunity records automatically, you must add it using the Lightning App Builder. (Go to App Launcher > Opportunities)
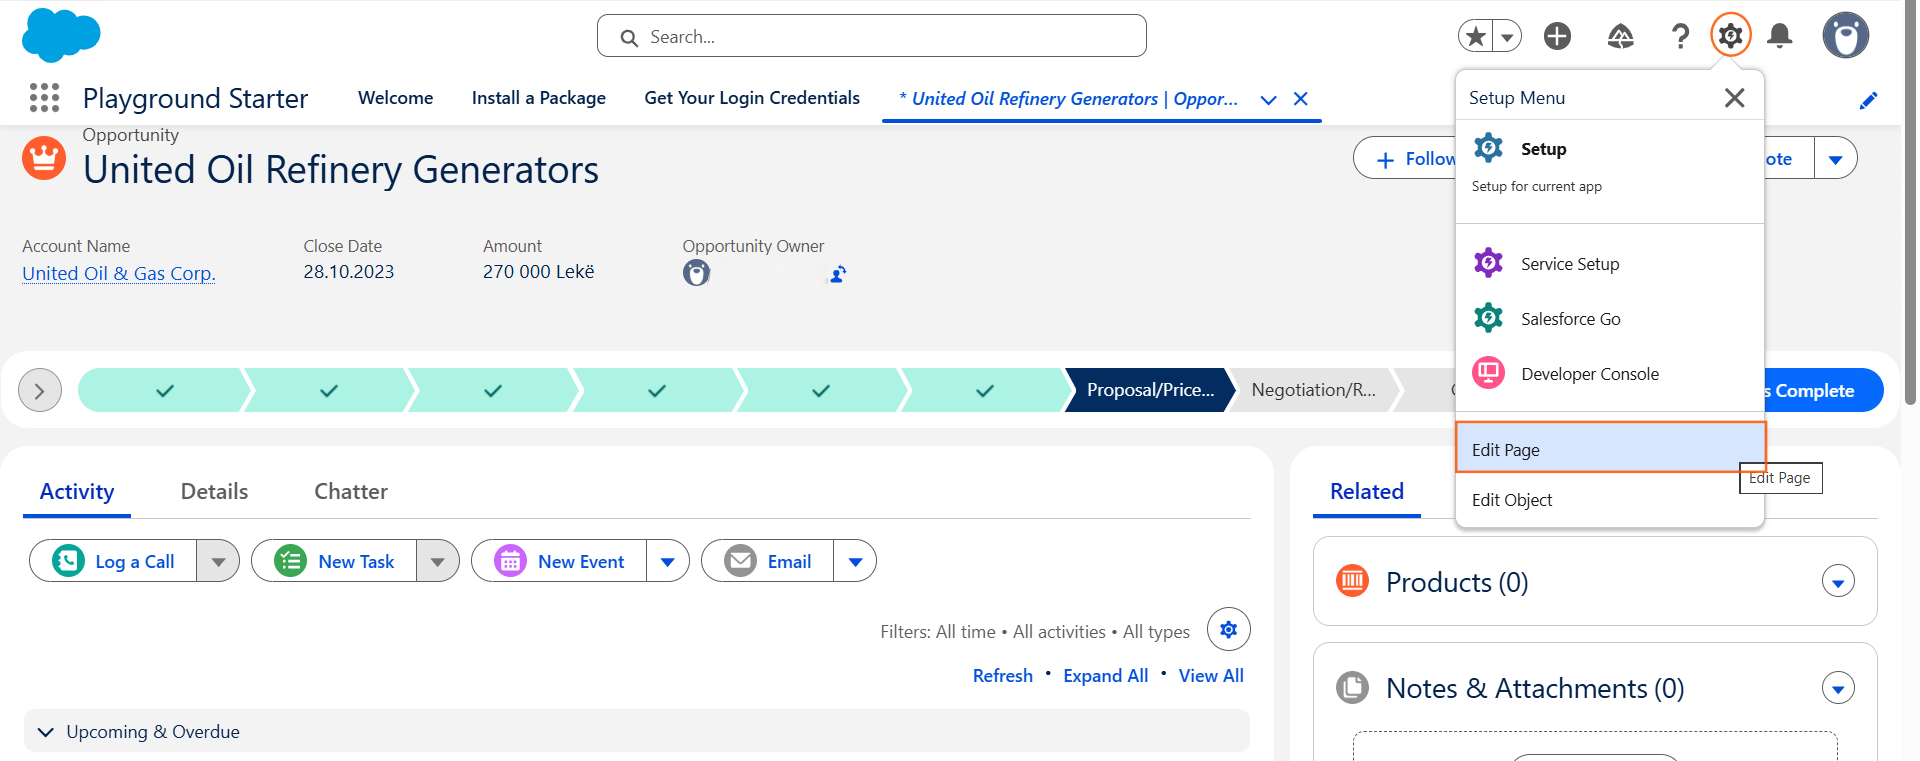
- Open any Opportunity record.
- Click the Gear Icon (Setup) and select Edit Page.
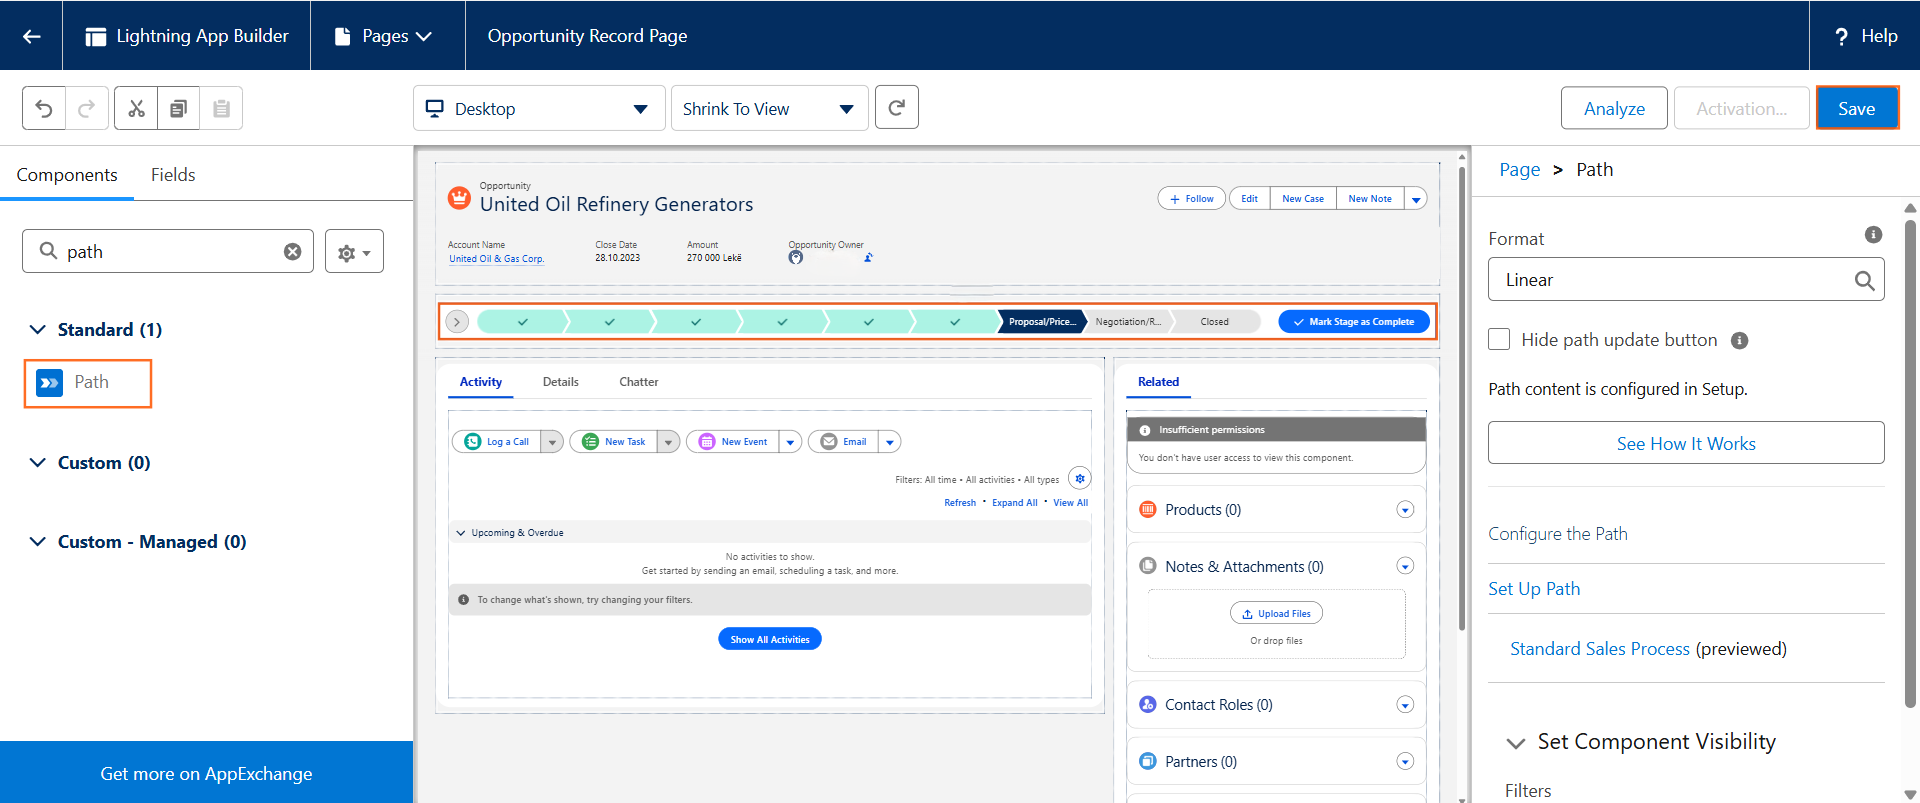
- Find the Path component in the left-hand menu.
- Drag and drop it onto the top of the page canvas.
- Click Save and then Activate to make the change visible to users.
Step 6: Best Practices for Technical Guides
- Key Fields: Remind users that adding fields to a Path does not make them “Required.” If a field is mandatory, you still need a Validation Rule.
- Guidance: Keep guidance concise. Use bullet points for “Exit Criteria” so sales reps know exactly what is required to move the deal forward.
- Record Types: If different teams (e.g., Inbound vs. Outbound) have different stages, create a separate Path for each Record Type

 Salesforce

