


Tracking the Lead Source in Salesforce is essential for attributing revenue back to your marketing efforts, calculating ROI, and prioritising the channels that bring in the most qualified leads for UTDS Optimal Choice. This process relies on utilising the standard Lead Source field and integrating it with your external marketing tools.
Step 1: Optimise the Lead Source Picklist
The standard Lead Source field is a picklist, which controls the consistency of your data.
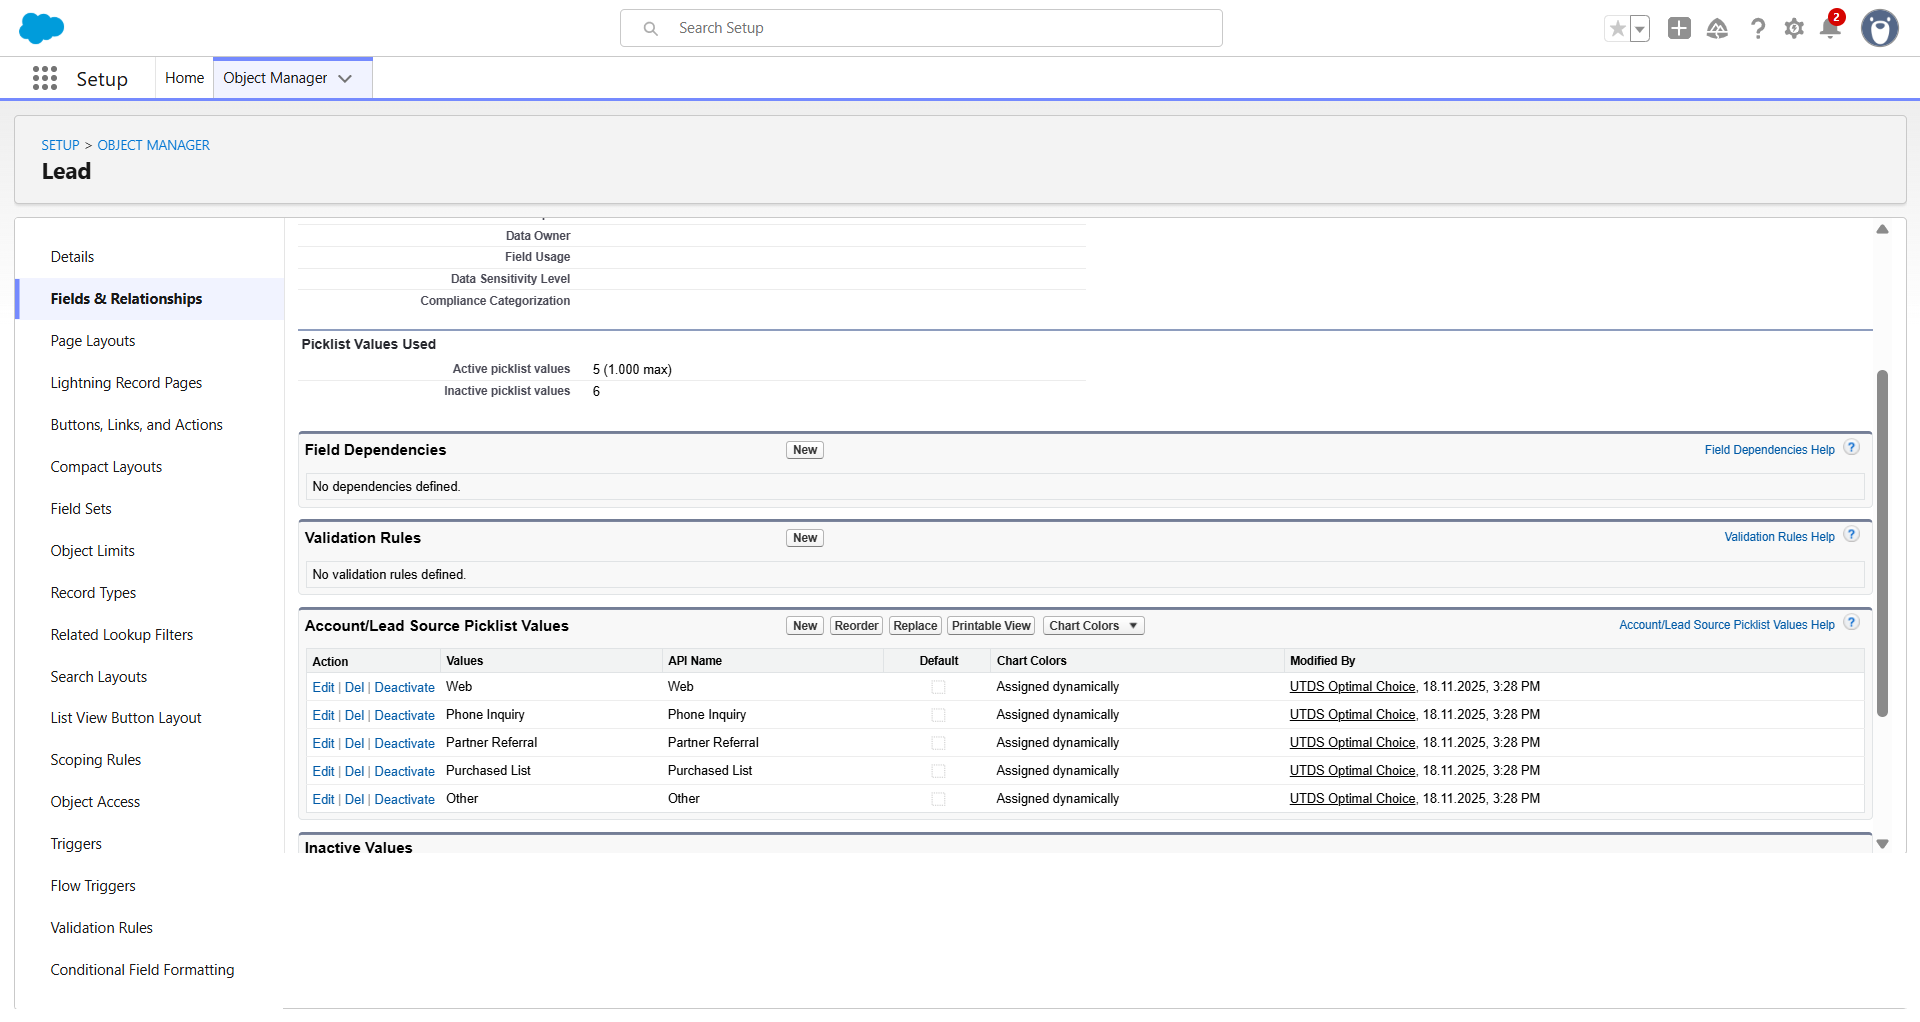
- Define Values: Go to Setup to Object Manager to Lead to Fields & Relationships. Click the Lead Source field.
- Ensure Specificity: Review the picklist values. They must be specific and represent actual marketing channels (e.g., “Organic Search,” “Paid Search,” “Referral,” “Website Form,” “Trade Show”). Avoid vague terms like “Web” or “Other.”
- Map to Opportunity: Ensure the Lead Source values are mapped to the corresponding Opportunity Source field (if applicable) during Lead Conversion so you don’t lose the attribution data in the sales pipeline.
Step 2: Implement Data Capture
The next step is ensuring the field is populated automatically when a Lead is created.
1. Web-to-Lead Forms (Optimal for Website Leads)
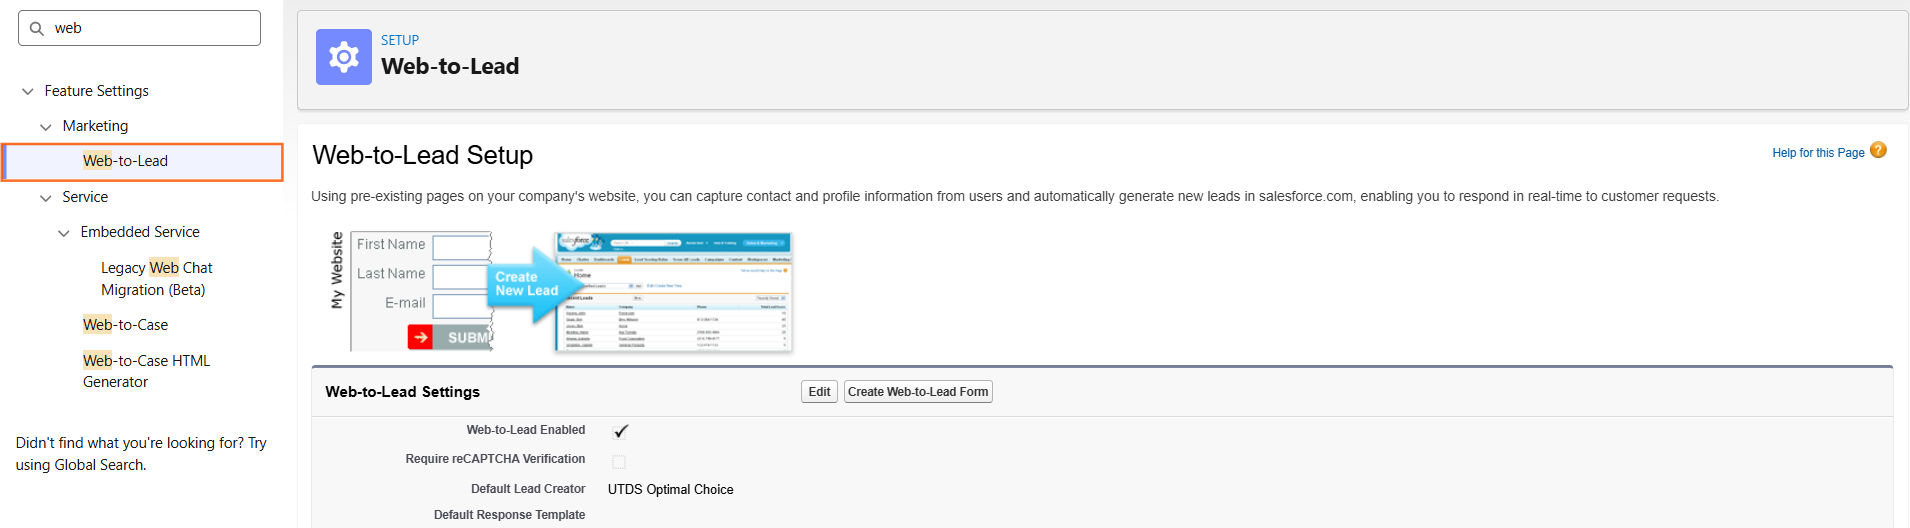
- If you use the standard Web-to-Lead feature for your website forms:
- Use a hidden field on your website forms. This hidden field captures the traffic source information (e.g., the UTM parameters or referrer URL) and maps it directly into the Lead Source field in Salesforce upon submission. This is the most accurate automated method.
- Use a hidden field on your website forms. This hidden field captures the traffic source information (e.g., the UTM parameters or referrer URL) and maps it directly into the Lead Source field in Salesforce upon submission. This is the most accurate automated method.
2. Manual Entry (For Offline Leads)
- For leads from events, networking, or phone calls, the sales or marketing user must enter the data:
- Ensure the Lead Source field is prominent and potentially required on the Lead creation page layout to minimise empty fields.
- Ensure the Lead Source field is prominent and potentially required on the Lead creation page layout to minimise empty fields.
3. Integration Tools (For Bulk Imports)
- When importing leads from CSV or integrating with marketing automation platforms (like Pardot or HubSpot):
- The integration or the import mapping must explicitly match the source data column in your file to the Lead Source field in Salesforce.
Step 3: Reporting and Analysis
Once the data is flowing, you can report on the effectiveness of each channel.
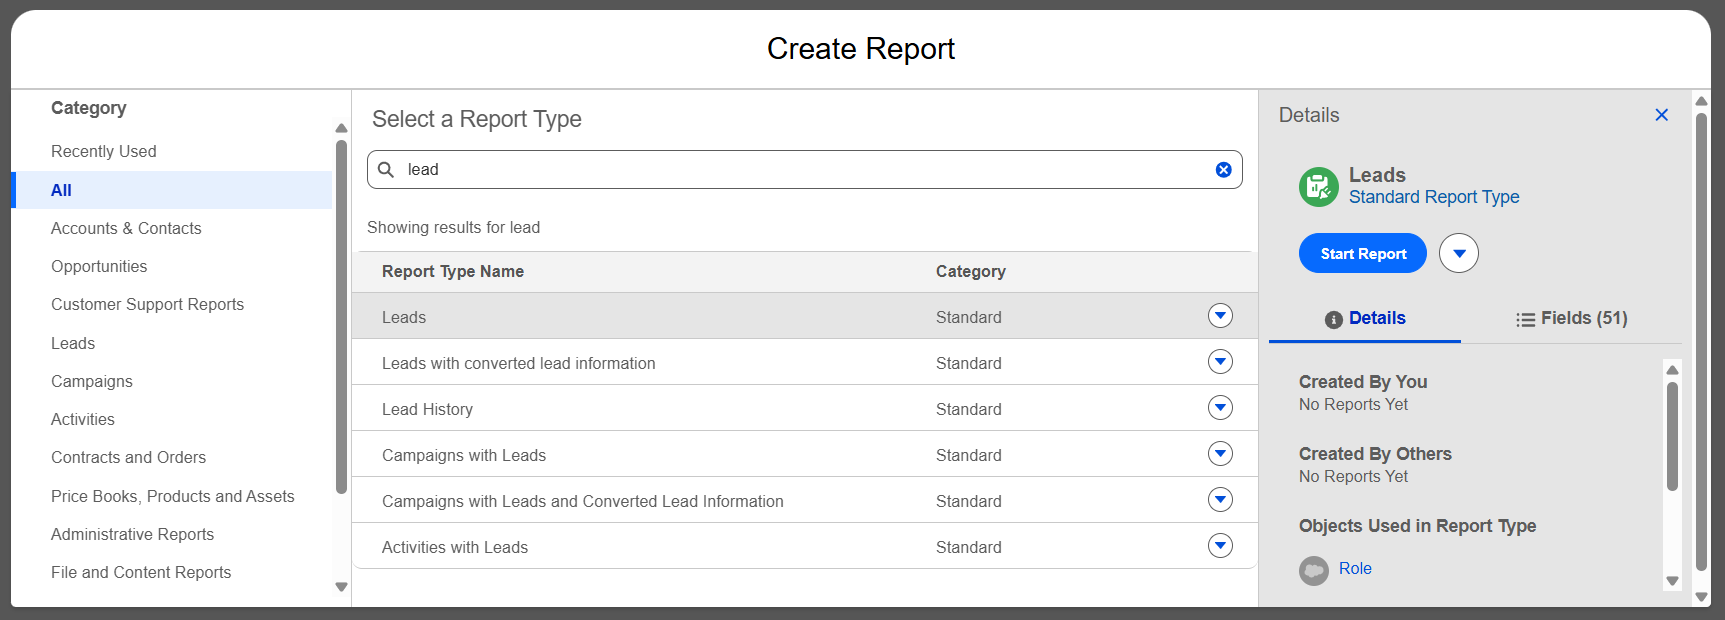
- Create a Report: Go to App Launcher to Reports and create a new report using the Leads object.
- Group and Filter:
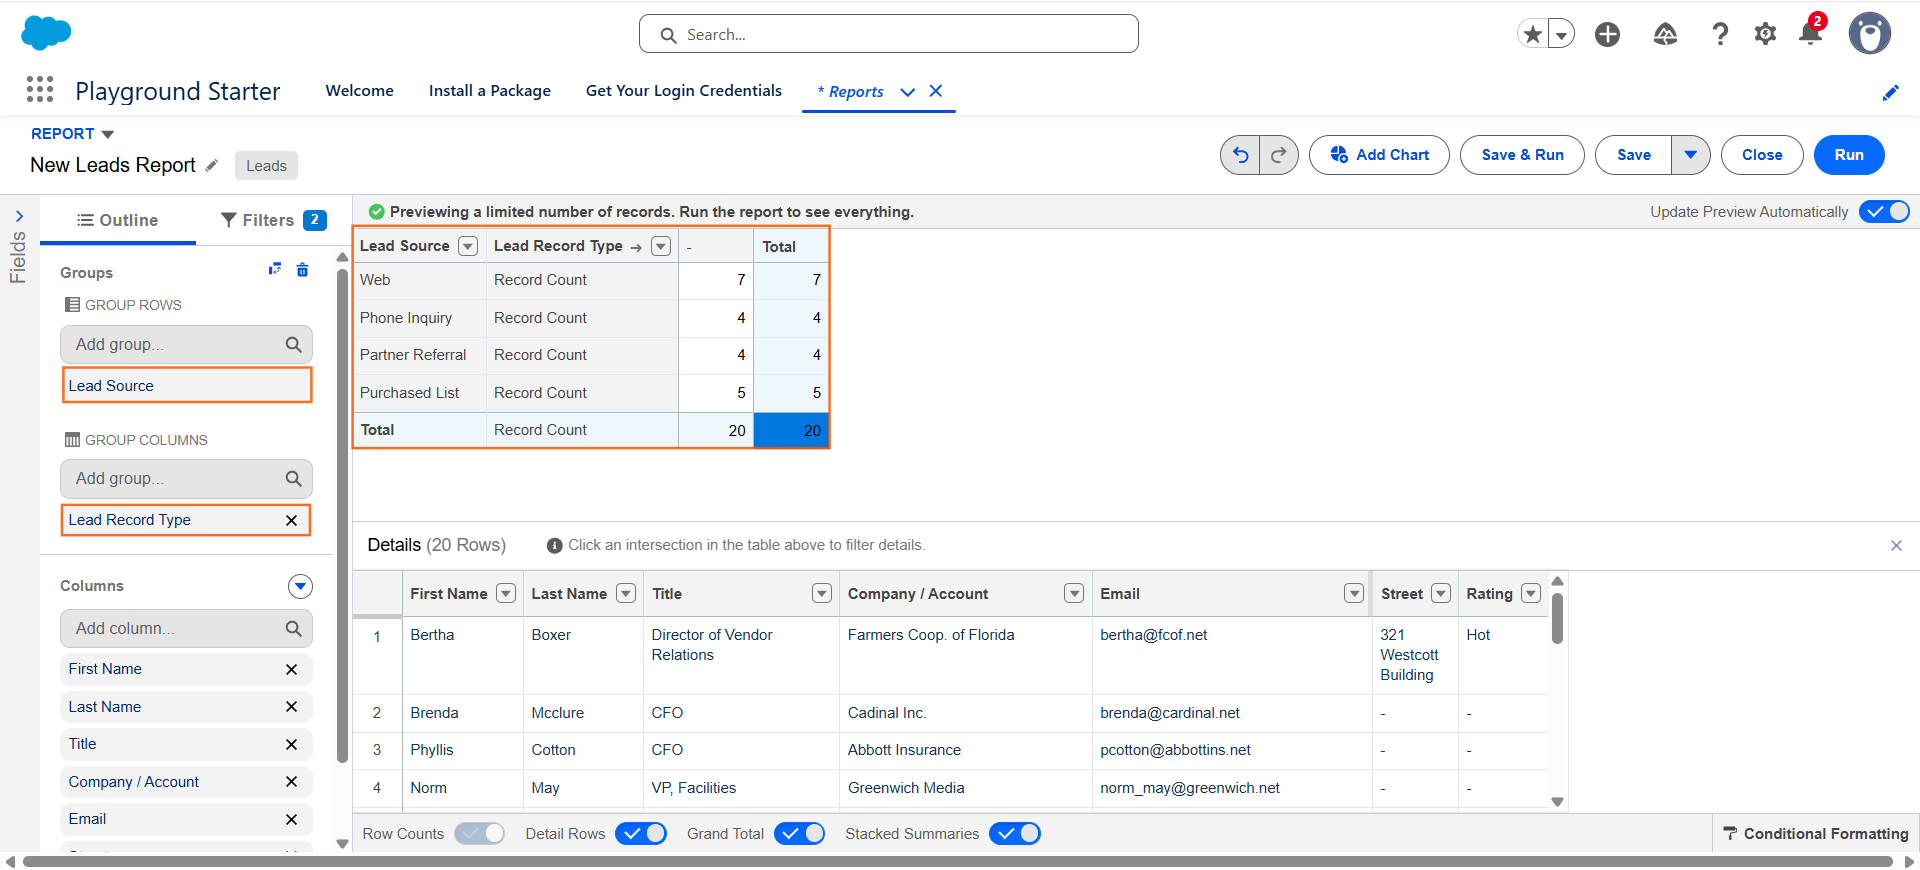
- Group the report by Lead Source.
- Add a second grouping level by Lead Status (or Converted field).
- Analyze Conversion Rate: This allows UTDS Optimal Choice to compare:
- Total Leads generated per source (Volume).
- Percentage of Leads that converted to Opportunities (Quality/Conversion Rate).
This reporting process validates which marketing activities are driving the most pipeline value, not just the highest volume of names.

 Salesforce

