


The Role Hierarchy in Salesforce is primarily a data-sharing tool, not a traditional organizational chart. It is designed to ensure that managers can see and report on the records owned by their subordinates.
Step 1: The Relationship with OWD
Before setting up the hierarchy, you must understand that it only works if your Organization-Wide Defaults (OWD) are set to Private or Public Read-Only. If the OWD is “Public Read/Write,” everyone already has access, and the hierarchy serves no sharing purpose.
Step 2: Accessing the Role Hierarchy
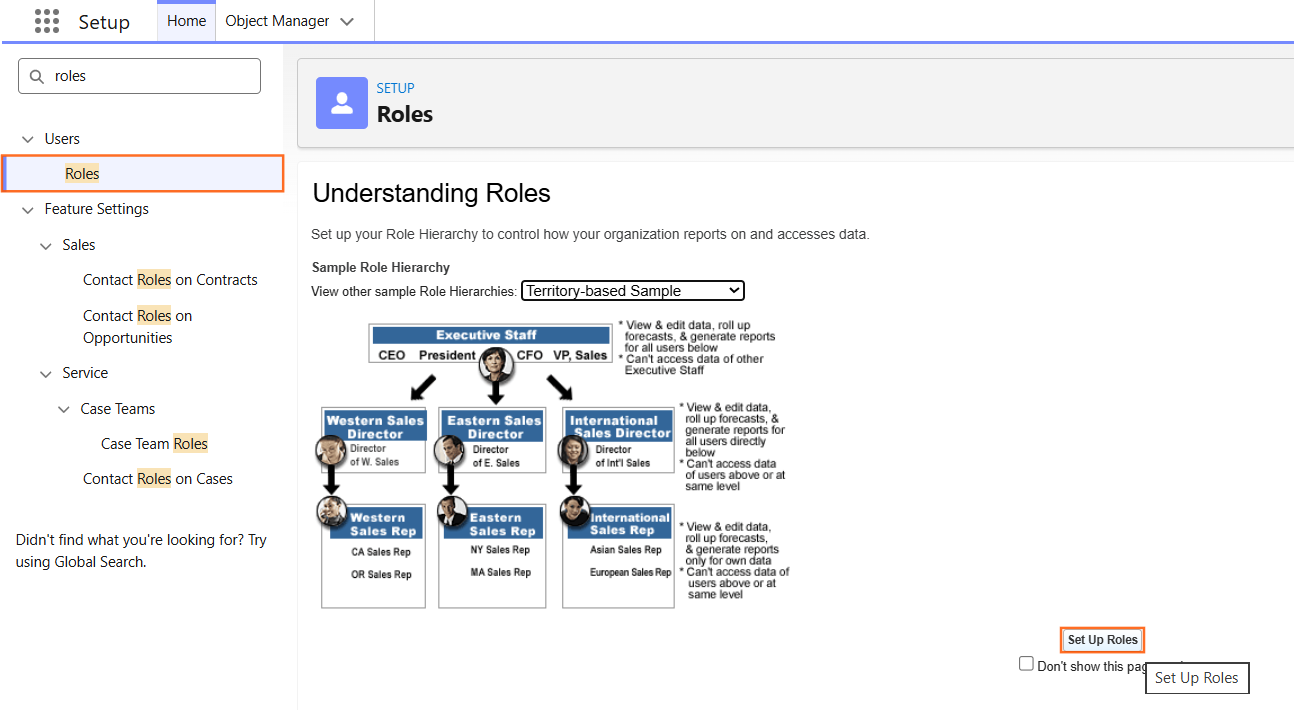
- Navigate to Setup.
- In the Quick Find box, type Roles.
- Select Roles.
- If you see a splash page, click Set Up Roles.
Step 3: Adding and Configuring Roles
Salesforce uses a “Tree” structure. You should always start from the top and build downward.
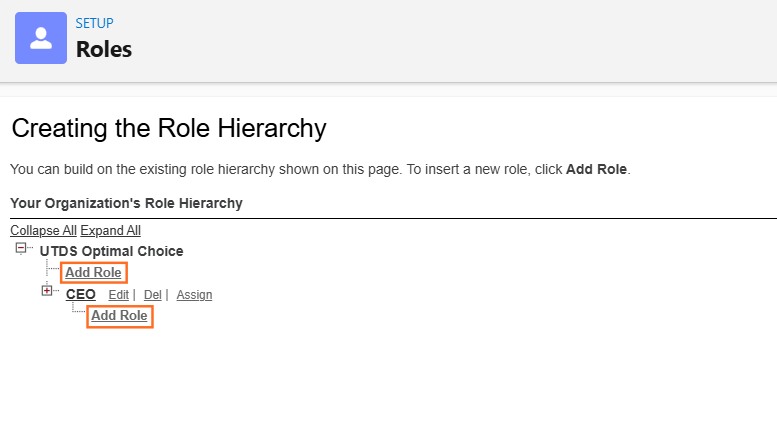
- Click Add Role under the existing top-level role (e.g., CEO).
- Label: The name users see (e.g., Western Regional Manager).
- Role Name: The API name (automatically populated).
- This Role Reports To: Ensure this points to the correct “Manager” role.
- Role Name as displayed on reports: How it will appear in the “Role” column of a report.
- Click Save.
Step 4: Assigning Users to Roles
A role is empty until you put a user into it.
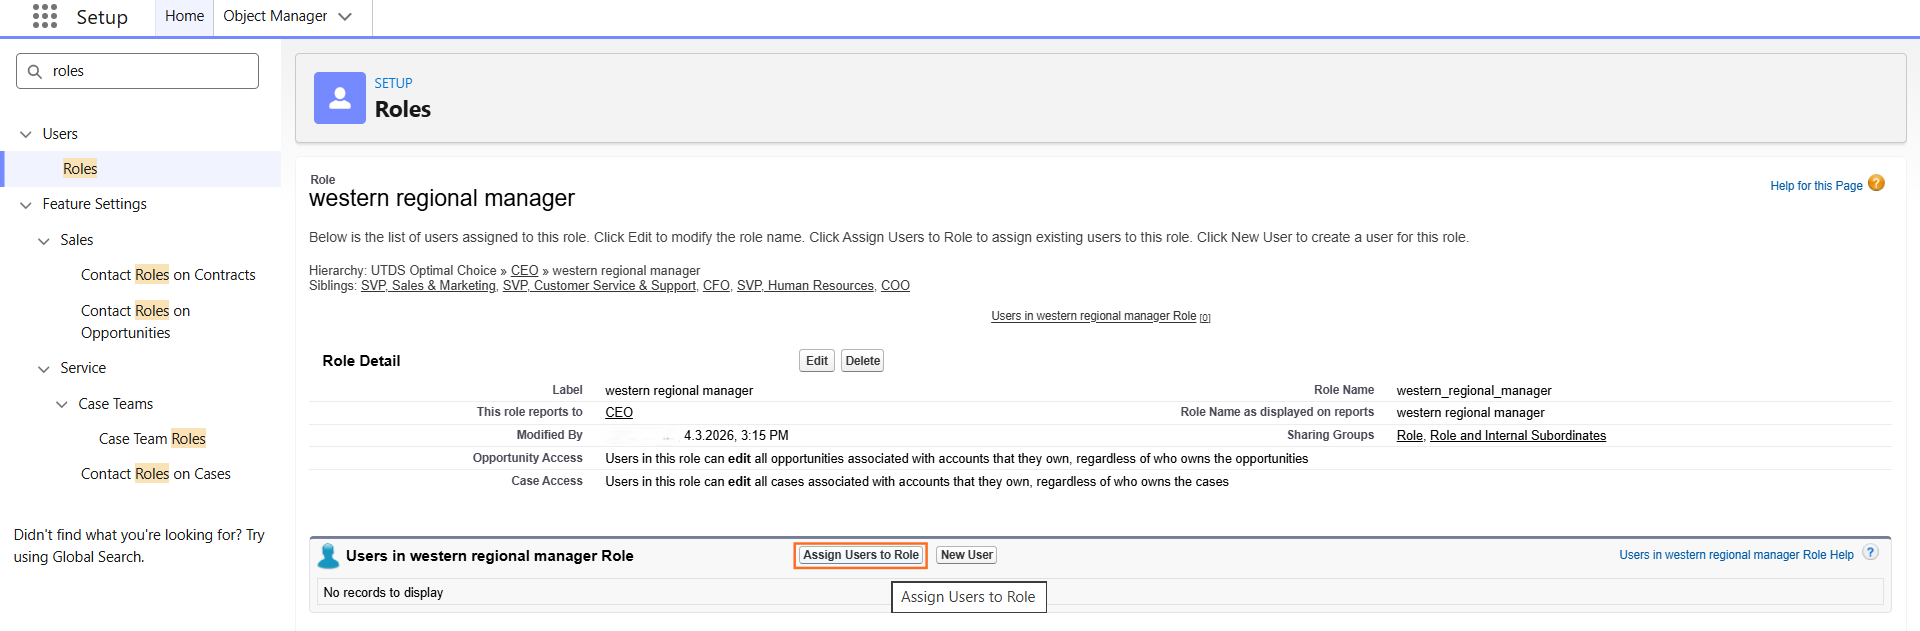
- Click Assign Users to Role next to the role name.
- Select All Users from the dropdown.
- Move the desired users from the Available Users list to the Selected Users list.
- Click Save.
Step 5: Best Practices for Technical Design
When documenting the hierarchy for your guide, keep these structural rules in mind:
- Granularity: Do not create a role for every single job title. Group users with the same level of data access into one role (e.g., all Sales Reps in one “Sales Representative” role).
- The “Grant Access Using Hierarchies” Checkbox: For custom objects, ensure this box is checked in Sharing Settings. If unchecked, managers will not automatically see their subordinates’ records for that object.
- Avoid “Orphan” Roles: Every role should roll up to a parent to ensure data flow remains intact.
- Performance: A complex hierarchy with too many levels can slow down recalculations and reporting performance.

 Salesforce

