


Customising Page Layouts allows administrators to control the fields, sections, related lists, and buttons visible to users based on their assigned Profile and Record Type. This ensures an optimal user experience by preventing clutter and enforcing business process flow.
The process involves three main steps: Creating the Layout, Assigning the Layout, and Customising the Layout.
Step 1: Create or Clone the Page Layout
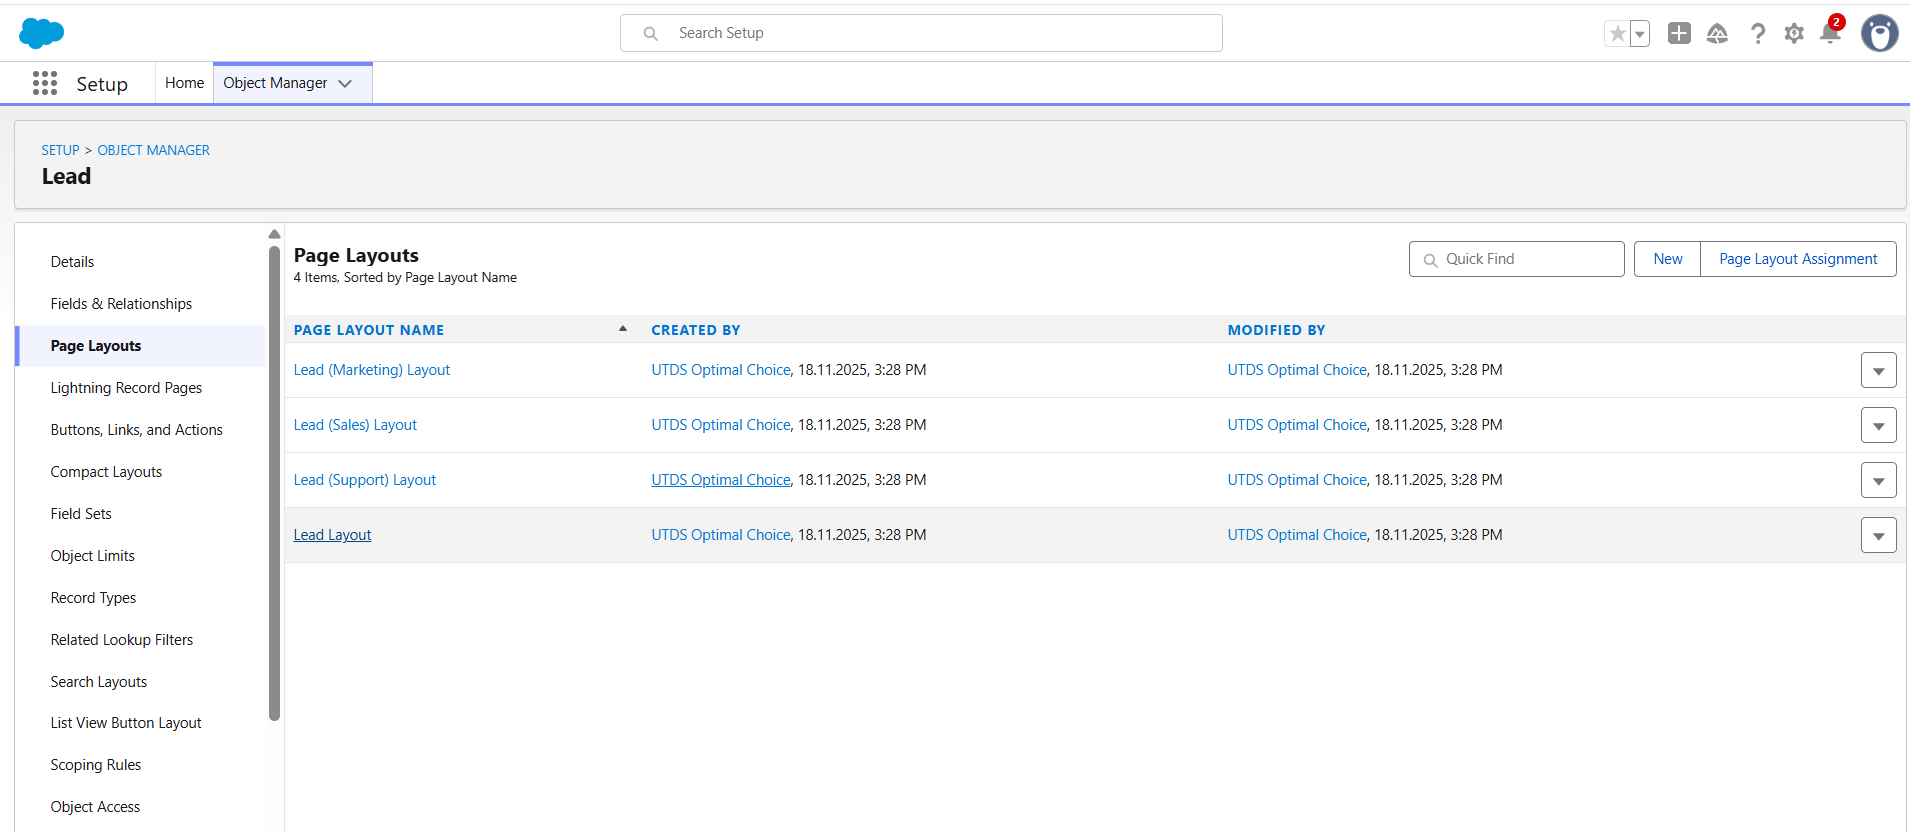
You must have a specific layout ready for assignment. Cloning an existing layout is the fastest way to start.
- Navigate to Object Manager: Click the gear icon (⚙️) to Setup to Object Manager.
- Select the Object: Find and click on the object you need to customise (e.g., Lead, Account, Opportunity).
- Go to Page Layouts: Select Page Layouts in the left-hand menu.
- Clone or Create:
- Optimal Choice: Click on the name of an existing layout (e.g., Lead Layout) and click “Clone”.
- Name the New Layout: Give the clone a descriptive name that matches its intended user group (e.g., Lead Layout).
- Save.
Step 2: Customise the New Page Layout
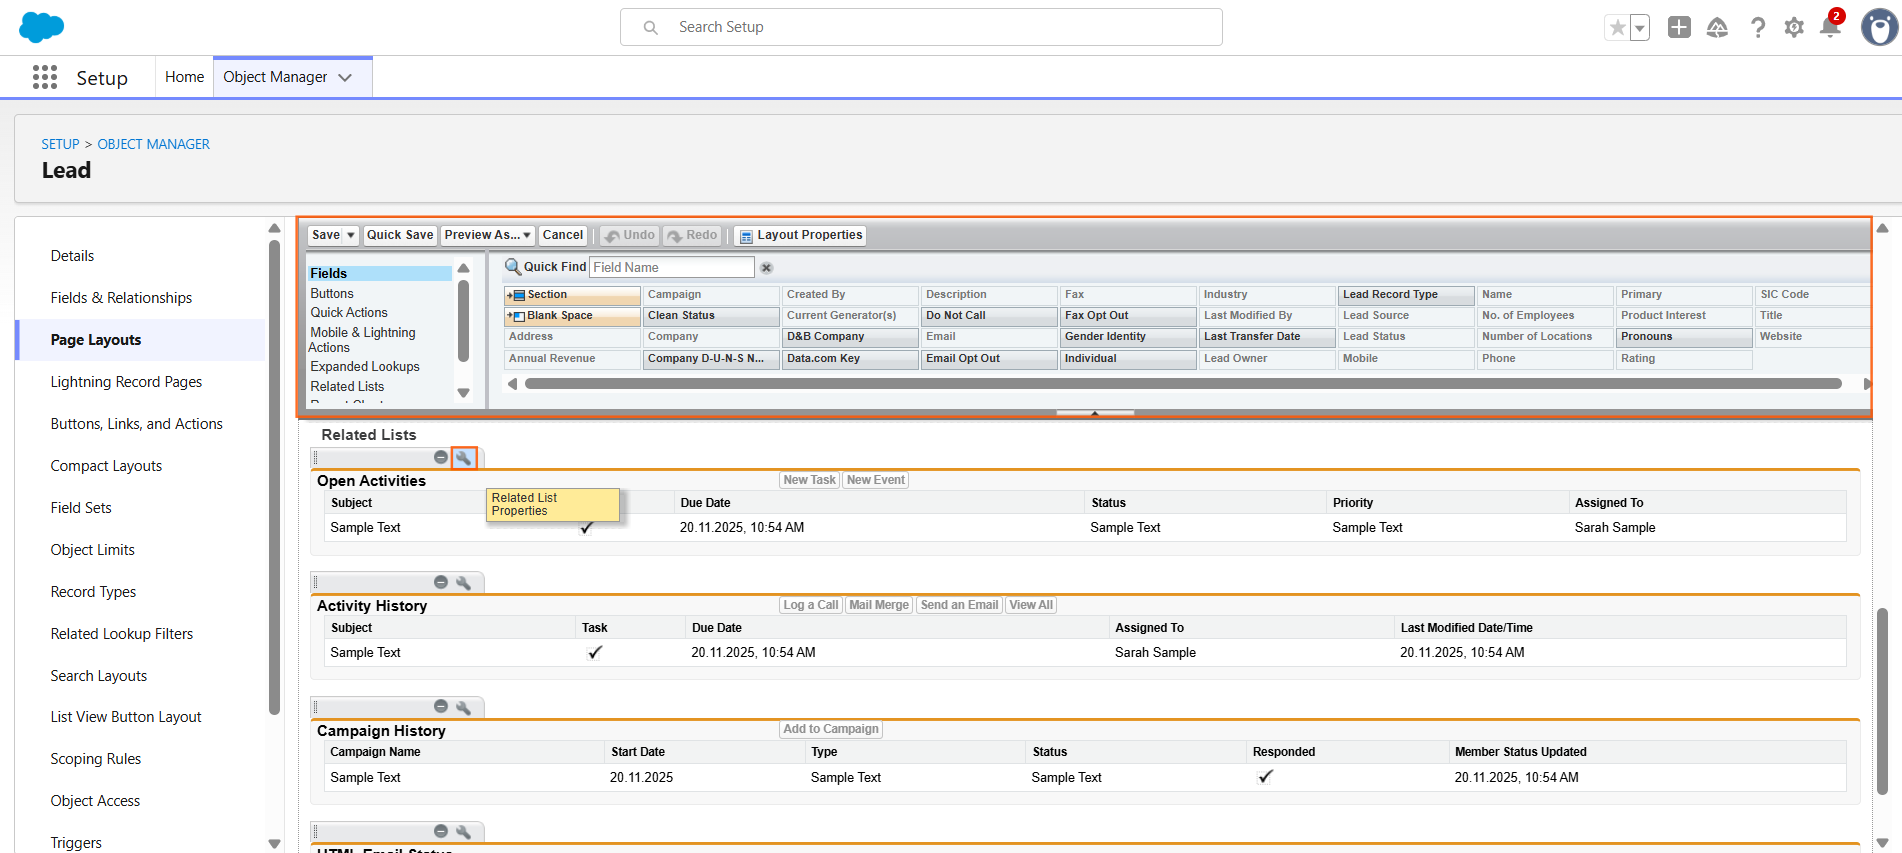
Now, tailor the layout by adding, removing, or rearranging fields, buttons, and sections to meet the specific needs of the profile.
- Open the New Layout: Click on the name of the layout you just created (Lead Layout).
- Use the Palette: The top of the screen shows the palette, which contains all available fields, buttons, and components.
- Adjust Fields:
- Remove: Drag unnecessary fields (e.g., SLA Expiration Date for Marketing) from the layout and drop them back into the palette.
- Add: Drag relevant fields (e.g., Lead Source Detail) from the palette onto the layout.
- Set Properties: Double-click on a field in the layout to set it as Read-Only or Required for users viewing this layout.
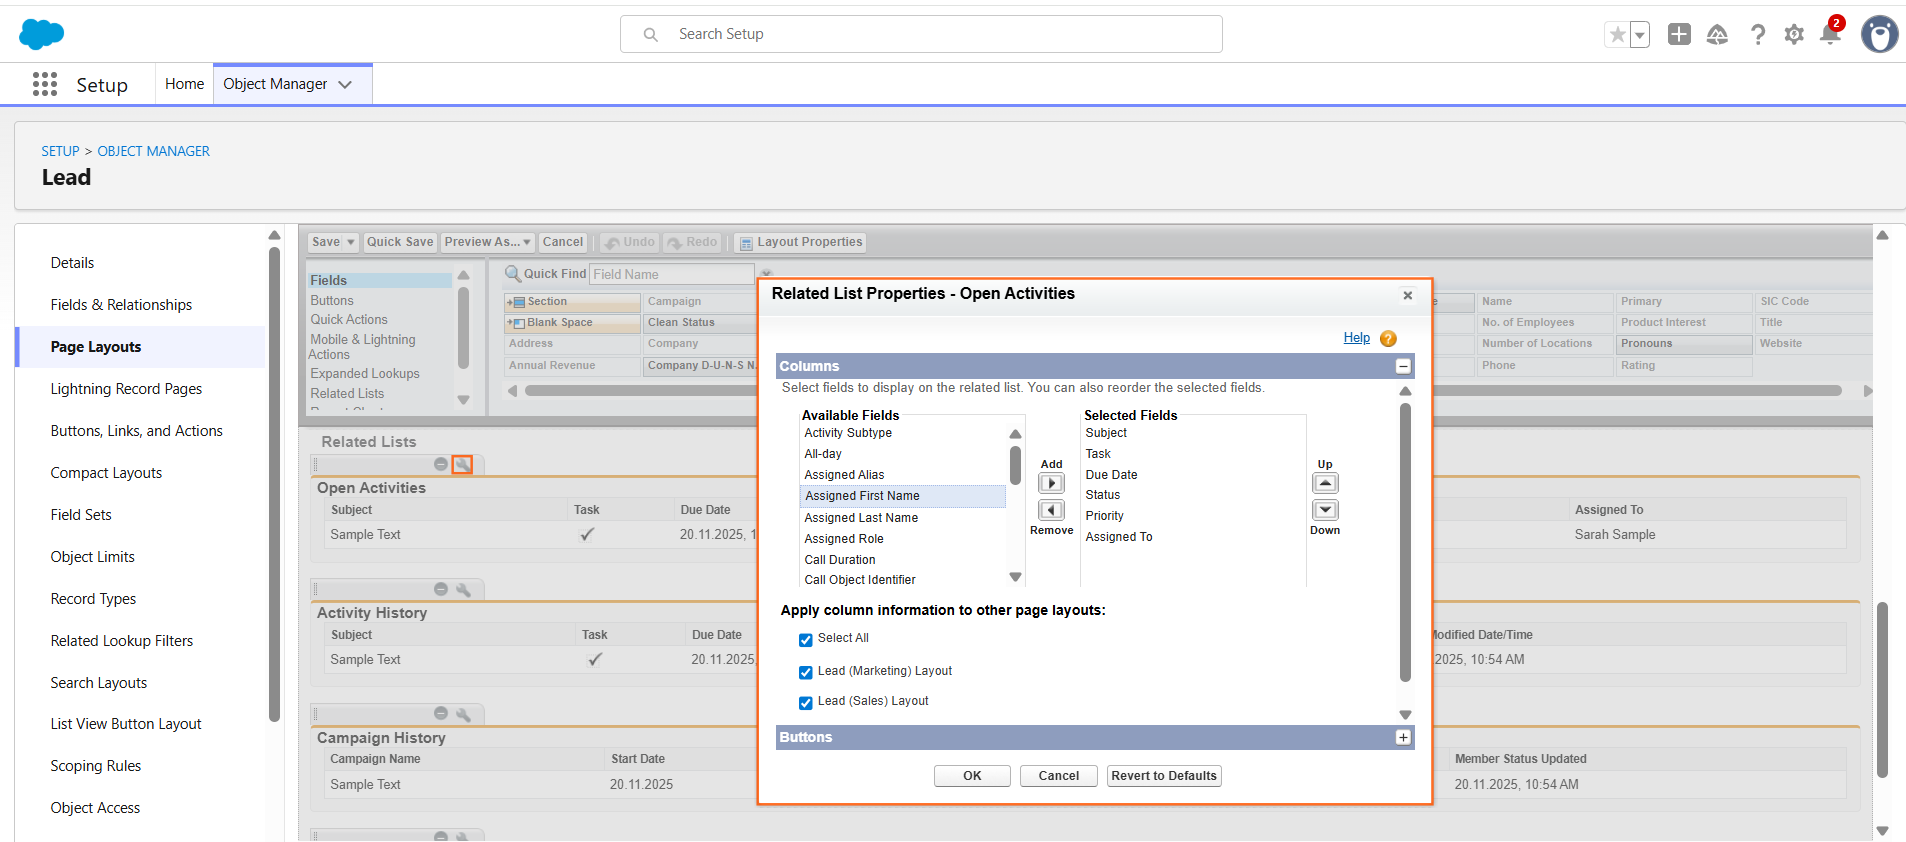
4. Adjust Related Lists: Scroll down and use the wrench icon on the Related Lists to add or remove columns (e.g., adding Date Created to the Activities list).
5. Save the layout.
Step 3: Assign the Layout to Profiles and Record Types
This is the most crucial step, connecting the new layout to the specific users (Profiles) and contexts (Record Types).
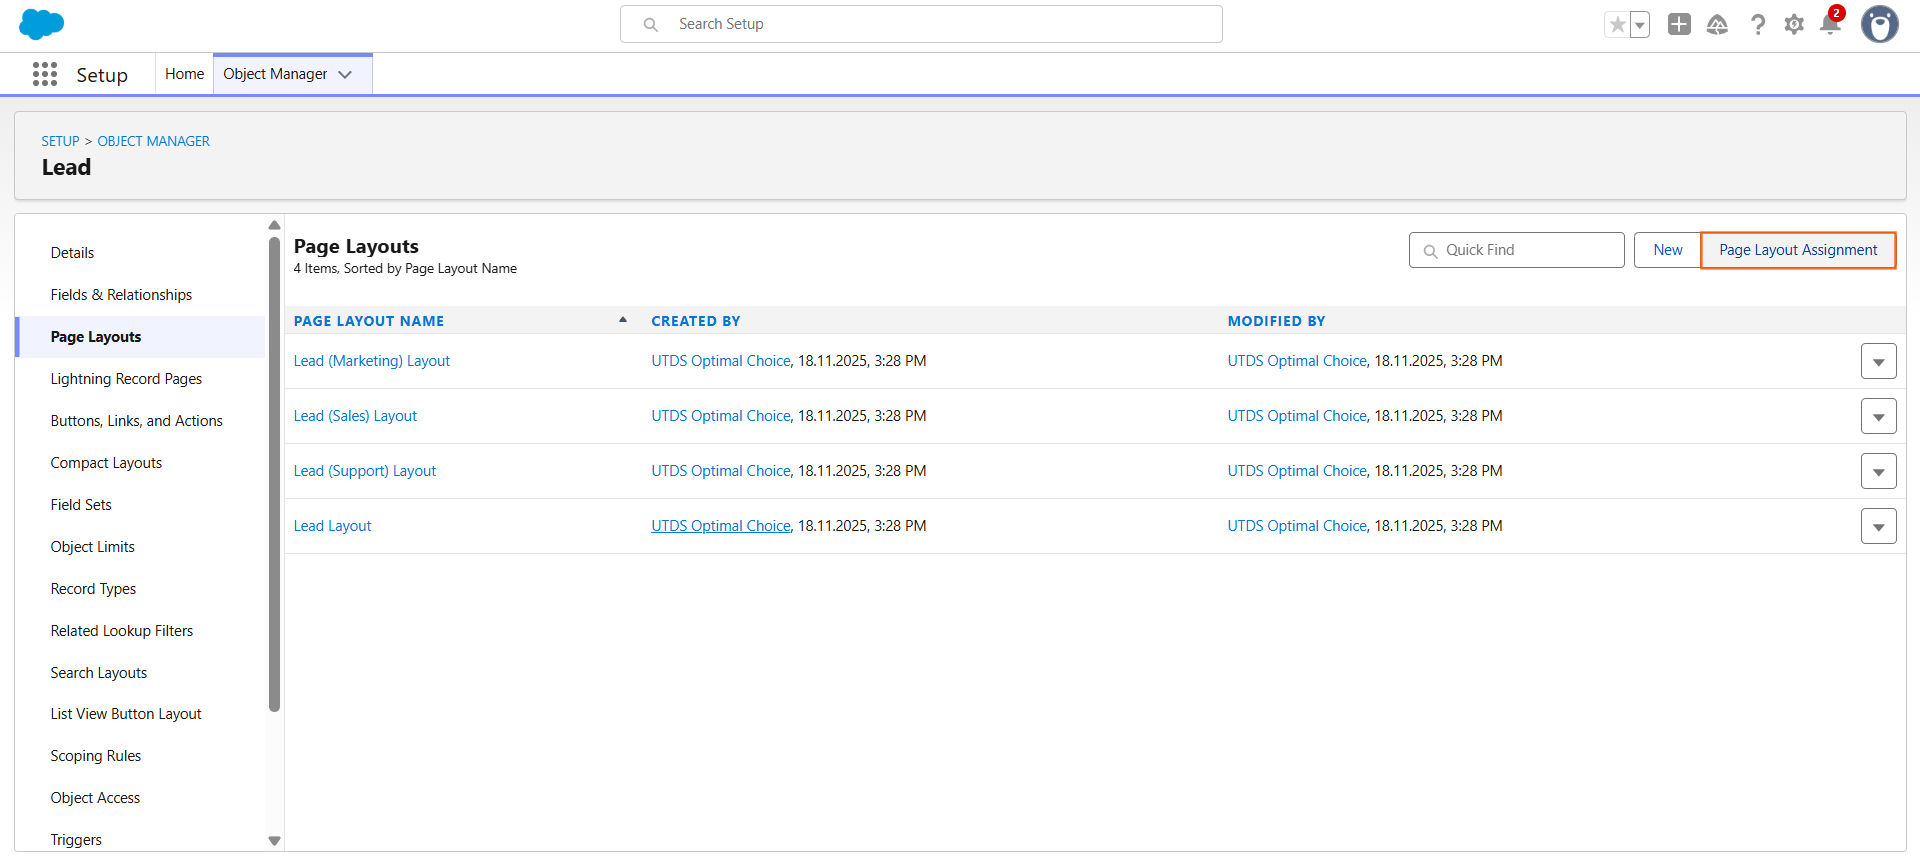
- Navigate to Assignment: Back in the Page Layouts list for your object (e.g., Lead), click the button “Page Layout Assignment.”
- Edit Assignment: Click “Edit Assignment.” You will see a grid showing all combinations of Profiles and Record Types.
- Optimal Assignment:
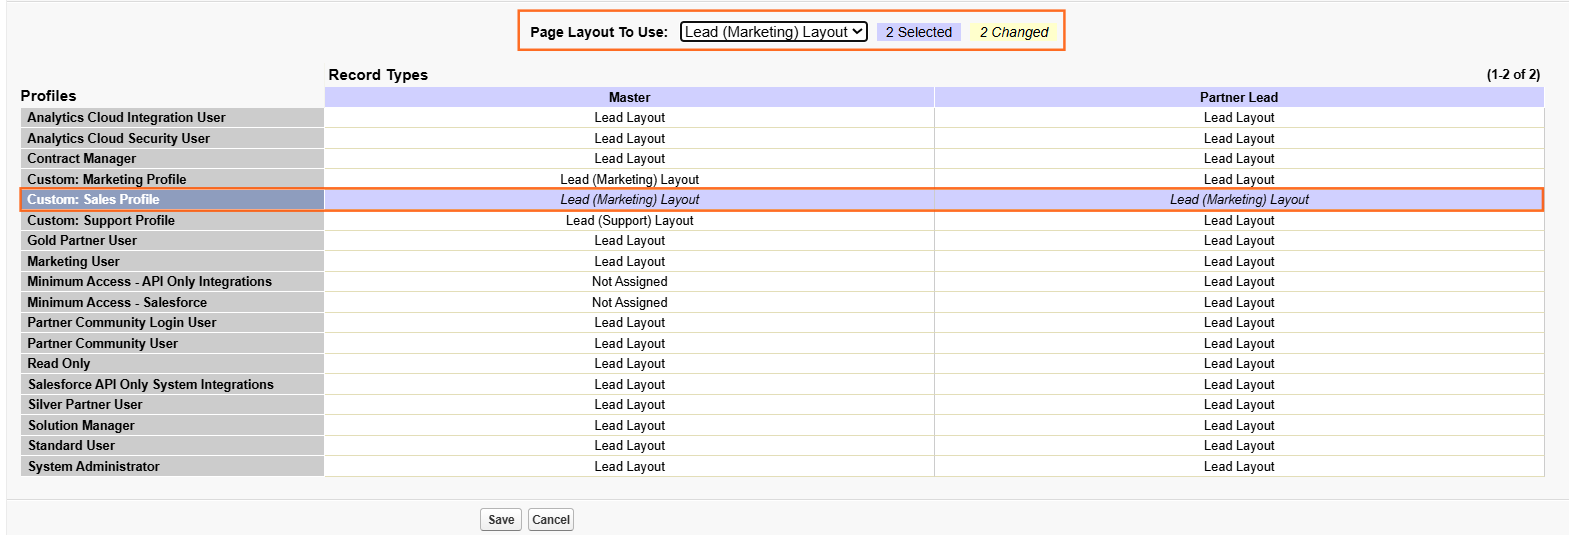
- Select Profiles: Click the Profile Name (e.g., Custom: Sales Profile) in the table header to select all cells in that profile’s column.
- Choose Layout: Select the new layout from the dropdown menu at the top (“Page Layout To Use”) (e.g., Lead Layout).
- Repeat: Repeat this process for all relevant profiles and record type combinations (e.g., ensuring the Sales Profile is assigned the Sales Lead Layout).
4. Save.
Now, every time a user with the Sales Profile opens a Lead record, they will only see the fields, buttons, and related lists you configured in the Marketing Lead Layout.

 Salesforce

