


Creating a new Lead Record Type in Salesforce is essential for distinguishing different types of leads (e.g., Customer Leads vs. Partner Leads), standardizing your business processes, and tailoring the user experience for each type.
The process involves two main components: creating a Lead Process (which defines the picklist values for the Lead Status field) and then creating the Record Type itself, which links the process, a page layout, and user profiles.
Step 1: Create a Custom Lead Process (If Needed)
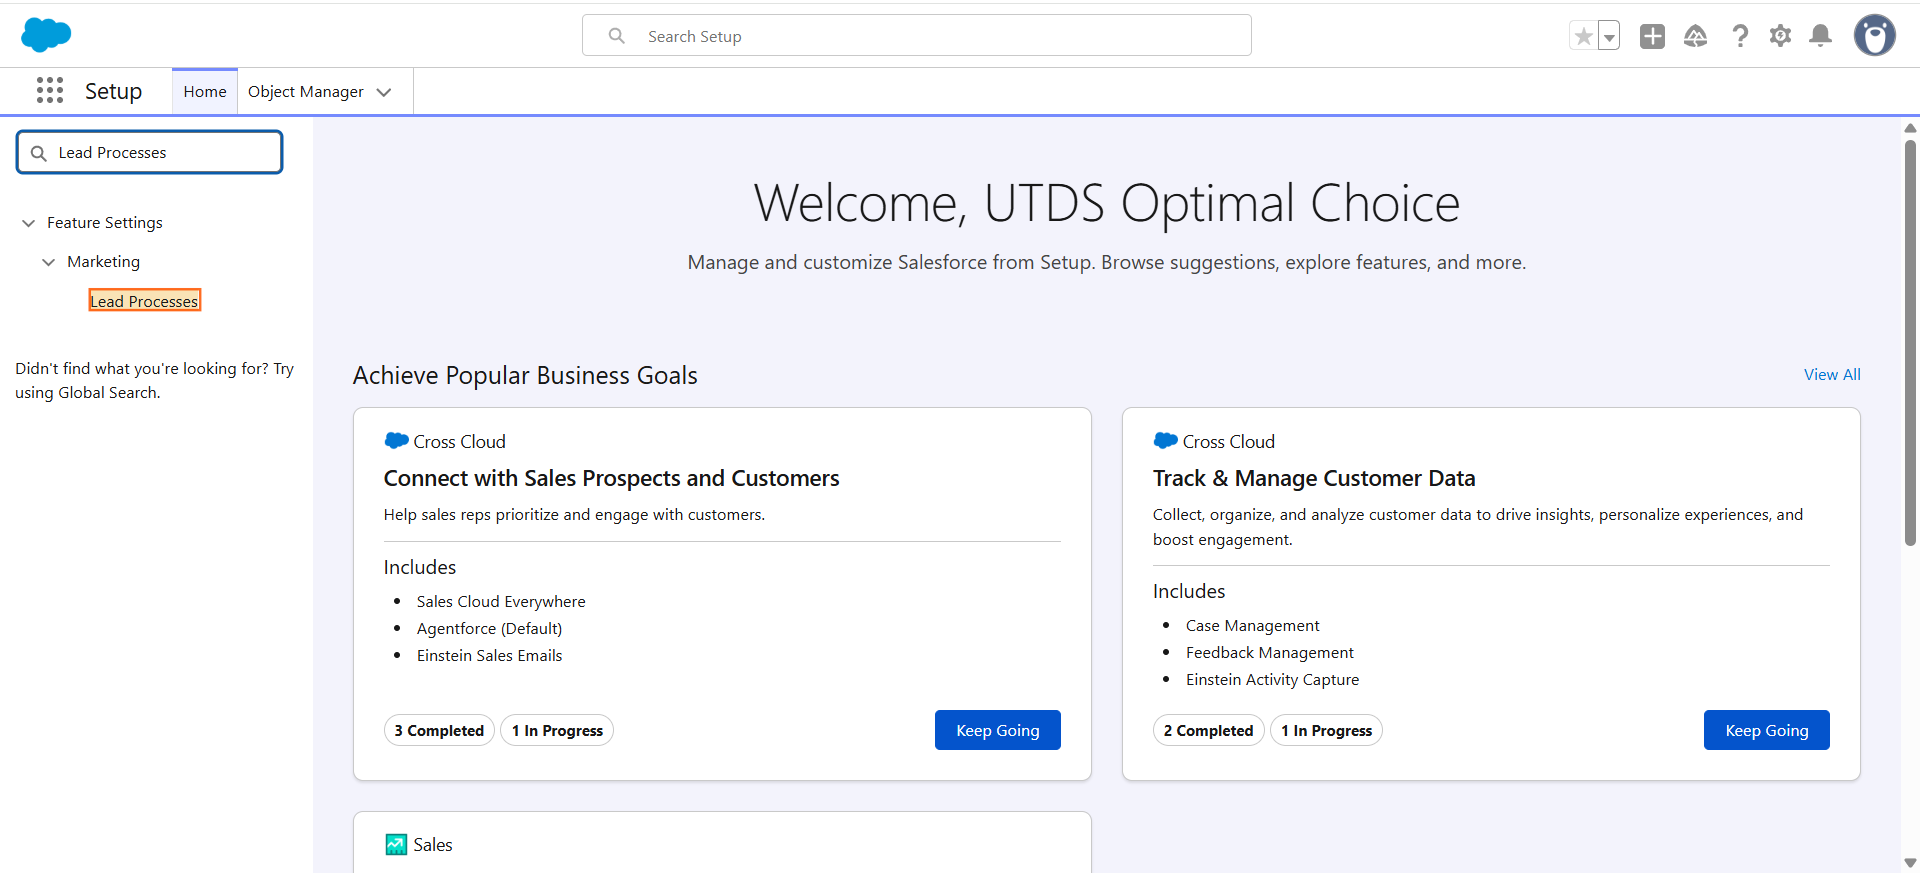
The Lead Process controls which values are available in the Lead Status picklist for this new record type. If your new record type needs a unique set of lead stages, you must create a new process first.
- Navigate to Setup: Click the gear icon (⚙️) to Setup.
- Find Lead Processes: In the Quick Find box, type Lead Processes and select it.
- Create New: Click New Lead Process.
- Define: Give the process a unique name (e.g., Partner Lead Process).
- Select Picklist Values: Select the values that should be included in the Lead Status field for this specific process and click Save.
Step 2: Create the New Lead Record Type
This step connects the Lead Process (or the existing Master Process) to the record type.
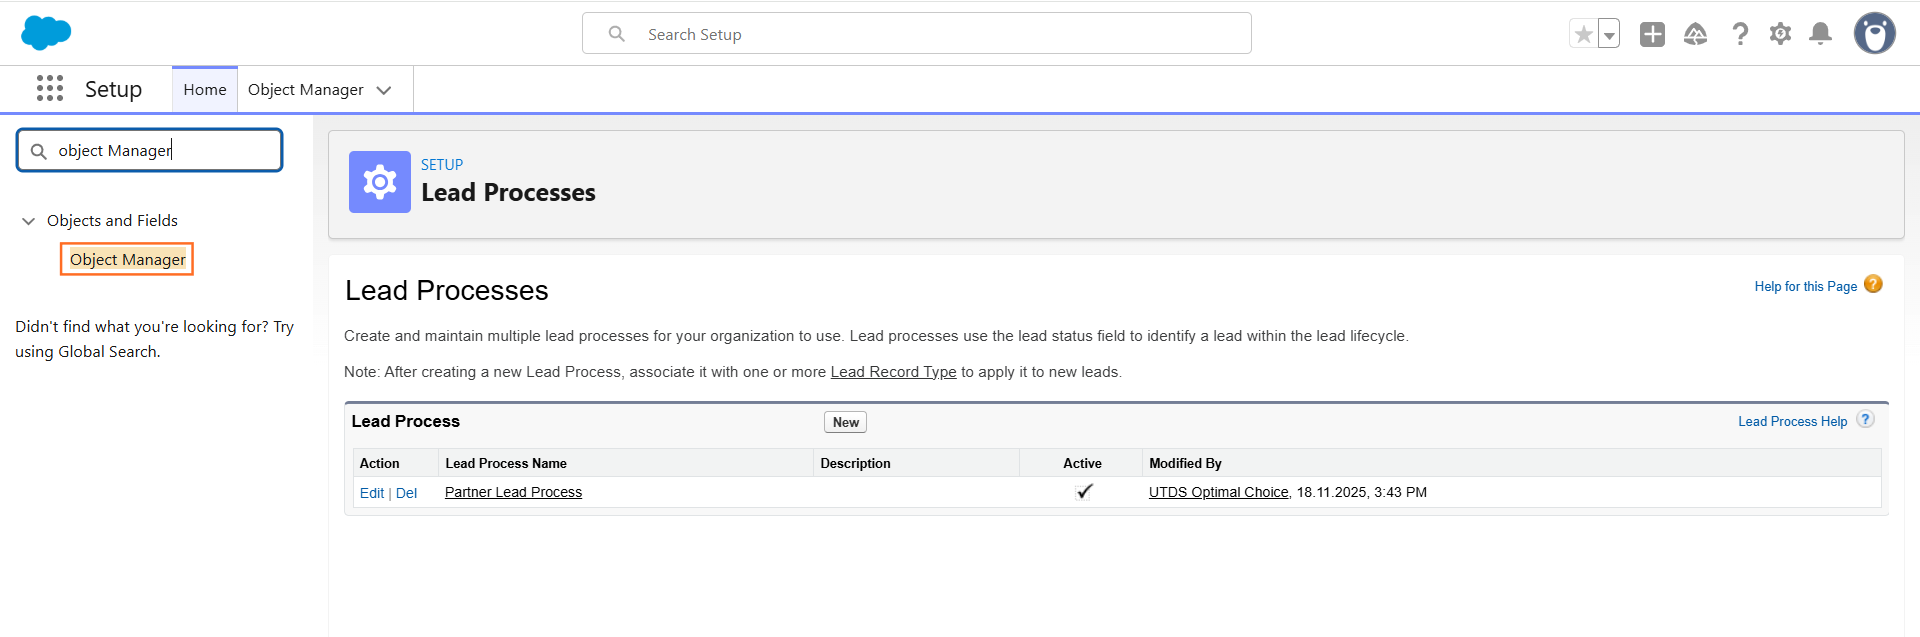
Navigate to Object Manager: From Setup, in the Quick Find box, type Object Manager and select it.
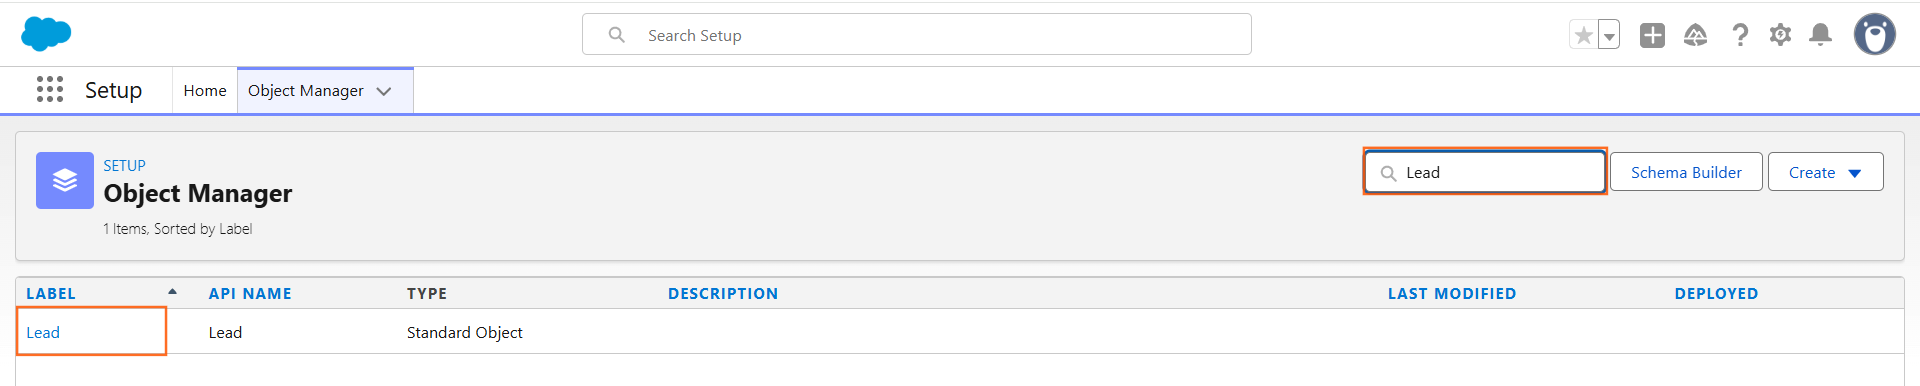
- Find the Lead Object: Click on the Lead object.
- Create Record Type: Select Record Types in the left sidebar, then click New.
- Define Details:
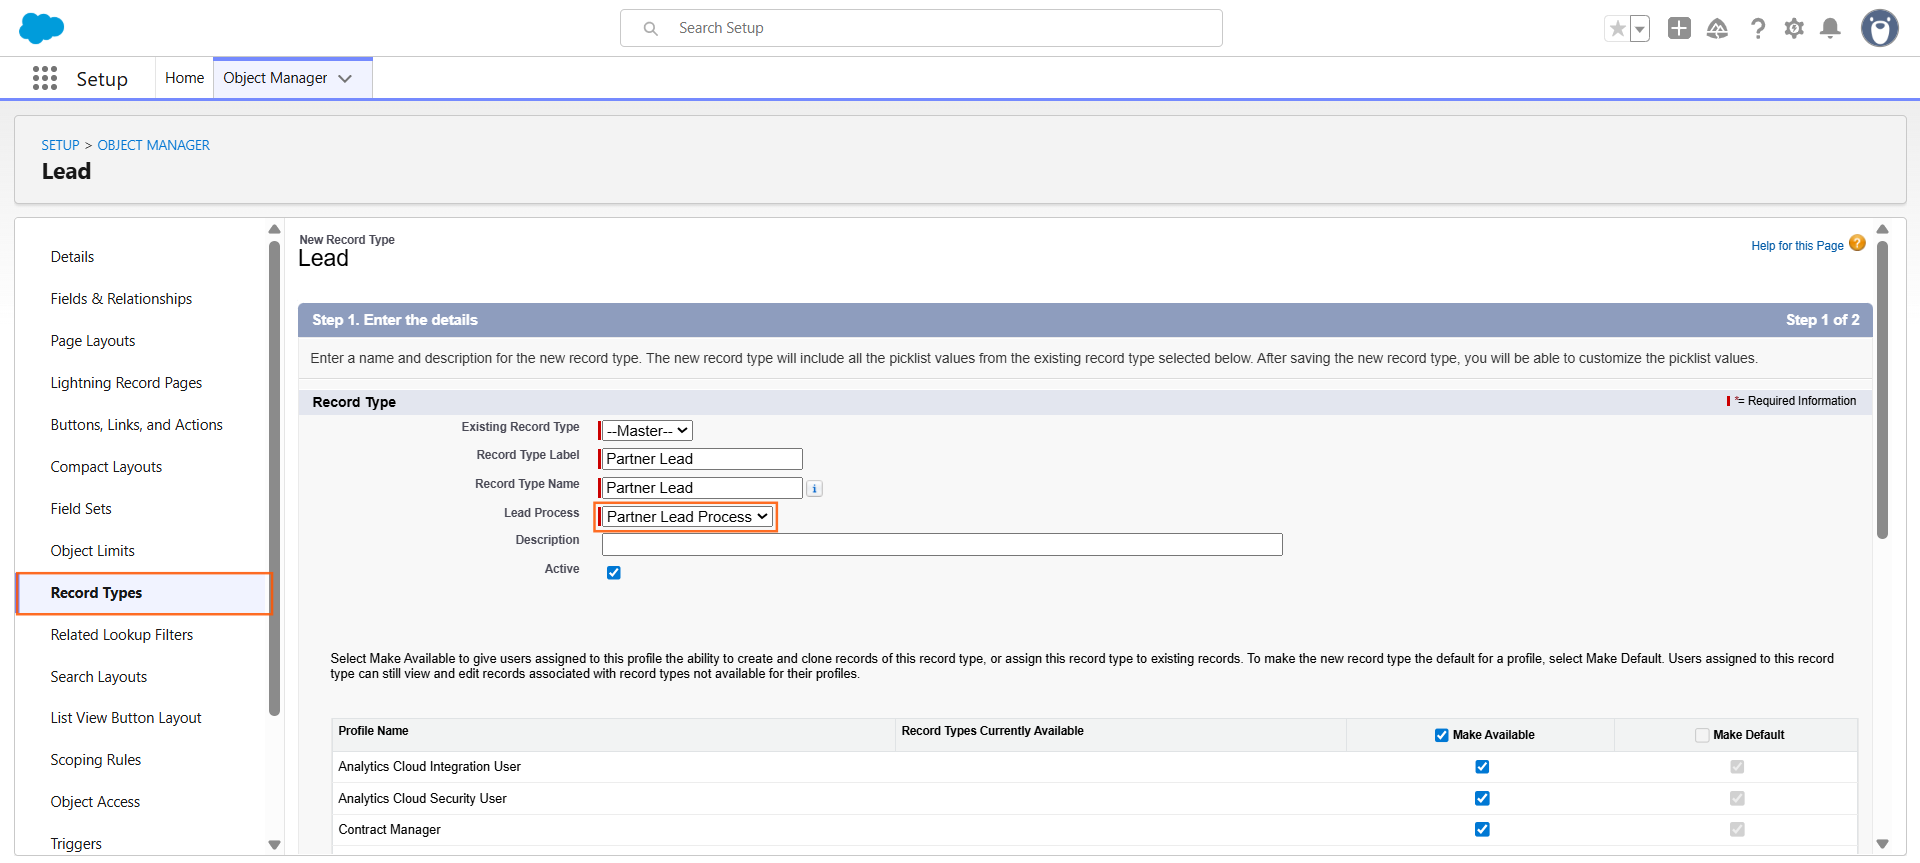
- Existing Record Type: Select the existing record type you want to clone the settings from (often the Master record type).
- Record Type Label: Give the Record Type a clear, descriptive name (e.g., Partner Lead). Once you enter it, Record Type Name will auto populate, no need to add anything there.
- Lead Process: Select the Lead Process you created in Step 1 (e.g., Partner Lead Process) or select the standard Master process if you don’t need unique statuses.
- Active: Check this box to make it available to users.
5. Enable for Profiles: Select the User Profiles (e.g., Sales Profile, Partner Users) that should have access to create and view this new record type.
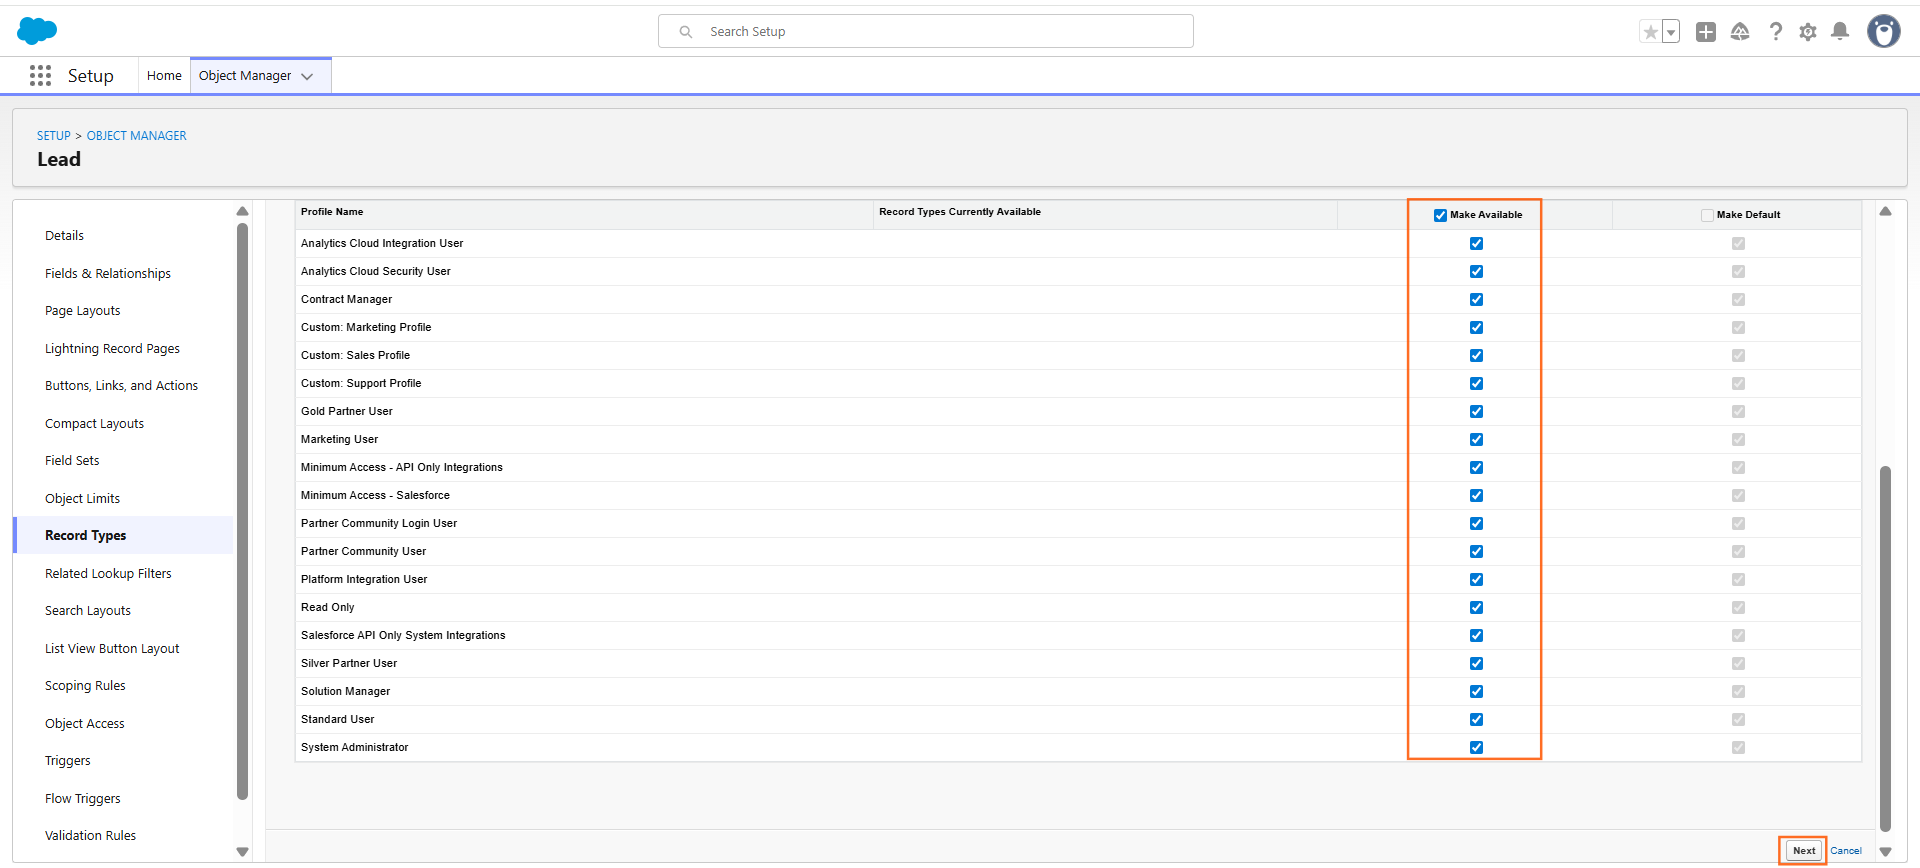
6. Set Default: Choose whether this should be the default record type for any of the selected profiles. Click Next.
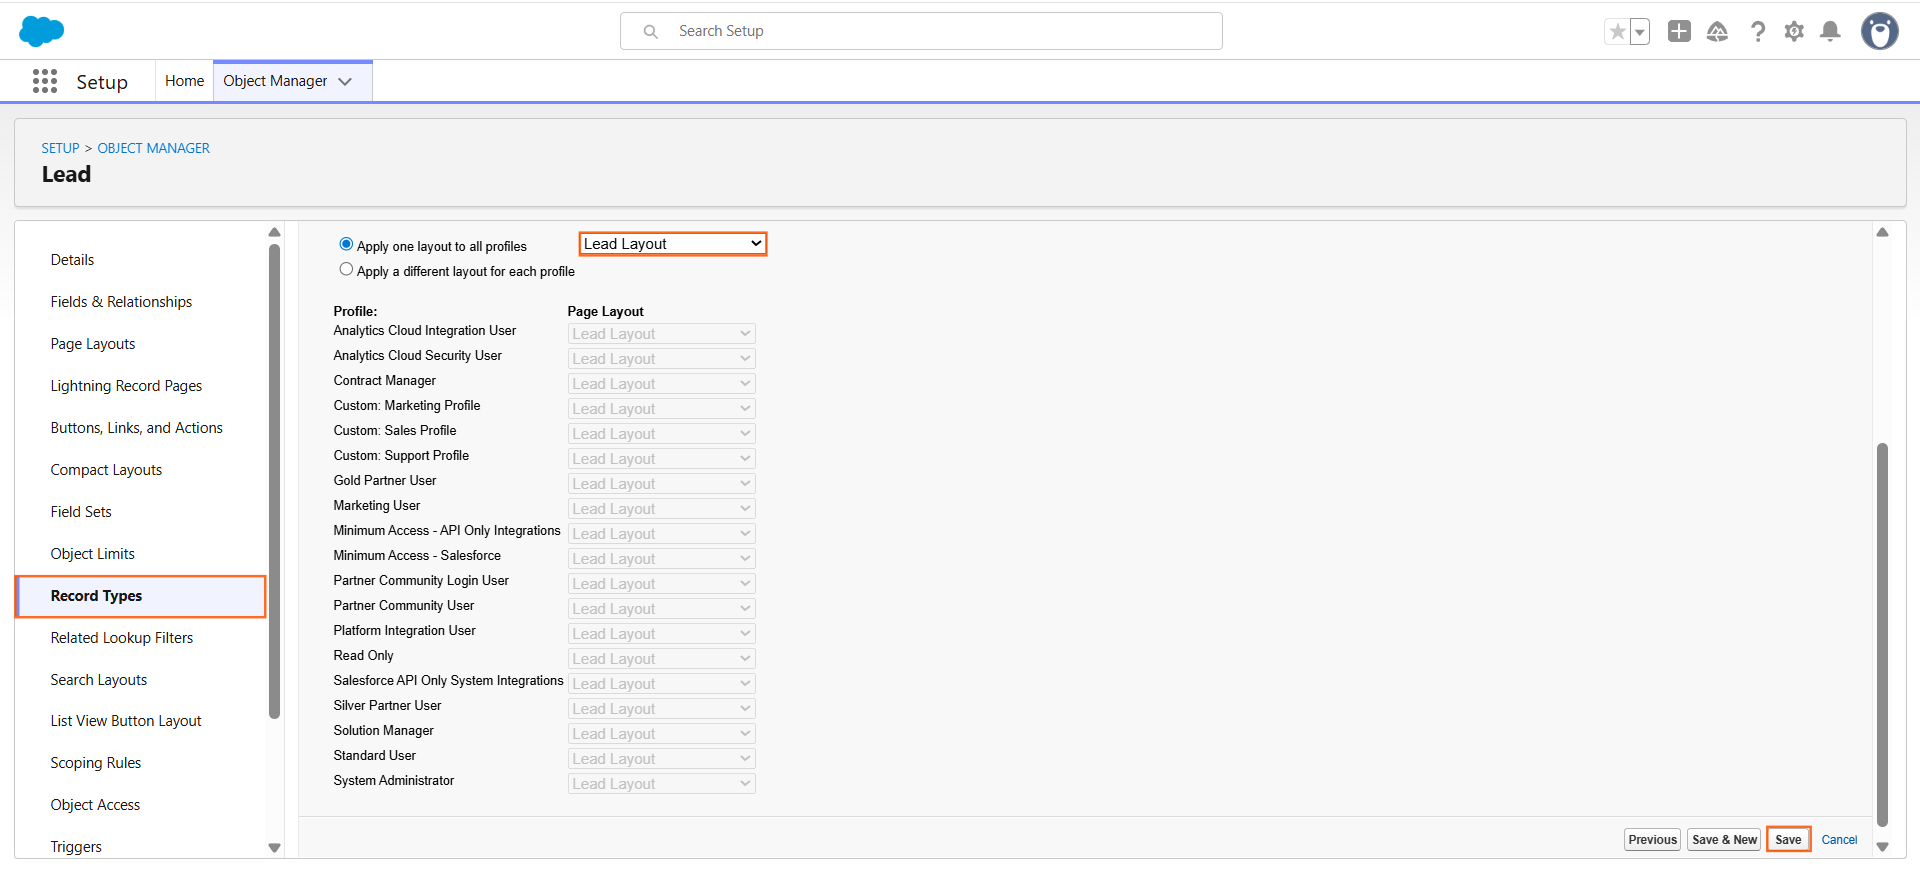
7. Assign Page Layout: On the final screen, choose the Page Layout that users will see when they create or view this new record type. You may need to create a new page layout specifically for this record type to ensure users only see the relevant fields. Click Save.
Step 3: Configure Picklist Values (Tailoring Fields)
After creation, you must adjust the picklist values that are now available to this record type, as the previous steps only addressed the Lead Status field.
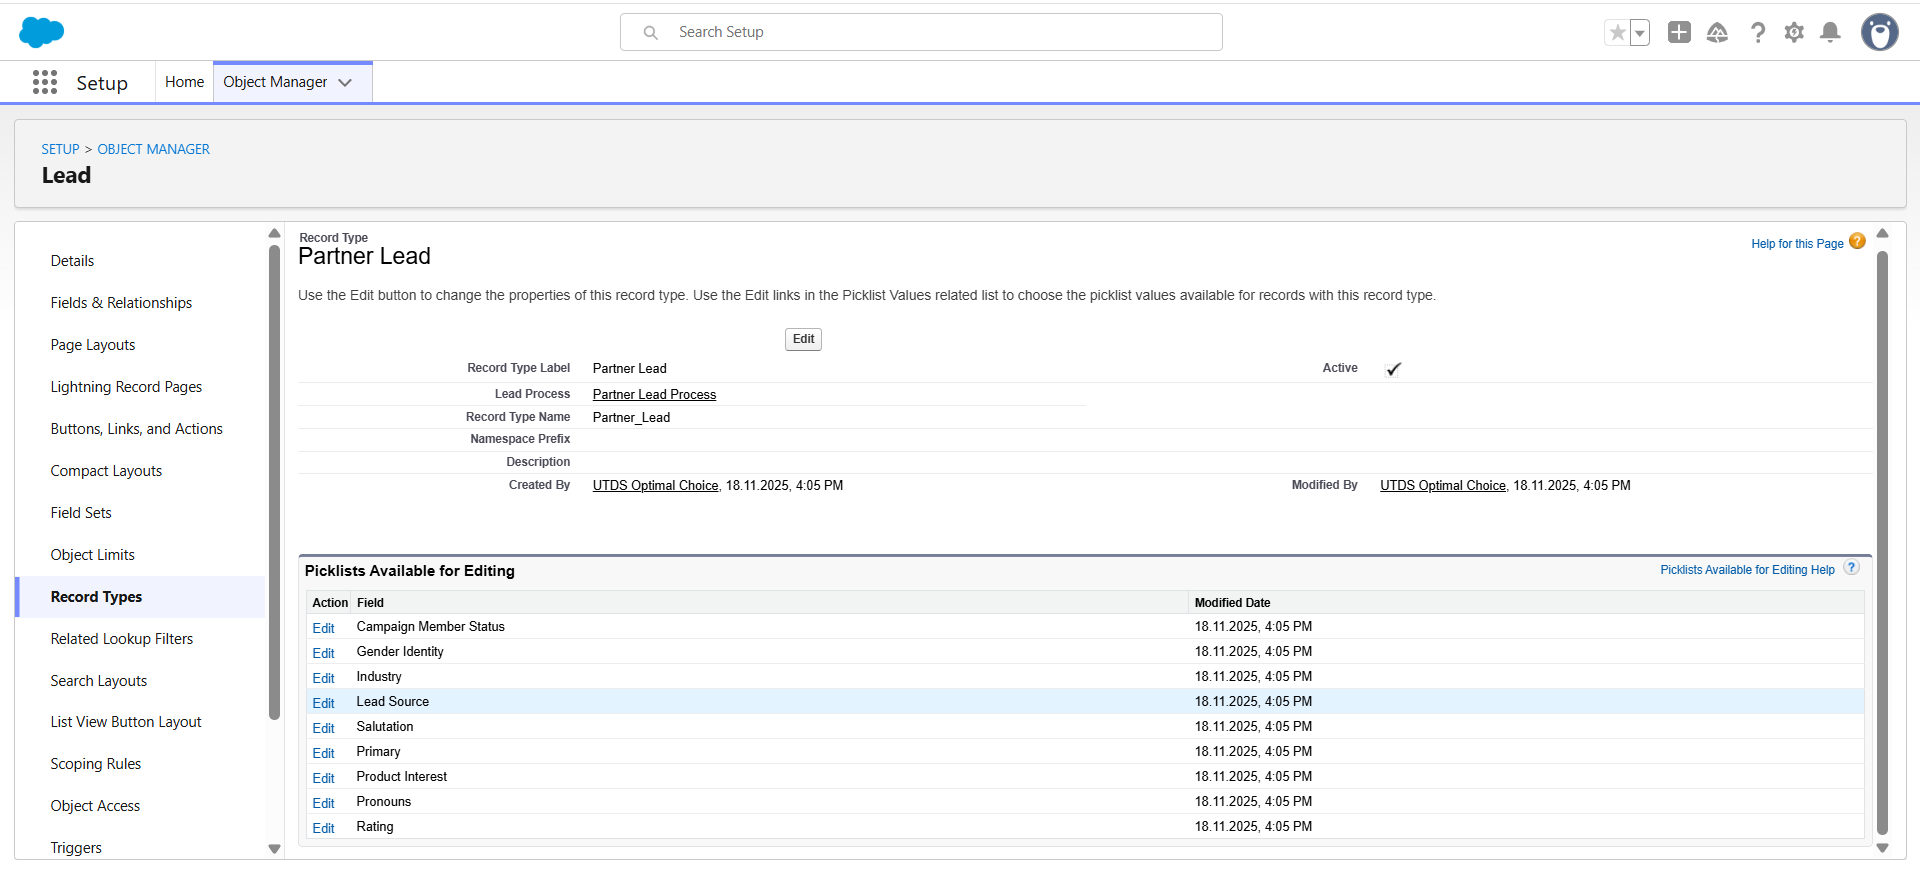
- Edit Record Type: Go back to Object Manager to Lead to Record Types. Click on the name of the new record type (e.g., Partner Lead).
- Adjust Picklists: Scroll down to the Picklists Available for Editing section.
- Modify Values: Click on any picklist field (e.g., Lead Source or Industry).
- Select: Use the multi-select tool to remove any values that are not relevant to this specific record type. Click Save.
This three-step process ensures your new Lead Record Type has the correct process, layout, and field values for the designated users.

 Salesforce

